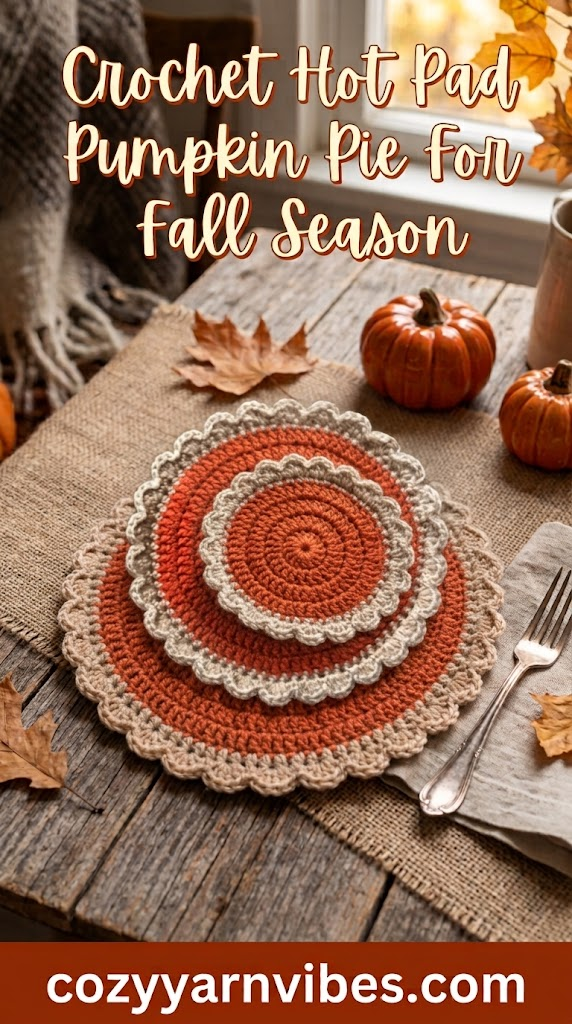
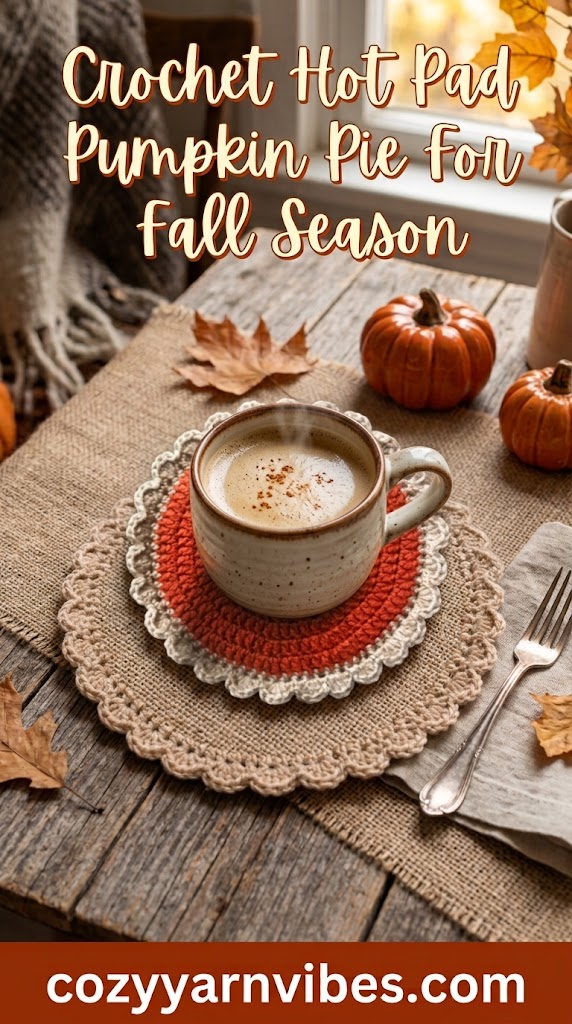
Looking for a cute handmade project to decorate your home for autumn? These crochet hot pad pumpkin coasters are a simple and festive way to bring fall colors and handmade charm to your table. The pumpkin-inspired design works beautifully for coffee tables, dining tables, Thanksgiving gatherings, and cozy fall coffee stations.
These crochet hot pad pumpkin coasters can be made with basic crochet stitches and a small amount of yarn, making them a practical project for using leftover yarn. Make several in different autumn colors to create a matching set or give them as handmade fall gifts.
Easy Crochet Hot Pad Pumpkin Coasters Tutorial
These crochet hot pad pumpkin coasters are worked from the center outward to create a flat circular base. The pumpkin details are then added to give the piece its seasonal appearance. A small stem at the top completes the pumpkin design.
The pattern uses simple stitches and gradual increases, so you can make a set of crochet hot pad pumpkin coasters without needing complicated techniques. Use orange for a traditional pumpkin look, or experiment with neutral and muted autumn colors.
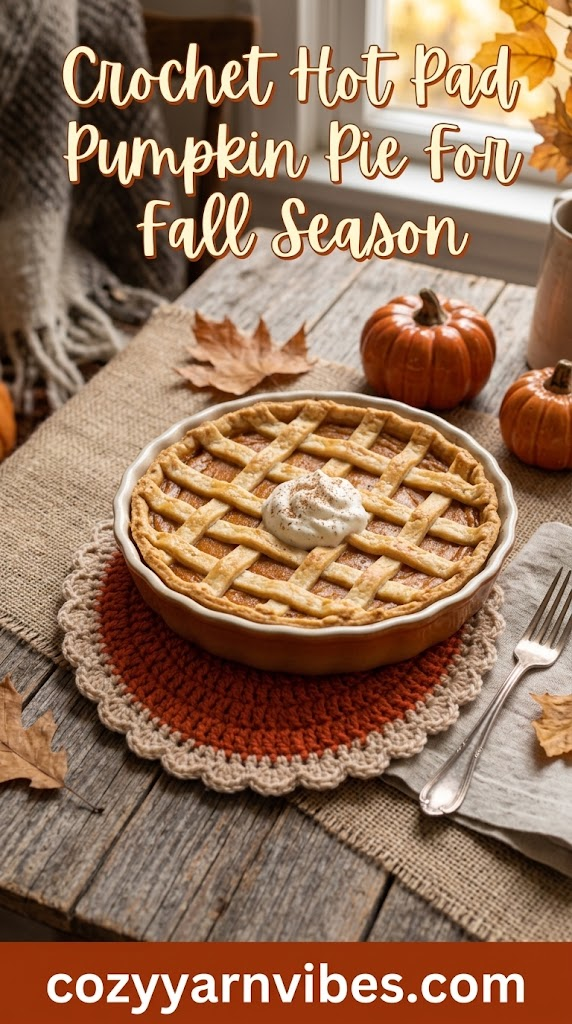
Why You’ll Love This Pattern
- Beginner-friendly crochet project
- Quick to make
- Uses a small amount of yarn
- Perfect for fall and Thanksgiving decor
- Great for coffee and dining tables
- Easy to customize with different colors
- Useful for using leftover yarn
- Makes a thoughtful handmade fall gift
Skill Level
Beginner to Easy Intermediate
If you are comfortable making chains, double crochet, single crochet, and slip stitches, you should be able to follow these crochet hot pad pumpkin coasters.
Finished Size
Approximately:
- Width: 4.5–5 inches
- Height: 4–4.5 inches
- Stem: approximately 1 inch
The finished size can vary depending on your yarn, hook size, and crochet tension. You can also adjust the size by adding or removing increase rounds.
Materials Needed
Yarn
- Worsted weight cotton yarn (#4)
- Approximately 20–25 yards of orange yarn for each coaster
- A small amount of brown or green yarn for the stems
Cotton yarn is a good choice for crochet hot pad pumpkin coasters because it is durable, washable, and helps the finished piece maintain its shape.
Color
For a classic fall look, use:
- Pumpkin orange
- Brown or dark green for the stems
You can also try cream, beige, mustard, rust, olive green, burgundy, or other autumn shades.
Additional Supplies
- 4 mm (G) crochet hook
- Yarn needle
- Scissors
- Stitch marker
- Measuring tape
Stitches & Abbreviations
This pattern uses US crochet terms.
Ch chain
Dc double crochet
Sc single crochet
sl st slip stitch
St stitch
Sts stitches
Rep repeat
Rnd round
FO fasten off
BLO back loop only
How to Make These Stitches
Chain (ch)
Yarn over and pull the yarn through the loop on your hook to make a chain.
Single Crochet (sc)
Insert the hook into the stitch. Yarn over and pull up a loop. Yarn over again and pull through both loops on the hook.
Double Crochet (dc)
YO and insert the hook into the stitch. Yarn over and pull up a loop. YO and pull through two loops. Yarn over once more and pull through the remaining two loops.
Slip Stitch (sl st)
Insert the hook into the stitch, yarn over, and pull the yarn through both the stitch and the loop on your hook.
Pattern Notes
- The crochet hot pad pumpkin coasters are worked from the center outward.
- Use US crochet terminology throughout the pattern.
- Keep your tension even so the base stays flat.
- Do not pull your stitches too tightly.
- The circular shape is created by working increases around the center.
- The pumpkin details are added after the circular base is completed.
- The stems are worked separately and attached to the pumpkin sections.
- Blocking can help the finished coaster maintain a neat shape.
- Make sure the finished piece lies flat before using it.
Crochet Hot Pad Pumpkin Coasters Step-by-Step
These crochet pumpkin pie coasters are made as two separate crocheted layers, one in CARROT yarn for the front and one in BUFF yarn for the back. The two pieces are then joined together with a BUFF-colored edging to create a sturdy, double-layered coaster.
Step 1: Make the Front Piece
Using CARROT yarn and an H crochet hook, begin by making a magic ring.
Beginning Round
Work 12 double crochet stitches into the magic ring. Pull the yarn tail to tighten the center, then join with a slip stitch into the first double crochet of the round.
Round 2
Chain 2. Work 2 double crochet stitches into the same chain-2 space, then work 2 double crochet stitches in every stitch around.
Slip stitch to join into the first double crochet of the round, rather than into the beginning chain-2.
(24 dc)
Round 3
Chain 2, then work 1 double crochet in the same space. Work 2 double crochet stitches in the next stitch.
Repeat the sequence of 1 double crochet in the next stitch and 2 double crochet stitches in the following stitch around the round.
Slip stitch to join into the first double crochet.
(36 dc)
Round 4
Chain 2, then work 1 double crochet in the same space. Work 1 double crochet in the next stitch and 2 double crochet stitches in the following stitch.
Repeat the sequence of 1 double crochet in the next 2 stitches and 2 double crochet stitches in the next stitch around.
Slip stitch to join into the first double crochet.
(48 dc)
Round 5
Chain 2, then work 1 double crochet in the same space. Work 1 double crochet in each of the next 2 stitches, followed by 2 double crochet stitches in the next stitch.
Repeat the sequence of 1 double crochet in the next 3 stitches and 2 double crochet stitches in the following stitch around.
Slip stitch to join into the first double crochet.
(60 dc)
Round 6
Chain 2, then work 1 double crochet in the same space. Work 1 double crochet in each of the next 3 stitches, followed by 2 double crochet stitches in the next stitch.
Repeat the sequence of 1 double crochet in the next 4 stitches and 2 double crochet stitches in the next stitch around.
Slip stitch to join into the first double crochet.
(72 dc)
Round 7
Chain 2, then work 1 double crochet in the same space. Work 1 double crochet in each of the next 4 stitches, followed by 2 double crochet stitches in the next stitch.
Repeat the sequence of 1 double crochet in the next 5 stitches and 2 double crochet stitches in the next stitch around.
Slip stitch to join into the first double crochet.
(84 dc)
After completing Round 7, remove your hook from the loop at the join, but leave the loop open. Cut the yarn, leaving a long tail. Do not fasten off or weave in this tail because it will be used when joining the two layers.
Step 2: Make the Back Piece
Repeat the same seven-round pattern using BUFF yarn and an H crochet hook.
Work the magic ring and increase each round in exactly the same way as the CARROT piece.
Your completed BUFF piece should also have 84 double crochet stitches after Round 7.
Once finished, remove your hook from the joining loop and leave the loop open. Cut the yarn, leaving a tail. Do not fasten off or weave in the tail.
Step 3: Prepare the Two Layers
Before joining the pieces, weave in the beginning magic ring tails from the center of both the CARROT and BUFF pieces.
Do not weave in the joining tails.
Place the CARROT front piece and BUFF back piece together with their wrong sides facing each other. Line up the open joining loops from both pieces.
Insert your crochet hook through both joining loops.
Pull the two ending yarn tails snugly so that both loops sit securely on the hook.
Tuck the CARROT and BUFF ending tails down between the two layers. This keeps the tails hidden inside the double-layered coaster.
Step 4: Add the Pie Crust Edging
Using BUFF yarn and an H crochet hook, begin the crust edging by pulling the BUFF yarn through both joining loops on your hook.
Leave a long beginning tail. This tail will be used later to fill the small open space created where the scalloped edging begins.
Work the First Edging Round
For the first stitch, work 1 half double crochet through both layers. Insert your hook through the corresponding stitches of the CARROT front piece and BUFF back piece, yarn over, and pull the yarn through both sets of stitches to complete the half double crochet.
Continue working 1 half double crochet through both layers in each set of lined-up stitches around the entire coaster.
When you reach the beginning of the round, slip stitch to join into the first half double crochet.
Step 5: Create the Scalloped Pie Crust
Now create the decorative scalloped edging that gives the coaster its pie-crust appearance.
At the joining space, chain 2.
Work 3 double crochet stitches into the same chain-2 space.
Then work 1 single crochet in each of the next 2 stitches.
Repeat the sequence of 4 double crochet stitches in the next stitch followed by 1 single crochet in each of the next 2 stitches around the coaster.
Scallop repeat: dc 4 in next st, sc 1 in each of next 2 sts.
Continue working the scallops around the entire coaster.
Step 6: Complete the Final Scallop
As you approach the end of the round, you will have 2 stitches remaining.
Work 4 double crochet stitches into the next stitch.
Then work 1 single crochet into the final stitch.
Join the scalloped edging as instructed to complete the round.
Step 7: Finish the Pie Crust Edging
Fasten off and weave in the finishing tail.
You should still have the long beginning BUFF yarn tail that was left when you started the scalloped edging. Keep this tail because it will be used to fill the small open space at the beginning of the scalloped round.
Step 8: Fill the Small Opening
Thread the long beginning tail onto a tapestry needle.
From the BUFF backside, bring the needle through to the CARROT front side, positioning it where the other stitches of the scalloped round begin.
Make a stitch that matches the height and placement of the surrounding stitches.
Pull the yarn through to the backside.
Make a second stitch directly beside the first faux stitch to fill the remaining open space.
Weave in the remaining tail securely.
Step 9: Finish Your Crochet Pumpkin Pie Coaster
Check the entire outer edge and make sure the two layers are joined securely.
Gently straighten the coaster so the CARROT front and BUFF back sit evenly together.
Your double-layered crochet pumpkin pie coaster is now complete and ready to use as a seasonal table accent or hot pad.
The double-layer construction gives the piece extra thickness, while the BUFF scalloped edging creates the look of a decorative pie crust around the CARROT pumpkin pie center.
Love Pumpkin Hot Pads & Crochet Coasters?
Handmade crochet pieces bring such a warm, welcoming feeling to a fall kitchen. If you enjoyed making these pumpkin hot pads and coasters, you might also love exploring a few ready-made seasonal accessories.
Below are three Amazon finds featuring crochet-inspired kitchen and tabletop decor. From pumpkin-themed pot holders to adorable crochet coasters, these pieces are worth browsing for your autumn decorating ideas.
Affiliate disclosure: As an Amazon Associate, I earn from qualifying purchases.

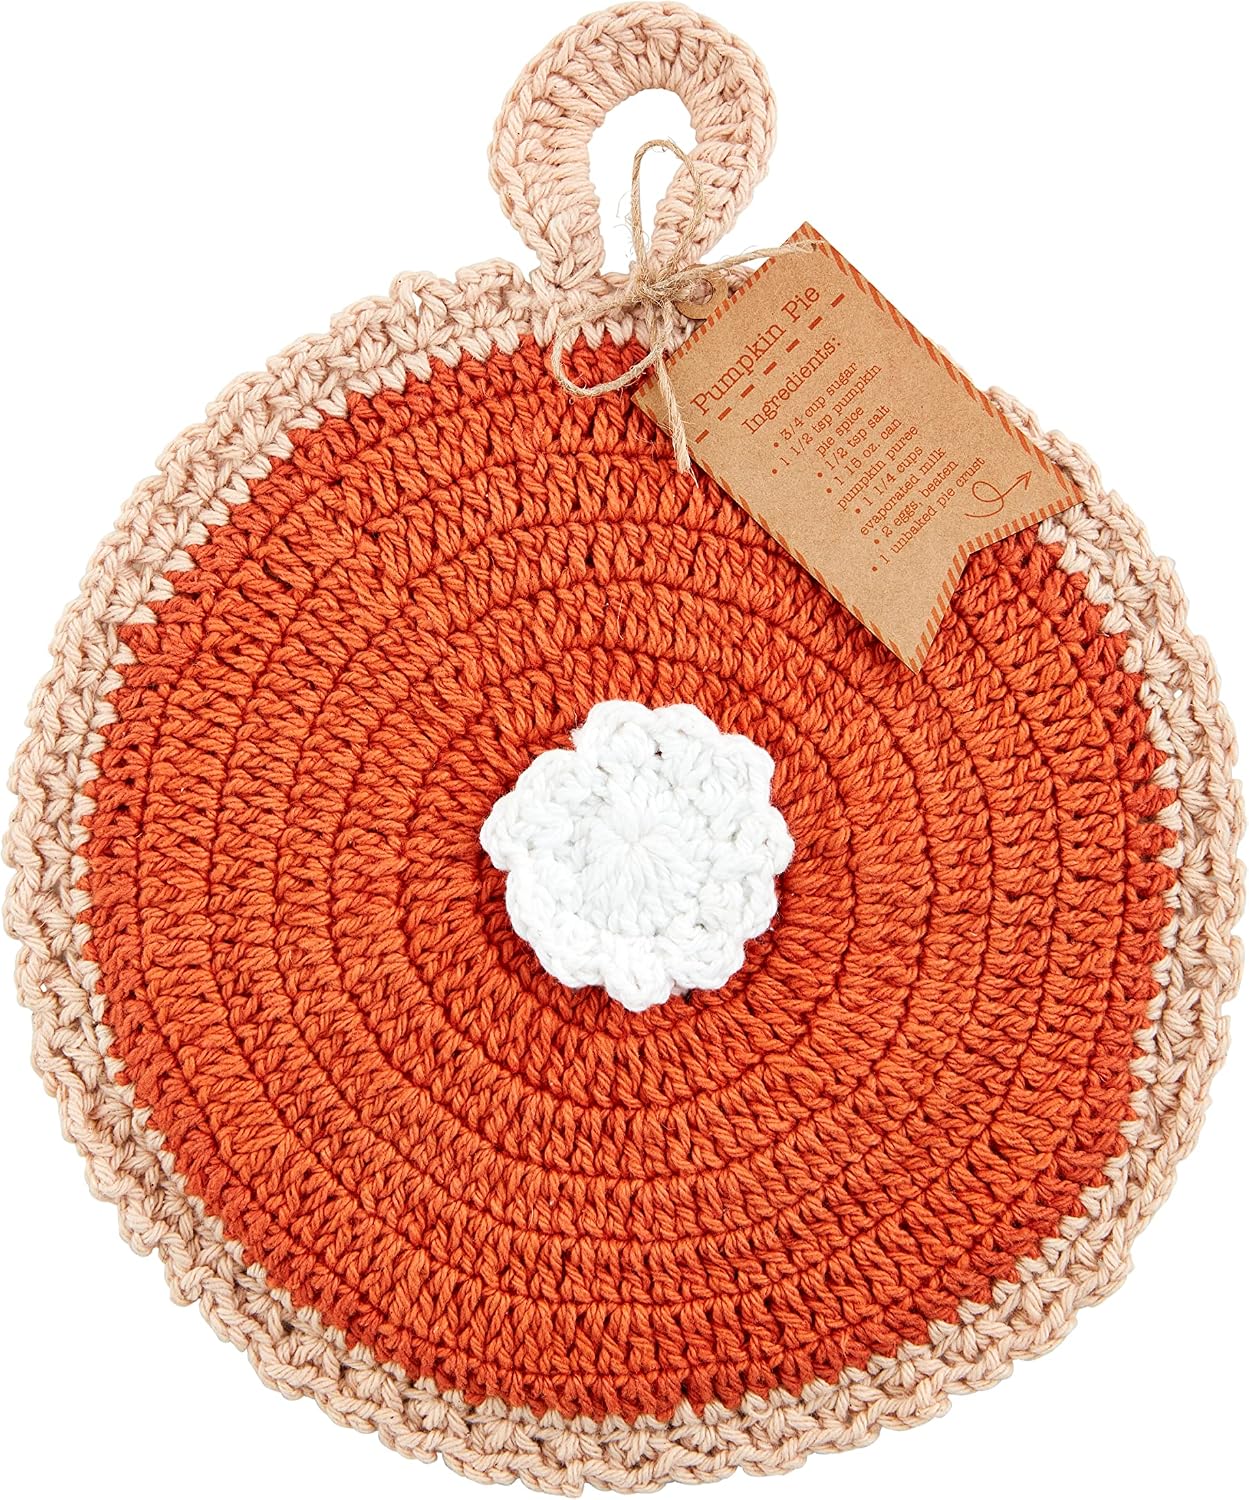
1. Mud Pie Crochet Pumpkin Pot Holder
If you love the pumpkin theme of this crochet project, the Mud Pie Crochet Pumpkin Pot Holder is a lovely product to explore. Its pumpkin-inspired design makes it especially relevant for fall kitchen styling.
It could be a charming addition to a seasonal kitchen display or a thoughtful gift idea for someone who enjoys autumn-themed home accessories.
✓ Pros
- Pumpkin theme matches this tutorial
- Seasonal kitchen accessory
- Ready-made alternative to DIY
Things to Check
- Exact size and materials
- Care instructions
- Suitability for handling hot cookware
See current price and product details on Amazon.
2. Mud Pie Crochet Potato Pot Holder
Looking for something a little different? The Mud Pie Crochet Potato Pot Holder brings a playful food-inspired idea into the mix.
Although it isn’t pumpkin-shaped, it could appeal to anyone who enjoys quirky crochet kitchen accessories and cozy handmade-inspired decor.
✓ Pros
- Fun food-inspired design
- Interesting crochet gift idea
- Ready-made kitchen accessory
Things to Check
- Not a pumpkin-shaped design
- Exact dimensions and fabric
- Heat-use and care instructions
See current price and product details on Amazon.

3. Romooa Crochet Pumpkin Coasters
For a cute seasonal coffee table, the Romooa Crochet Pumpkin Coasters are another option to browse. Pumpkin-themed coasters can bring a little autumn charm to your morning coffee or afternoon tea.
This listing is especially relevant if you love the coaster side of our free crochet pattern and want to explore ready-made options.
✓ Pros
- Closely matches the pumpkin coaster theme
- Suitable style for seasonal table decor
- Easy ready-made decorating idea
Things to Check
- Number of coasters included
- Size and washing instructions
- Not automatically suitable as a hot pad
See current price and product details on Amazon.
Which Crochet Kitchen Accessory Should You Choose?
These three products serve slightly different decorating interests. Here’s a quick way to compare them before visiting Amazon.
| Product | Design Theme | Why Explore It? | Shop |
|---|---|---|---|
| Mud Pie Pumpkin Pot Holder | Pumpkin kitchen accessory | Closest pot-holder theme to the pumpkin hot pad tutorial | Amazon ↗ |
| Mud Pie Potato Pot Holder | Playful food-inspired design | A quirky kitchen gift or decorative accessory idea | Amazon ↗ |
| Romooa Pumpkin Coasters | Pumpkin-themed tabletop decor | Closest match to the coaster part of the tutorial | Amazon ↗ |
Note: This is a design and intended-use comparison, not a verified test of heat protection or product quality.
What to Look for Before Buying
Check the Dimensions
Make sure the accessory is the right size for your mugs, kitchen display, or intended use.
Check Heat Suitability
A decorative crochet coaster isn’t necessarily safe for hot pans. Follow the manufacturer’s heat-use guidance before using any item with hot cookware.
Review Care Instructions
Kitchen accessories can get messy. Check whether the item can be washed and how it should be dried.
Match Your Fall Style
Choose colors and shapes that work with your pumpkins, autumn table settings, and other cozy decor.
Want to Make Your Own Instead?
Follow the free crochet pumpkin hot pad and coaster tutorial in this post! Making your own lets you experiment with yarn colors, stitch textures, and different sizes for your fall kitchen decorations.
As an Amazon Associate, I earn from qualifying purchases. Product prices and availability may change.
Customization Ideas
Classic Pumpkin
Use traditional orange yarn with brown or green stems for a classic autumn appearance.
Rustic Fall Pumpkin
Combine rust, burnt orange, mustard, cream, and brown for a warm farmhouse-inspired fall palette.
Mini Pumpkin
Use a smaller hook and lighter yarn to create smaller pumpkin designs. These can work well as decorative accents or petite coasters.
Colorful Pumpkins
Try sage green, dusty pink, cream, mustard, burgundy, and deep brown to give your crochet hot pad pumpkin coasters a modern fall look.
Halloween Pumpkin
Use bright orange with black details, or embroider a small jack-o’-lantern face onto the pumpkin for Halloween decorating.
Styling Ideas
These crochet hot pad pumpkin coasters are perfect for creating a coordinated fall table setting. Pair them with:
- Fall mugs
- Pumpkin spice drinks
- Thanksgiving table settings
- Wooden serving trays
- Autumn centerpieces
- Candles
- Mini pumpkins
- Fall floral arrangements
- Coffee station decor
- Rustic farmhouse decorations
Place several crochet hot pad pumpkin coasters around your coffee table or dining table for an easy seasonal display. You can also combine orange pumpkins with cream, brown, or mustard table linens for a warm autumn arrangement.
Other Variations to Try
- Make each pumpkin in a different shade of orange.
- Add a small crocheted leaf beside each stem.
- Embroider jack-o’-lantern faces for Halloween.
- Make a larger version to use as a small trivet.
- Create matching sets in several fall colors.
- Add a contrasting border around the outer edge.
- Use leftover cotton yarn to create a multicolored pumpkin collection.
- Package several crochet hot pad pumpkin coasters together as a handmade fall gift set.
Care Instructions
Hand wash your crochet hot pad pumpkin coasters in cool or lukewarm water with a mild detergent.
Avoid bleach and harsh cleaning products because they can damage or fade the yarn.
Gently squeeze out excess water without twisting the coaster.
Lay the coaster flat on a clean towel and allow it to air dry completely.
Avoid direct heat and high dryer temperatures.
Store your crochet hot pad pumpkin coasters flat in a dry place when they are not being used.
Conclusion
These crochet hot pad pumpkin coasters are a quick and enjoyable way to bring handmade fall decor into your home. The simple circular construction, pumpkin details, and warm seasonal colors make them perfect for coffee tables, dining tables, and autumn gatherings.
Whether you make one coaster or a complete matching set, you can easily customize this project with different colors, sizes, stems, and decorative details. It is also a useful way to use leftover cotton yarn while creating something festive for the season.
Add these crochet hot pad pumpkin coasters to your fall crochet list and experiment with different autumn color combinations to create your own handmade collection.
If you are looking for more amazing coaster ideas for fall, don’t forget to try this Pumpkin coaster as well.
Frequently Asked Questions
Are these crochet hot pad pumpkin coasters beginner-friendly?
Yes. These crochet hot pad pumpkin coasters use basic stitches and simple increases. If you are comfortable with chains, single crochet, double crochet, and slip stitches, you should be able to follow the pattern.
What yarn is best for crochet hot pad pumpkin coasters?
Worsted weight cotton yarn is a good choice because it is durable, washable, and holds its shape well. Cotton also gives the finished crochet hot pad pumpkin coasters a sturdy feel.
Can I make the crochet pumpkin coaster bigger?
Yes. Continue the increase rounds until the base reaches your preferred size. A larger version can be used as a small trivet or decorative hot pad.
Can I use acrylic yarn instead of cotton?
You can use acrylic yarn for decorative coasters, but cotton is generally preferable for projects intended for use around warm drinks because it is durable and maintains its shape well.
Can I make crochet hot pad pumpkin coasters in different colors?
Absolutely. Try traditional orange, rust, mustard, cream, olive green, burgundy, brown, or neutral autumn shades. Making every coaster in a different fall color is an easy way to create a unique seasonal set.