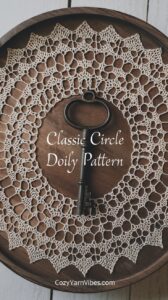
Classic Circle Doily Pattern
This beginner-friendly crochet doily pattern uses simple stitches to create an elegant circular design. Ideal for decorating tables, shelves, or even framing as wall art, this doily is a wonderful project to help you master working in the round.
Finished Size


Approximately 10 inches in diameter (size may vary depending on yarn and hook).
Materials
- Yarn: Lightweight cotton yarn (#2 fine or #3 light recommended).
- Hook: 3.0 mm or 3.5 mm crochet hook.
- Other Supplies: Scissors, yarn needle, stitch markers (optional for tracking rounds).
Abbreviations (US Terms)
- ch: Chain
- sl st: Slip Stitch
- sc: Single Crochet
- dc: Double Crochet
- st(s): Stitch(es)
- sp: Space
How to Do These Stitches
Chain (ch):
- Create a slipknot on your hook.
- Yarn over and pull the loop through the hook.
- Repeat to create as many chains as needed.
Common Mistake:
Chains that are too tight will make the foundation stiff. Keep your tension loose and consistent.
Slip Stitch (sl st):
- Insert your hook into the stitch or space indicated.
- Yarn over and pull the loop through both the stitch and the loop on your hook.
Common Mistake:
Accidentally skipping the slip stitch step when joining rounds can leave gaps in your work. Double-check that each round is joined securely.
Single Crochet (sc):
- Insert your hook into the stitch.
- Yarn over and pull up a loop (2 loops on the hook).
- Yarn over and pull through both loops.
Common Mistake:
Inconsistent stitch size. Practice even tension for uniform stitches.
Double Crochet (dc):
- Yarn over, insert your hook into the stitch, and pull up a loop (3 loops on the hook).
- Yarn over and pull through the first two loops (2 loops remaining).
- Yarn over and pull through the last two loops.
Common Mistake:
Skipping the yarn-over step before inserting your hook can cause missing stitches.
Pain Points to Avoid While Making the Doily
- Maintaining a Consistent Tension:
Uneven tension can make your doily ripple or curl. Check your stitches periodically and adjust tension if needed. - Stitch Counting:
Ensure you’re counting stitches in each round, especially for increases. A missing or extra stitch will affect the shape. - Joining Rounds Properly:
Always join rounds with a slip stitch at the top of the first chain or stitch. Skipping this step can leave gaps. - Blocking the Finished Doily:
A doily may look uneven when finished. Blocking (wetting and shaping) is crucial to highlight its design and ensure it lies flat.
Pattern
Round 1:
Start with a magic circle.
- Ch 3 (counts as the first dc), work 11 dc into the magic circle.
- Tighten the circle and join with a sl st to the top of the ch-3. (12 dc)
Round 2:
- Ch 3, dc in the same st (increase).
- Work 2 dc in each st around.
- Join with a sl st to the top of the ch-3. (24 dc)
Round 3:
- Ch 3, dc in the same st, dc in the next st.
- 2 dc in the next st, dc in the next st. Repeat from * to * around.
- Join with a sl st to the top of the ch-3. (36 dc)
Round 4:
- Ch 3, dc in the same st, dc in the next 2 sts.
- 2 dc in the next st, dc in the next 2 sts. Repeat from * to * around.
- Join with a sl st to the top of the ch-3. (48 dc)
Round 5:
- Ch 3, dc in the same st, dc in the next 3 sts.
- 2 dc in the next st, dc in the next 3 sts. Repeat from * to * around.
- Join with a sl st to the top of the ch-3. (60 dc)
Round 6 (Add Openwork):
- Ch 1, sc in the same st, ch 5, skip 2 sts.
- Sc in the next st, ch 5, skip 2 sts. Repeat from * to * around.
- Join with a sl st to the first sc. (20 ch-5 loops)
Round 7:
- Sl st into the first ch-5 sp, ch 3 (counts as dc), work 7 dc into the same ch-5 sp.
- 8 dc in the next ch-5 sp. Repeat from * to * around.
- Join with a sl st to the top of the ch-3. (160 dc)
Round 8 (Final Edging):
- Ch 1, sc in the same st, ch 3, skip 1 st.
- Sc in the next st, ch 3, skip 1 st. Repeat from * to * around.
- Join with a sl st to the first sc. (80 ch-3 loops)
Finishing
- Fasten off and weave in ends using a yarn needle.
- Block the doily to shape it and highlight the pattern.
Optional Tassels or Fringe
For a modern twist, add tassels or fringe around the edges:
- Cut yarn into equal lengths (about 4 inches).
- Fold a piece of yarn in half, insert the folded end through one of the outer loops, and pull the tails through the fold to secure.
- Repeat this around the edge to add a fringe effect.


Pingback: 25 Crochet Doily Patterns: Timeless Designs for Every Skill Level - cozyyarnvibes.com
Pingback: Mandala Doily Pattern - cozyyarnvibes.com