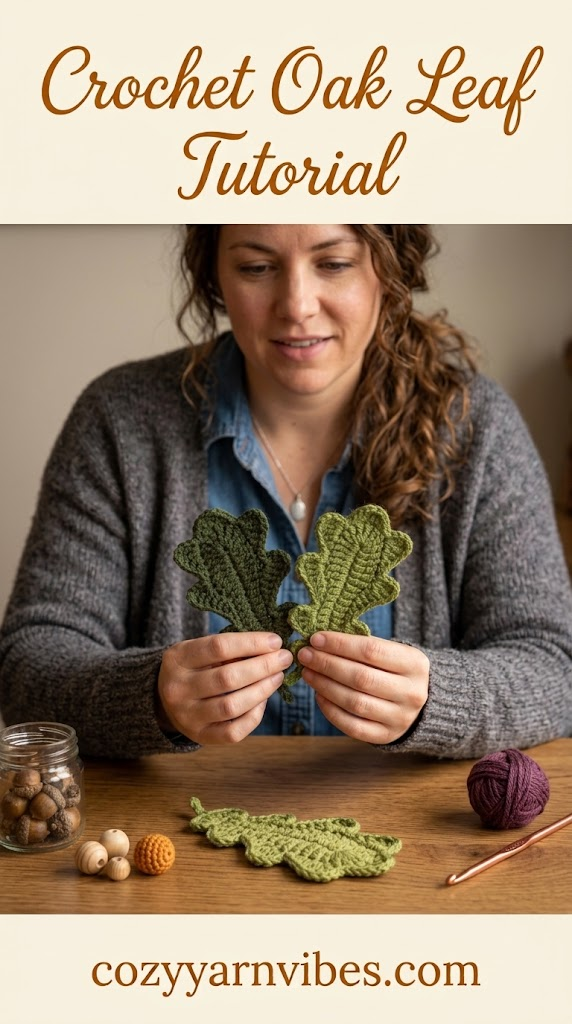
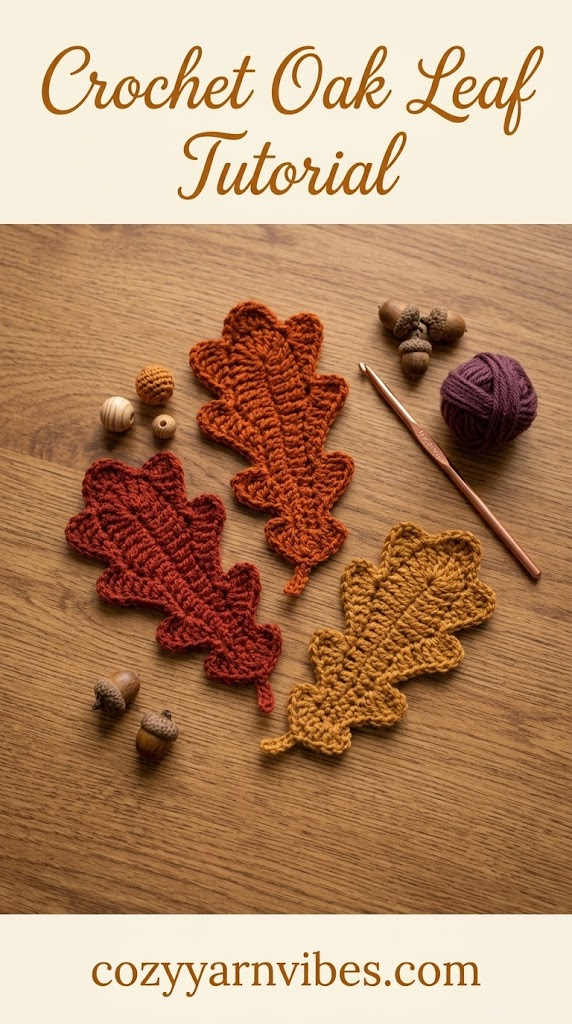
Looking for a beautiful crochet project for the fall season? This Crochet Oak Leaf tutorial is an easy way to bring the warm colors and natural beauty of autumn into your handmade projects. With its pointed lobes and classic oak leaf shape, this pattern makes a lovely decoration for garlands, wreaths, bags, blankets, and other crochet projects.
This Crochet Oak Leaf is worked from a small center and gradually shaped outward. By combining chain stitches with single crochet, half double crochet, double crochet, and treble crochet stitches, you can create defined oak-like lobes without needing complicated techniques.
The Crochet Oak Leaf pattern is designed to create a recognizable oak-inspired shape with several pointed sections along the edges. You can make individual leaves or crochet several in different autumn colors to create a seasonal collection.
Easy Crochet Oak Leaf Tutorial
This Crochet Oak Leaf pattern creates a decorative leaf with several pointed lobes inspired by the natural shape of an oak leaf. The center chain forms the main structure, while different stitch heights are used to create the curves and points along each side.
The pattern is simple enough for crocheters who are comfortable with basic stitches. You can also adjust the size by changing your yarn weight and crochet hook.
For an autumn look, try shades such as rust, mustard, burnt orange, golden yellow, burgundy, olive green, and brown. These colors make the finished Crochet Oak Leaf perfect for fall décor.
Why You’ll Love This Pattern
- Easy crochet fall project
- Uses a small amount of yarn
- Beginner-friendly design
- Creates a classic oak-inspired shape
- Perfect for scrap yarn
- Easy to customize
- Great for fall decorations
- Useful for appliqués and embellishments
- Can be made in several different sizes
Skill Level
Beginner to Intermediate
This Crochet Oak Leaf is suitable for crocheters who are comfortable with chain, single crochet, half double crochet, double crochet, treble crochet, and slip stitches.
If you are new to crochet leaves, work slowly through the first leaf and pay close attention to the stitch placement. Once you understand how the lobes are formed, making additional leaves becomes much easier.
Finished Size
The finished size of your Crochet Oak Leaf will depend on your yarn weight, crochet hook, and tension.
For a small decorative leaf, use lightweight yarn and a smaller hook. For a larger oak leaf, choose thicker yarn and a larger hook.
Materials Needed
Yarn
Use a small amount of your preferred yarn. Cotton yarn is a good choice because it provides clear stitch definition and helps the leaf hold its shape.
Color
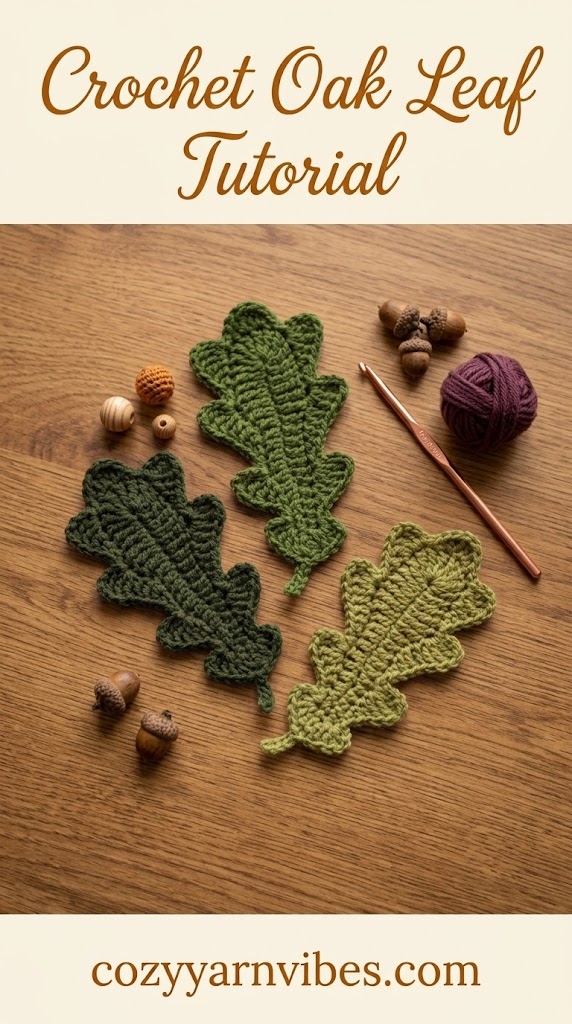
For a traditional leaf, use shades of green. For fall-inspired Crochet Oak Leaf designs, try rust, orange, mustard, golden yellow, brown, burgundy, or olive green.
Additional Supplies
- Crochet hook suitable for your yarn
- Yarn needle
- Scissors
- Stitch marker, if needed
Stitches & Abbreviations (US Terms)
- ch = chain
- sc = single crochet
- hdc = half double crochet
- dc = double crochet
- tr = treble crochet
- sl st = slip stitch
- st = stitch
- rep = repeat
How to Make These Stitches
Chain (ch)
Make a slip knot and place it on your hook. Yarn over and pull through the loop on your hook. Continue making chains until you reach the required number.
Single Crochet (sc)
Insert the hook into the stitch, yarn over, and pull up a loop. Yarn over again and pull through both loops on the hook.
Half Double Crochet (hdc)
Yarn over and insert the hook into the stitch. Pull up a loop so that you have three loops on your hook. Yarn over and pull through all three loops.
Double Crochet (dc)
Yarn over and insert the hook into the stitch. Pull up a loop. Yarn over and pull through two loops. Yarn over again and pull through the remaining two loops.
Treble Crochet (tr)
Yarn over twice and insert the hook into the stitch. Pull up a loop. Yarn over and pull through two loops at a time until only one loop remains.
Slip Stitch (sl st)
Insert the hook into the stitch, yarn over, and pull the yarn through both the stitch and the loop already on your hook.
Pattern Notes
The Crochet Oak Leaf is worked around a foundation chain. The stitches on each side of the chain create the two sides of the leaf, while groups of taller stitches form the pointed lobes.
Keep your tension even throughout the pattern. If the leaf starts curling while you work, gently flatten it with your fingers before continuing.
The oak leaf shape becomes more visible as you complete the outer stitches, so do not worry if the leaf does not look recognizable during the first few steps.
How to Make a Crochet Oak Leaf: Step by Step
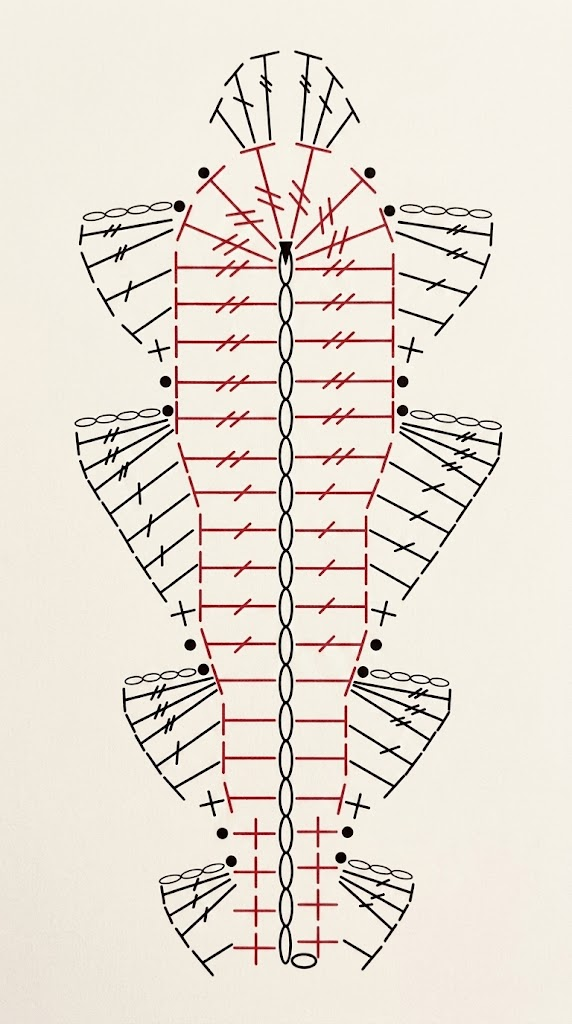
Foundation Chain
Start by making a chain of 20 stitches.
Ch 20.
Do not turn your work. Round 1 is worked into the foundation chain and then continued along the opposite side.
Round 1: Create the Leaf Base
Begin in the second chain from the hook.
1. Work 4 single crochets (sc), placing one sc into each of the next 4 chains.
2. Work 4 half double crochets (hdc) into the next 4 chains.
3. Work 5 double crochets (dc) into the next 5 chains.
4. Work 5 treble crochets (tr) into the next 5 chains.
5. In the final chain, work 8 treble crochets (tr) into the same chain.
These 8 treble crochets create the rounded turning point at the end of the leaf and allow you to continue working along the opposite side of the foundation chain.
Work Back Along the Foundation Chain
After completing the 8 treble crochets in the final chain, continue along the opposite side of the foundation chain.
Work the following stitches in the corresponding chains:
- 5 tr
- 5 dc
- 4 hdc
- 4 sc
Once you reach the beginning of the foundation chain, make 1 slip stitch (sl st) in the last chain to join Round 1.
At this stage, you should have a long, symmetrical leaf base with a rounded end. The pointed oak leaf shape will be created in the next round.
Round 2: Create the Oak Leaf Lobes
Round 2 adds the distinctive points and lobes of the oak leaf. Work carefully because several groups of stitches are placed into individual stitches.
First Side of the Leaf
Begin with 1 hdc in the first sc of Round 1.
Skip the next stitch.
In the next stitch, work the following group into the same stitch:
3 dc, ch 3, 1 sl st
This creates the first pointed lobe of the leaf.
Next, work:
1 sl st, 1 sc, 1 hdc, 1 dc in the next 4 stitches
In the next stitch, work:
3 tr, ch 4, 1 sl st
This creates the next, taller oak leaf point.
Continue with:
1 sl st, 1 sc, 1 hdc, 3 dc in the next 6 stitches
In the next stitch, work:
3 tr, ch 4, 1 sl st
Continue with:
1 sl st, 1 sc, 1 hdc, 1 dc in the next 4 stitches
In the next stitch, work:
2 tr, ch 4, 1 sl st
This completes the main series of lobes on the first side of the leaf.
Shape the Upper Center of the Leaf
Next, work the following stitches into the next stitch:
1 hdc, 1 dc, 1 tr
This brings the stitches toward the upper center of the oak leaf.
Round 2: Mirror the Other Side
The remaining part of Round 2 mirrors the stitches you just worked. This creates matching lobes on the opposite side of the leaf.
In the next stitch, work:
1 tr, 1 dc, 1 hdc
Then make 1 sl st.
In the next stitch, work:
1 sl st, ch 4, 2 tr
Continue with:
1 dc, 1 hdc, 1 sc, 1 sl st in the next 4 stitches
In the next stitch, work:
1 sl st, ch 4, 3 tr
Then work:
3 dc, 1 hdc, 1 sc, 1 sl st in the next 6 stitches
In the next stitch, work another:
1 sl st, ch 4, 3 tr
Then continue with:
1 dc, 1 hdc, 1 sc, 1 sl st in the next 4 stitches
In the next stitch, work:
1 sl st, ch 3, 3 dc
Skip the next stitch.
Finish this side by working:
1 hdc
Then make 1 sl st in the last slip stitch of Round 1 to complete the leaf.
Add the Stalk
Once the main leaf is complete, add a short stalk to the bottom.
1. Chain 5.
2. Starting in the second chain from the hook, work 1 sc.
3. Work 3 sl sts, placing one slip stitch into each of the remaining chains.
4. Finish with 1 sl st in the last sl st of Round 2 to secure the stalk to the leaf.
Fasten off and cut the yarn.
Finishing the Crochet Oak Leaf
Use a yarn needle to weave the yarn ends neatly into the back of the leaf. Trim any excess yarn.
Gently arrange the lobes with your fingers so that the pointed sections are clearly defined. If necessary, lightly block the finished Crochet Oak Leaf to help it lie flat and maintain its shape.
Important Pattern Notes
The shape of the Crochet Oak Leaf depends on the combination of stitch heights. Taller stitches help create the wider sections, while shorter stitches keep the ends narrow.
Try to maintain consistent tension throughout the leaf. Uneven tension can make one side larger than the other.
If your leaf does not lie flat, gently arrange the stitches with your fingers. Light blocking can also help improve the final shape.
Other Variations to Try
Once you have made your first Crochet Oak Leaf, experiment with different yarn weights, colors, and sizes.
- Use green yarn for a classic botanical leaf.
- Use orange and yellow for a bright fall design.
- Try rust and brown for a traditional autumn palette.
- Use fine yarn to make miniature leaves.
- Use chunky yarn for oversized leaves.
- Make several leaves and connect them into a garland.
- Combine different autumn colors for a natural effect.
Customization Ideas
Classic Green Oak Leaf
Use one shade of green for a simple botanical look. These leaves can be used throughout the year for appliqués, accessories, and crochet decorations.
Autumn Oak Leaf
Choose warm colors such as rust, mustard, orange, golden yellow, burgundy, and brown. Making several Crochet Oak Leaf pieces in different shades creates a beautiful fall arrangement.
Two-Color Oak Leaf
Use one color for the main leaf and another shade for the stem or selected sections. A contrasting color can make the pointed lobes stand out.
Mini Oak Leaves
Use thin yarn with a smaller crochet hook to create tiny leaves. Mini Crochet Oak Leaf pieces are useful for cards, hair accessories, appliqués, jewelry, and small decorations.
Large Oak Leaves
For a larger Crochet Oak Leaf, use thicker yarn and a larger hook. Oversized leaves can be used as table décor, wall decorations, wreath embellishments, or part of a seasonal display.
Where to Use Your Crochet Oak Leaf
There are many ways to use your finished Crochet Oak Leaf. Sew individual leaves onto crochet bags, sweaters, hats, scarves, blankets, pillows, and other handmade projects.
You can also crochet several leaves in different colors and connect them to make a fall garland. Hang the garland around a window, fireplace, doorway, shelf, or table.
Another idea is to use the leaf as an appliqué. Sew it onto fabric or another crochet project to add a simple botanical detail.
For seasonal décor, combine your Crochet Oak Leaf with crochet pumpkins, acorns, maple leaves, and other fall-inspired pieces.
Care Instructions
If your Crochet Oak Leaf is made with cotton or acrylic yarn, gently hand wash it when necessary.
Use mild soap and cool water. Avoid twisting or stretching the leaf while it is wet. Instead, gently press it between a clean towel to remove excess water.
Lay the leaf flat and allow it to dry completely. Avoid high heat because it can affect the shape of some yarn fibers.
Frequently Asked Questions
Is this Crochet Oak Leaf pattern suitable for beginners?
Yes. The pattern is suitable for beginners who are comfortable with basic crochet stitches such as chain, single crochet, half double crochet, double crochet, treble crochet, and slip stitch.
How much yarn do I need for a Crochet Oak Leaf?
Only a small amount of yarn is needed, making this an excellent scrap-yarn project. The exact amount will depend on the size of your leaf and the yarn weight you choose.
Can I make the Crochet Oak Leaf smaller?
Yes. Use thinner yarn and a smaller crochet hook to create a smaller leaf. This is especially useful when making appliqués, ornaments, or small decorations.
Can I make a larger Crochet Oak Leaf?
Yes. Use thicker yarn and a larger crochet hook for a larger design. Keep in mind that changing the yarn and hook will also change the final texture and proportions.
What colors work best for a Crochet Oak Leaf?
Green is ideal for a classic leaf, while orange, rust, mustard, yellow, burgundy, and brown work beautifully for fall-inspired Crochet Oak Leaf projects.
What can I make with crochet oak leaves?
You can use crochet oak leaves for garlands, wreaths, appliqués, bags, hats, scarves, blankets, pillows, ornaments, table decorations, and seasonal displays.
Conclusion
This Crochet Oak Leaf Tutorial is a simple and creative way to add an autumn-inspired touch to your handmade projects. The combination of different crochet stitches creates pointed lobes that give the finished leaf its recognizable oak-inspired appearance.
Experiment with green yarn for a classic botanical look or choose warm autumn shades for seasonal décor. Make one Crochet Oak Leaf as an appliqué or create several leaves in different colors for a beautiful fall garland.
Whether you are using leftover yarn or preparing handmade decorations for the season, this Crochet Oak Leaf is a quick project that can be customized in many different ways.
Read our more crochet leaf pattern at Heart Leaf Crochet Pattern.