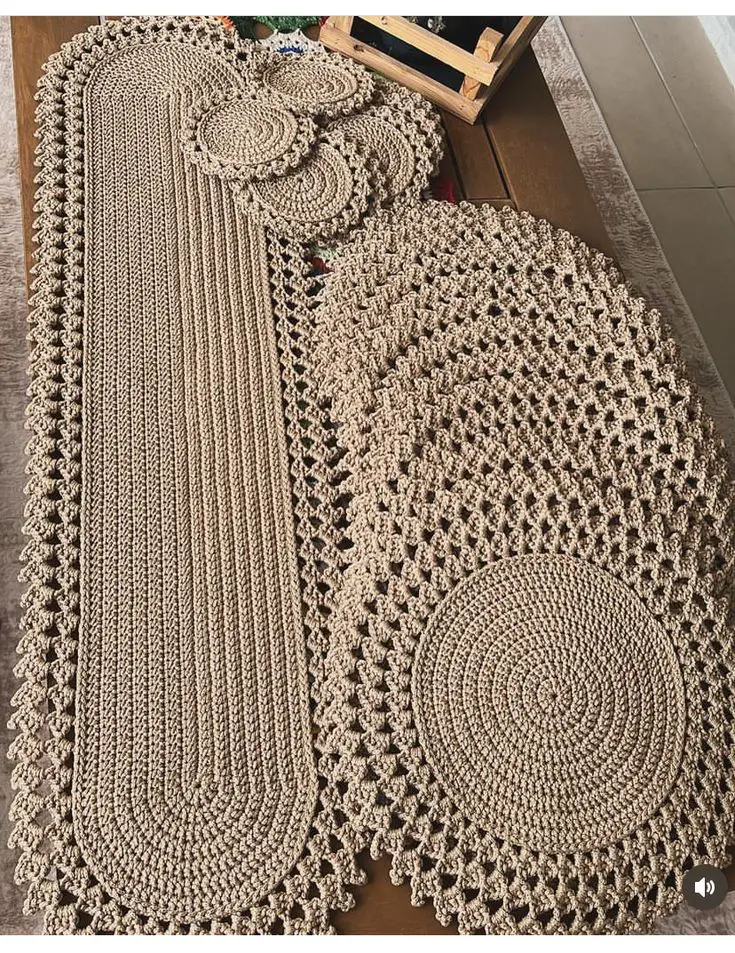
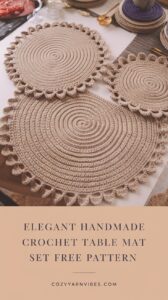
Elegant Handmade Crochet Table Mat Set – Free Pattern & Step-by-Step Guide
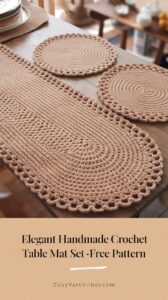
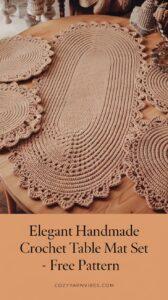
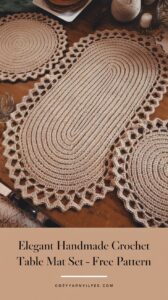
Adding a handmade touch to your home decor is always a wonderful idea. This crochet table mat set features an oval main mat and matching circular placemats, perfect for enhancing your dining space. With detailed instructions and stitch explanations, you’ll have everything you need to complete this elegant set.
What You’ll Need:
- Cotton or jute yarn (medium-weight)
- Crochet hook (recommended size: 4mm-5mm)
- Scissors
- Tapestry needle
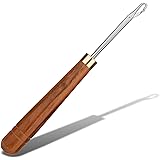
Giwrmu Latch Hook Tool, Wooden Latch Hooks, Latch Hook Crochet Needle for Micro Braids, Hair Extension and Carpet Craft
$7.99 (as of March 17, 2026 23:35 GMT +00:00 - More infoProduct prices and availability are accurate as of the date/time indicated and are subject to change. Any price and availability information displayed on [relevant Amazon Site(s), as applicable] at the time of purchase will apply to the purchase of this product.)
Vodiye 14 Sizes Crochet Hooks Set 2.0–10.0mm, Colorful Metal Crochet Needles, Ergonomic for Comfortable Crocheting
$6.89 (as of March 17, 2026 23:35 GMT +00:00 - More infoProduct prices and availability are accurate as of the date/time indicated and are subject to change. Any price and availability information displayed on [relevant Amazon Site(s), as applicable] at the time of purchase will apply to the purchase of this product.)How to Crochet the Main Oval Mat
Step 1: Start with a Foundation Chain
- Chain 51 stitches (adjust for your desired length).
- Work a double crochet (DC) into the 3rd chain from the hook and continue DC across.
- At the last chain, make 5 DCs into the same stitch to turn the row.
- Work DC along the opposite side of the chain.
- Place 5 DCs into the last stitch to form the other rounded edge.
Step 2: Build Up the Oval Shape
- Continue working in the round, increasing at the rounded edges (the 5 DC stitches) on each row.
- Repeat this for 10-12 rounds, maintaining a smooth oval shape.
Step 3: Decorative Border
- Once the oval base is complete, switch to a shell stitch border:
- (Shell Stitch: 5 DC into one stitch, skip 2 stitches, slip stitch in the next, repeat.)
- Work the shell stitch border around the entire mat.
How to Crochet the Circular Placemats
Step 1: Start with a Magic Ring
- Make a magic ring and chain 2.
- Work 12 DC into the ring, then pull it tight.
- Join with a slip stitch.
Step 2: Increase Rounds
- Round 2: 2 DC in each stitch (24 total stitches).
- Round 3: (1 DC in next stitch, 2 DC in the next) – repeat around.
- Continue increasing rounds using the pattern (2 DC, 1 DC, 1 DC), then (3 DC, 1 DC, 1 DC, 1 DC), and so on.
- Stop increasing when the placemat reaches the desired size.
Step 3: Add the Decorative Edge
- Use the shell stitch (same as in the main mat) around the edge for a decorative finish.
Crochet Stitch Guide
Double Crochet (DC)
- Yarn over, insert hook into stitch, yarn over, pull through (3 loops on hook).
- Yarn over, pull through two loops.
- Yarn over, pull through last two loops.
Magic Ring
- Wrap yarn around fingers, insert hook into loop, yarn over and pull through.
- Chain 2, work stitches into the loop, pull tail to close.
Shell Stitch
- Work 5 DC into the same stitch, skip 2 stitches, slip stitch into next.
- Repeat around the edge.
Final Thoughts
This handmade crochet table mat set brings a touch of elegance and warmth to your dining space. The combination of oval and circular mats makes for a stylish and practical decor piece. Customize the colors and yarn type to match your theme!
We hope you enjoyed this free crochet pattern. Share your creations with us on Instagram using #CozyYarnVibes!
Happy Crocheting! 🧶
Your pattern for circular is not correct 3dc then 1 dc 1 dc 1 dc for round then 4dc then 1 dc 1dc 1 dc 1dc for next round…if we keep doing then it doesn’t stay flat it folds in side
Hi Prachi, thank you so much for your feedback! I really appreciate you taking the time to test the pattern and share your experience. I’ll definitely recheck the stitch counts and make adjustments if needed to ensure it lays flat. If you have any specific suggestions or edits, I’d love to hear them — happy crocheting! 😊🧶
Hi there! Approximately how much yarn did you use to make the larger Oval Mat? Just trying to figure out how much to order. Thanks in advance!
Hi Prachi, on the oval, you say to increase o the 5 double crochet sides, how much do you increase each round?5 first, 10 second, 20 third? Is that correct? Please let me know. I love your pattern.🧶❤️
Hi! 😊 Thank you so much for your kind words — I’m so glad you love the pattern! 🧶❤️ Great question about the increases. For the oval, you’ll continue increasing only at the rounded ends (where you placed the 5 DCs) to maintain the shape. Here’s how the increases work:
In the second round, place 2 DCs in each of the 5 stitches at both ends (so, 10 DCs total per rounded end).
In the third round, alternate between 2 DCs and 1 DC across those 10 stitches — this gives you 15 DCs.
From the fourth round onward, continue evenly spacing increases only on those rounded ends. For example: 2 DCs in every 3rd stitch, then every 4th in the next round, and so on — just enough to keep the oval smooth and flat.
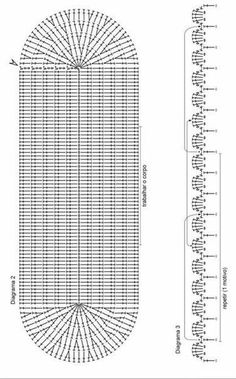
To keep the shape neat, it’s best to closely follow the stitch diagram —it shows exactly how many and where to place the increases in each round.
happy to help! 💕
Hi I followed the pattern and it doesn’t lay flat. Maybe the instructions should include how many stitches per row.
A you tell me how many yards of yarn I would need to make the centre piece and 8 placemats. I need to know to buy the correct amount of yarn.
Hi, im wondering about the decorative edge. In the picture, it looks like theres more to it than just one row of shell stitch. How do I create the same edge as the picture?
On the foundation chain, is it a single crochet or a double crochet foundation chain? TYA
How much yarn does it take to make the center runner?