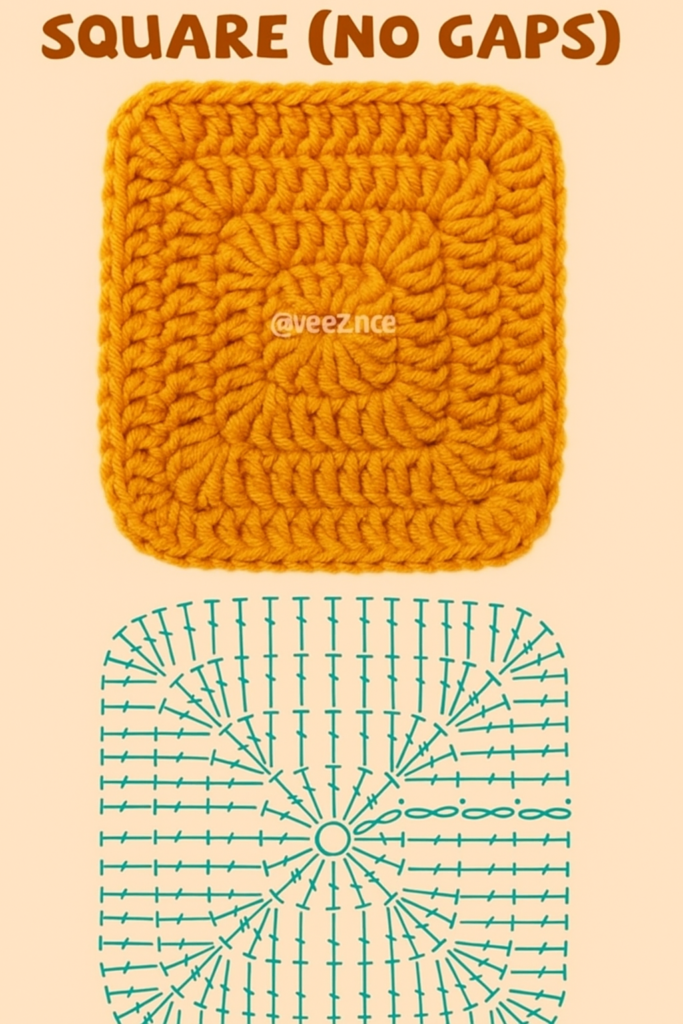
🧶Gap-Free Classic Square– Free Crochet Pattern
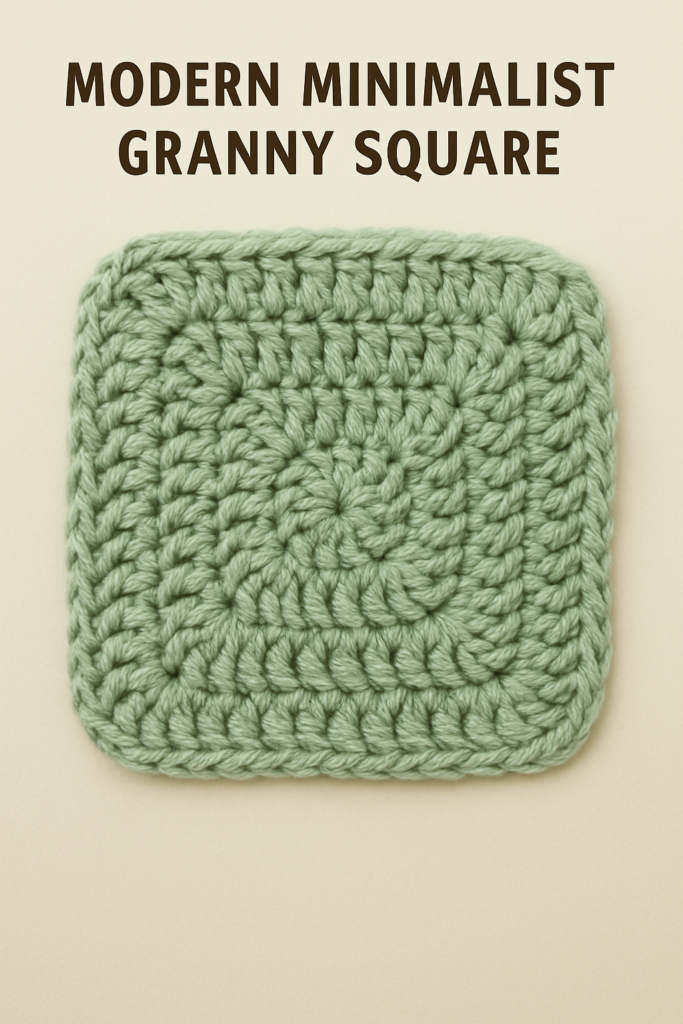
Looking for a clean, seamless granny square to elevate your crochet projects? This Solid Granny Square is the perfect alternative to traditional versions with gaps — offering a tight weave and modern finish. Whether you’re making blankets, table runners, bags, or coasters, this beginner-friendly square is versatile and simple to learn.
📏 Sizing Guide
- Finished Size: Approx. 3.5″ to 4″ square (adjustable based on yarn and hook)
- Customizable: Add rounds for larger squares
🧶 Materials Needed
✔ Worsted weight cotton or acrylic yarn (any color)
✔ Crochet hook – 5.0 mm (H) recommended
✔ Yarn needle & scissors
✔ Stitch marker (optional)
🧵 Stitches & Abbreviations (US Terms)
- ch – chain
- dc – double crochet
- sl st – slip stitch
- st(s) – stitch(es)
- sp – space
🧶 How to Do These Stitches
Here’s a quick refresher:
✔ Double Crochet (dc): Yarn over, insert hook in stitch, yarn over and pull up loop (3 loops on hook), yarn over, pull through 2 loops, yarn over, pull through remaining 2 loops.
✔ Slip Stitch (sl st): Insert hook into stitch, yarn over, pull through both the stitch and the loop on your hook.
✔ Magic Circle (or Adjustable Ring): Wrap yarn around two fingers, insert hook into the loop, yarn over and pull up a loop. Chain one, then work stitches into the loop. Pull tail to tighten.
Need help? Check out the Stitch Library in the menu or visit my YouTube channel for visual tutorials!
🔲 Solid Granny Square Crochet Pattern
Round 1:
Start with a magic circle, ch 3 (counts as dc), make 11 dc into the ring, join with sl st to the top of ch-3. (12 dc)
Round 2:
Ch 3, dc in the same st, 2 dc in each stitch around, sl st to join. (24 dc)
Round 3:
Ch 3, dc in next 2 sts, (2 dc in next st, dc in next 2 sts) repeat around. Join. (32 dc)
Round 4 (Start shaping into a square):
Ch 3, dc in next 2 sts, (2 dc, ch 2, 2 dc) in next st (this forms a corner), dc in next 7 sts
Repeat from * to * around. Join.
Round 5 and beyond:
Ch 3, dc in each st across until corner. (2 dc, ch 2, 2 dc) in ch-2 corner sp, continue dc in each st.
Repeat for each round to grow your square.
🎨 Customization & Variations
🧵 Color Changes: Change yarn color each round for a fun striped effect.
🇺🇸 Festive Vibe: Use red, white, and blue to create patriotic versions for July 4th!
👜 Make It a Bag: Join multiple squares for tote bags or pouches.
🛋️ Home Decor: Seam together several squares to make cushion covers or table runners.
🧼 Care Instructions
✔ Hand wash or machine wash cold
✔ Lay flat to dry
✔ Use cotton yarn for hot pads or coasters (acrylic may melt with heat)
❓ FAQs
Q: Can I use a different yarn weight?
A: Yes! Just adjust your hook size accordingly.
Q: How do I join multiple squares together?
A: You can whipstitch, slip stitch, or crochet them together — check out my joining tutorial in the Stitch Library.
💡 Project Ideas Using Solid Granny Squares
- Blankets & Throws
- Pillow Covers
- Bags or Totes
- Mug Rugs & Placemats
- Table Runners
- Wall Hangings
✨ Final Thoughts
The solid granny square is a must-have in your pattern collection. It’s simple, sturdy, and beginner-approved — perfect for mastering tension, stitch placement, and creative joining!
Try making a few today and tag me if you share your creations. 🧶💚
On Round 4 there are no * to indicate what is to be repeated for that whole round. I understand the corner but what’s between the corners. Please help
Vivian Schulkin
*(2 dc, ch 2, 2 dc) in next st (this forms a corner), dc in next 7 sts*
Goes like this:
1. Ch 3, dc in next 2 sts
2. (2 dc, ch 2, 2 dc) in next st (this forms a corner), dc in next 7 sts
3. (2 dc, ch 2, 2 dc) in next st (this forms a corner), dc in next 7 sts
4. (2 dc, ch 2, 2 dc) in next st (this forms a corner), dc in next 4 sts
[only dc 4 at the end of this step because you should have 3 dc’s waiting to join-refer back to step 1 if you are wondering where these 3 stitches came from]
5. Join
Please reevaluate round 3 and explain better…there is no way to get 32dc. I’ve tried how it’s written (gives 31), tried placing the first dc into the same stitch as the chain (that gives 33). I’m frogged this way too many times now, tried many different ways, and had a second person attempt this pattern. It isn’t working out.
The first chain you make counts as part of the 32dc.
In the 4th round too the last assumed 7dc to end the round is actually only 4 remaining dc.
When you chain 3, and dc in the next two at the start of step 4, that is (3) stitches. When you have 4 left, that is (4).
4+3=7.
You join at the first 3 you started on the round, not the corner.
If you put 2 dc and 2 ch in the corner in additional rows how can you not have a hole? Pictures only show 4 rows.
Pingback: 29 Unique Crochet Patterns - HelthDestiny