🧵 Introduction
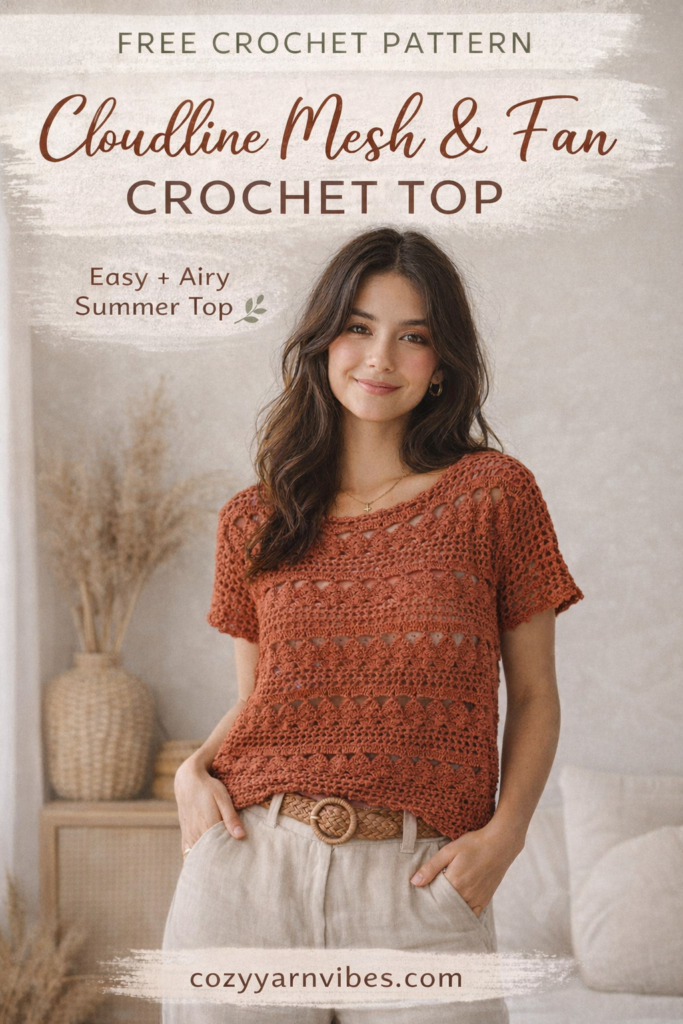
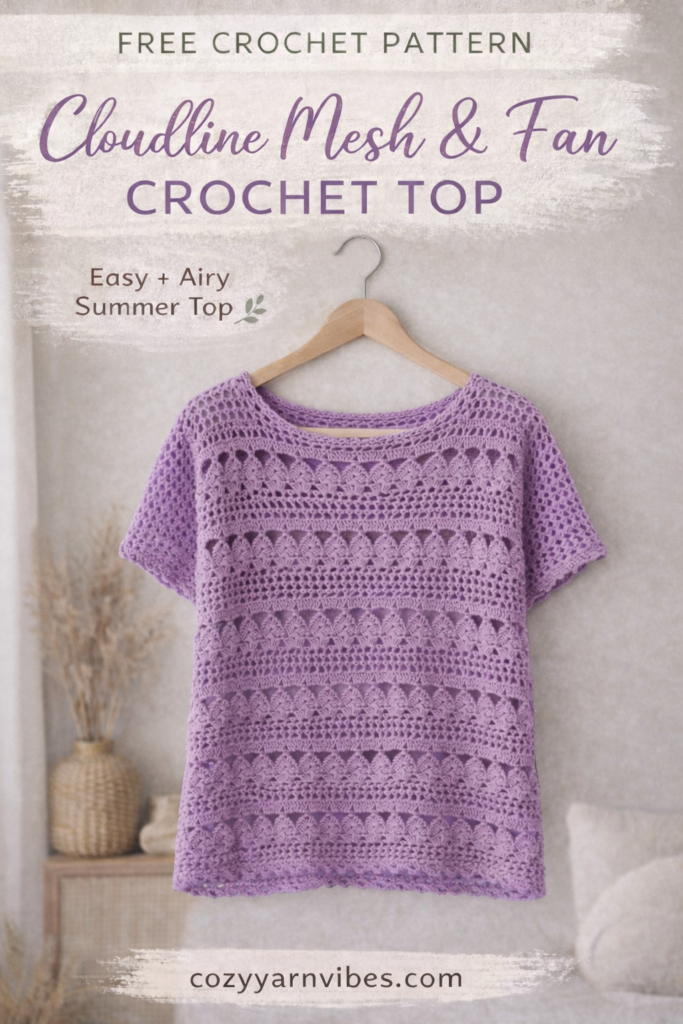
The Cloudline Mesh & Fan Top is a beautifully airy crochet design that combines open mesh rows with delicate fan stitches, creating a soft flowing texture that looks intricate but is surprisingly simple to make.
This pattern is built using easy repeating sections, making it perfect for relaxing crochet sessions while still giving a polished, boutique-style finish.
📏 Skill Level
Beginner to Intermediate
✔ Best for crocheters who know basic stitches and want to try lace patterns.
📐 Sizing Guide
- Fully customizable
- Start chain = width of your shirt
👉 Measure your bust and chain accordingly
🧶 Materials
- Cotton yarn (DK / light worsted)
- 4.0–4.5 mm hook
- Scissors
- Tapestry needle
Hssugi Crochet Kit for Beginners, Crochet Animal Kit Dog, Complete Crochet Starter Kits for Adults with Easy Yarn Step-by-Step Video Tutorials Crochet Hook for Women Birthday Present
$8.99 (as of June 26, 2026 14:57 GMT +00:00 – More infoProduct prices and availability are accurate as of the date/time indicated and are subject to change. Any price and availability information displayed on [relevant Amazon Site(s), as applicable] at the time of purchase will apply to the purchase of this product.)
The Woobles Minecraft Crochet Kit – Beginner Crochet Kit for Adults & Kids, Easy Knitting Kit with Woobles Yarn, DIY Crafts, Crochet Animals, Minecrafts, Gift for Gamers & Crafters (Ender Dragon)
$44.99 (as of June 26, 2026 14:57 GMT +00:00 – More infoProduct prices and availability are accurate as of the date/time indicated and are subject to change. Any price and availability information displayed on [relevant Amazon Site(s), as applicable] at the time of purchase will apply to the purchase of this product.)
Aeelike Crochet Kit for Beginners, 59pcs Crochet Starter Kits with Yarn, Ergonomic Hooks & Storage Case, Learn-to-Crochet Set for Adults, Kids & Seniors, Ideal DIY Craft Gift for Women
$13.67 (as of June 26, 2026 14:57 GMT +00:00 – More infoProduct prices and availability are accurate as of the date/time indicated and are subject to change. Any price and availability information displayed on [relevant Amazon Site(s), as applicable] at the time of purchase will apply to the purchase of this product.)
Katech Crochet Kit for Beginners, Beginner Crochet Kit for Adults-Crochet Kits Includes Crochet Hooks Knitting Bag Crochet Yarn for Crocheting Instruction Knitting Kit Crochet Supplies Gift
$33.38 (as of June 26, 2026 14:57 GMT +00:00 – More infoProduct prices and availability are accurate as of the date/time indicated and are subject to change. Any price and availability information displayed on [relevant Amazon Site(s), as applicable] at the time of purchase will apply to the purchase of this product.)🔤 Stitches & Abbreviations (US Terms)
- ch – chain
- sc – single crochet
- dc – double crochet
- sk – skip
- st – stitch
🧠 Pattern Notes
- Pattern is worked flat in rows
- Repeat sections create full design
- Make 2 panels (front + back)
- Join using slip stitch
⚠️ Important:
Keep your stitch count consistent — do not accidentally increase stitches or your width will change.
🧵 Construction Overview
- Chain your desired width
- Work mesh base rows
- Add fan stitch section
- Add spacing + structure rows
- Repeat pattern for length
- Make 2 panels
- Join together
🪡 Step-by-Step Pattern
Foundation
👉 Chain the width of your shirt
Row 1 (Mesh Base)
- ch 3 (counts as dc)
- skip 2 ch
- dc in 3rd stitch
- ch 2, skip 2
- dc in next
- repeat across
✔ Creates open mesh
Row 2 (Aligned Mesh)
- ch 3
- dc in first stitch
- ch 2, skip 2
- dc in next
- repeat across
✔ Keeps mesh structure consistent
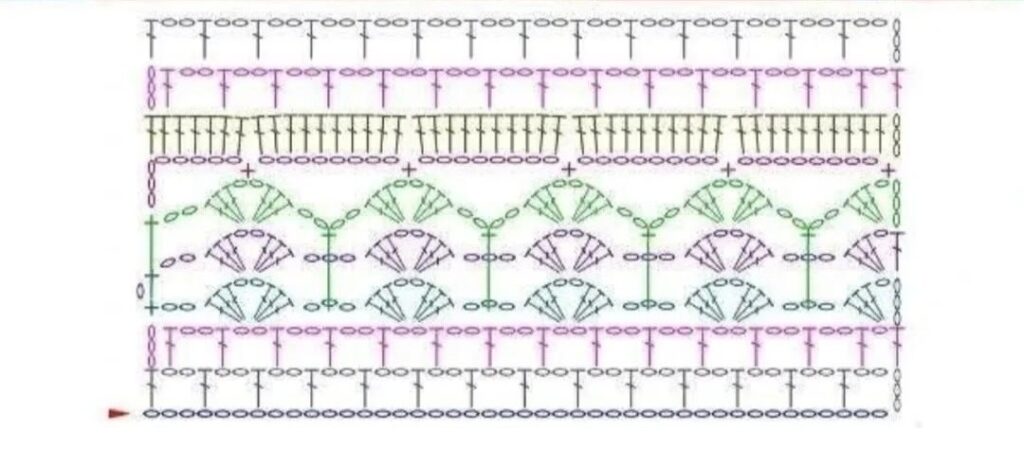
Row 3 (Transition + Fan Start)
- ch 4
- 3 dc in next stitch
- skip 3 stitches
- ch 3
- in next ch-2 space:
👉 (3 dc, ch 2, 3 dc) = fan stitch - repeat across
Row 4 & Row 5 (Fan Build Rows)
- Continue making fan stitches directly above fan stitches
- Maintain spacing between sections
⚠️ Follow your graph carefully here — this is where alignment matters most
Row 6 (Open Loop Row)
- sc in first stitch
- ch 8
- sc in space between next fan stitches
- repeat across
✔ Creates airy loop spacing
Row 7 (Structure Row)
- ch 3
- dc in each stitch across
⚠️ Important warning:
Do NOT increase stitches — keep count consistent
Repeat Pattern
Now repeat:
👉 Row 1 → Row 2 → Row 3 → Row 4 → Row 5 → Row 6 → Row 7
Continue until desired shirt length
👚 Shaping & Finishing
Panels
- Make 2 identical panels
Neckline
- Use Row 1 & 2 mesh pattern to shape neckline if needed
Assembly
- Join shoulders with slip stitch
- Join sides, leaving armholes
🎨 Customization Ideas
- 🌸 Add scalloped edging
- 🌿 Make cropped or oversized
- 🌊 Use pastel or ombré yarn
- 🧡 Add sleeves using mesh rows

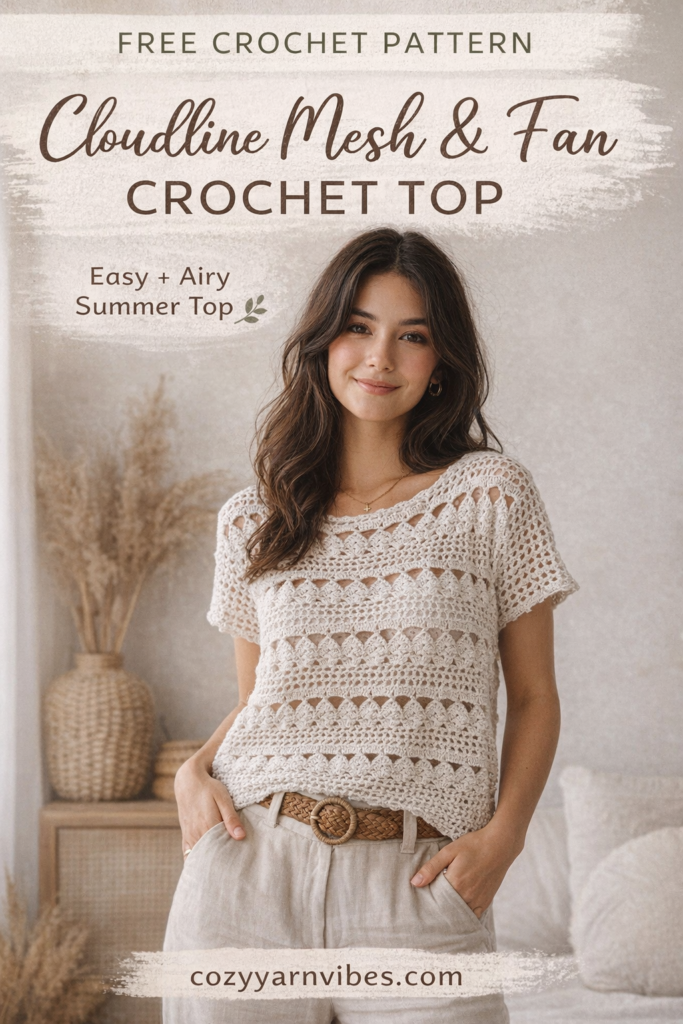
👗 Styling Ideas
- With denim shorts → casual summer look
- Over a dress → layered aesthetic
- With linen pants → cozy minimalist vibe
🧼 Care Tips
- Hand wash recommended
- Dry flat
- Avoid stretching while wet
❓ FAQs
Why is my top getting wider?
You are likely adding extra stitches — keep count consistent.
Can beginners make this?
Yes! Just follow rows carefully, especially fan sections.
Can I change yarn weight?
Yes, but adjust hook size accordingly.
Little Corner: Coloring Book for Adults and Teens, Super Cute Designs of Cozy, Hygge Spaces for Relaxation (Cozy Spaces Coloring)
$9.99 (as of June 27, 2026 14:42 GMT +00:00 – More infoProduct prices and availability are accurate as of the date/time indicated and are subject to change. Any price and availability information displayed on [relevant Amazon Site(s), as applicable] at the time of purchase will apply to the purchase of this product.)
I love your pattern, thanks for sharing. I would love to make for my granddaughter for her birthday, do you have any idea what I would use for my number of chain stitches for size small? She is tall and petite. Thank you 😊
Quantity of yarn is not given..?
Length of chain also not. Or at least a multiple of….
Hi and thank you for this adorable pattern for the cloud line mesh fan crocheted top. I have a question In row 3 you said something about next chain -2.what does that mean -2?
Thank you.
Plus is there a utube video on this pattern
LJ SLater