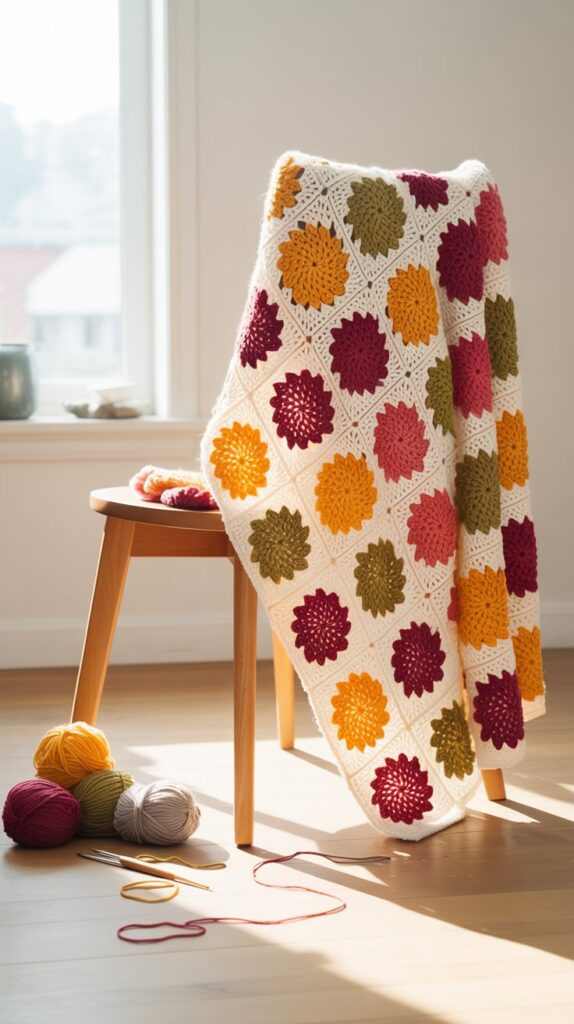
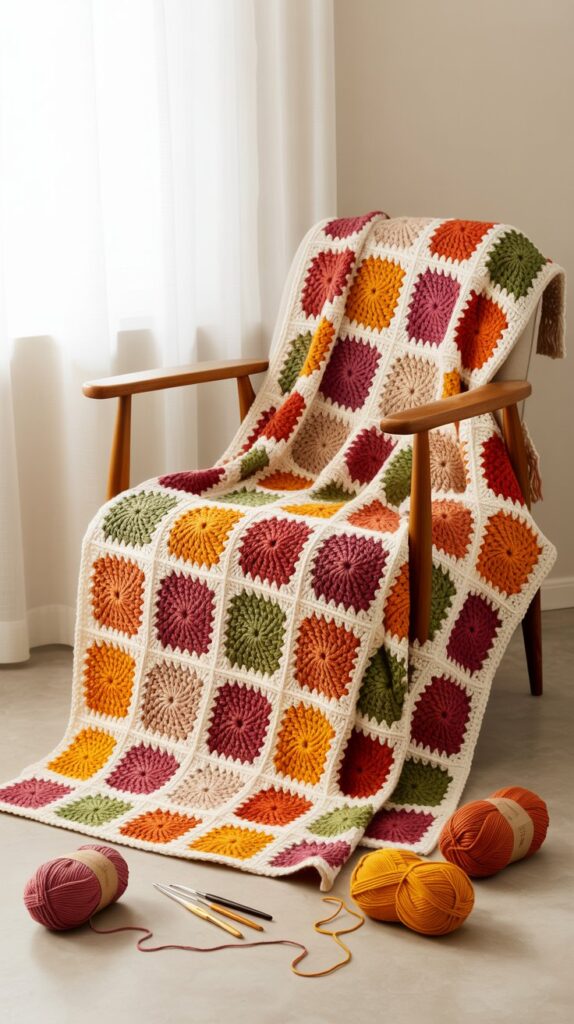
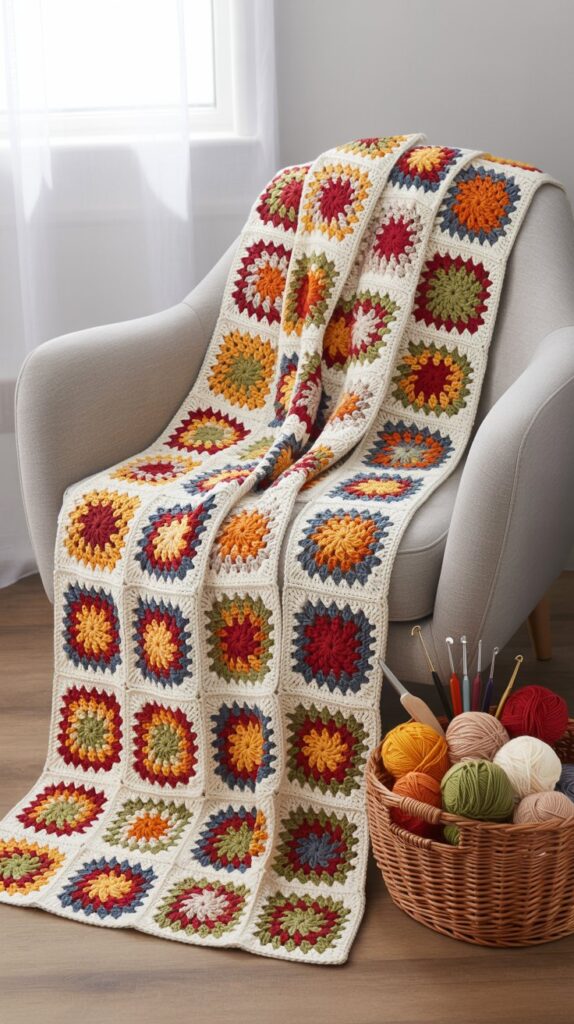
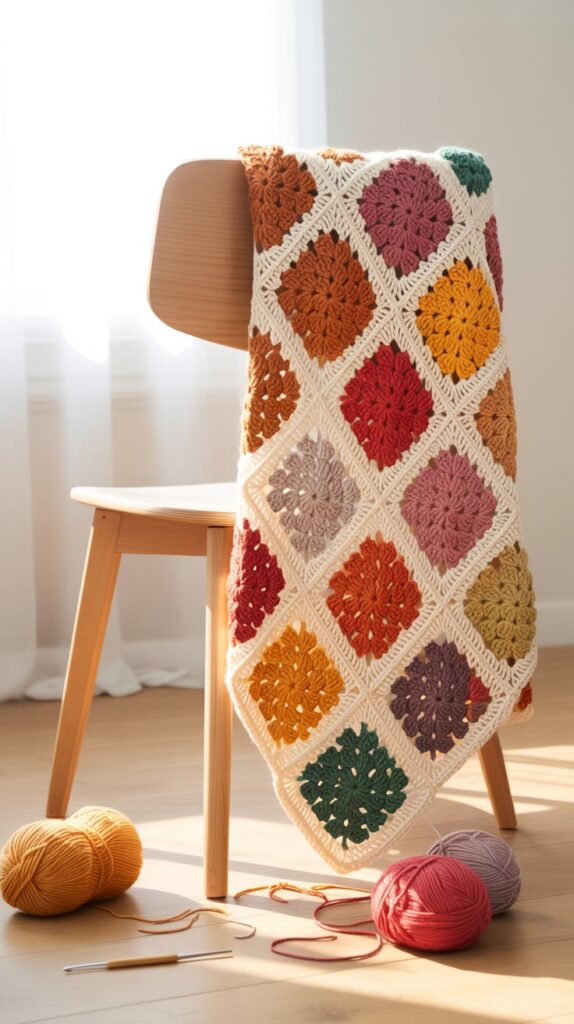
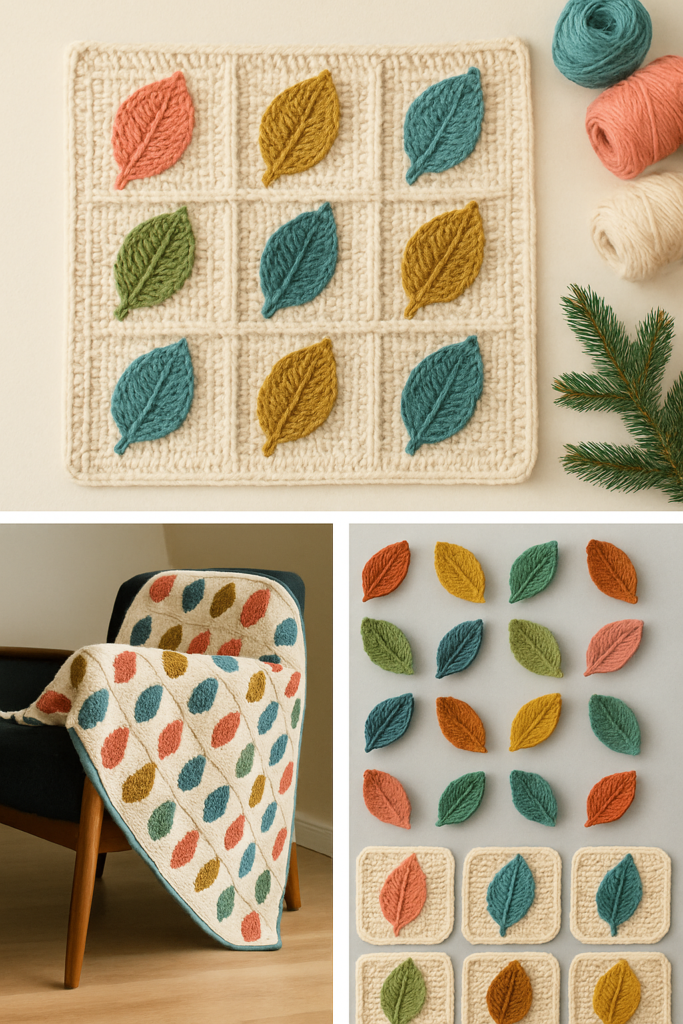
🍂 Colorful Crochet Leaf Motif Blanket – Free Pattern & Inspiration
Bring the cozy charm of autumn into your home with this vibrant Crochet Leaf Blanket. Whether used as a throw, baby blanket, or home accent piece, the delicate leaves surrounded by crisp white squares offer a modern yet organic touch.
🧶 Materials Needed:
- Yarn:
- Worsted or DK weight cotton or acrylic yarn
- Leaf colors: Assorted fall tones (red, orange, gold, green, purple, rust, etc.)
- Background color: White or cream
- Hook: 4.0 mm (G) or as required for your yarn
- Tapestry needle
- Scissors
- Blocking tools (optional but helpful)
CrochetBox Crochet Kit for Beginners Adults – Cthulhu Starters Crochet Kit, Beginners Crocheting Kitting for Adults Teen, Craft Gifts with Crochets Yarns, Hook, Step-by-Step Video, Instruction
$17.99 (as of July 18, 2026 18:04 GMT +00:00 – More infoProduct prices and availability are accurate as of the date/time indicated and are subject to change. Any price and availability information displayed on [relevant Amazon Site(s), as applicable] at the time of purchase will apply to the purchase of this product.)
iKumar 59 Pcs Crochet Kit for Beginners Adults, Crochet Kits Include Yarn and Storage Bag, Crochet Starter Kit for Beginners, Ergonomic Crochet Hooks 2.0-6.0 mm, Lace Steel Needles 0.6-1.9 mm
$29.99 (as of July 18, 2026 18:04 GMT +00:00 – More infoProduct prices and availability are accurate as of the date/time indicated and are subject to change. Any price and availability information displayed on [relevant Amazon Site(s), as applicable] at the time of purchase will apply to the purchase of this product.)
Crochet Kit for Beginner-2PCS Animals Brown and Beige Capybara Crochet Kit with Step-by-Step Video Tutorials,Stuffed Animal Knitting Kit for Adult,Capybara Party Crocheting Kit for Birthday
$16.99 (as of July 18, 2026 18:04 GMT +00:00 – More infoProduct prices and availability are accurate as of the date/time indicated and are subject to change. Any price and availability information displayed on [relevant Amazon Site(s), as applicable] at the time of purchase will apply to the purchase of this product.)
Mnuizu Crochet Kit for Beginners, Animal Crochet kit for Starters with Instructional and Step-by-Step Video Tutorials, Complete Crochet Accessories, Crochet Kit for Adults,Easy Starter Present(Fox)
$6.99 (as of July 18, 2026 18:04 GMT +00:00 – More infoProduct prices and availability are accurate as of the date/time indicated and are subject to change. Any price and availability information displayed on [relevant Amazon Site(s), as applicable] at the time of purchase will apply to the purchase of this product.)🍁 Stitches & Abbreviations (US Terms)
- ch – chain
- sl st – slip stitch
- sc – single crochet
- hdc – half double crochet
- dc – double crochet
- tr – treble crochet
- sk – skip
- st – stitch

🧵 How to Crochet the Leaf Motif
Pattern Chart: Refer to the top left of the image for the stitch diagram. Here’s a written version to help:
🔸 Leaf Pattern:
- Ch 11
- Row 1: Starting from 2nd ch from the hook:
- sc, sc, hdc, dc, 5tr, dc, hdc, sc, sc
- (continue around the other side of the chain)
- sc, sc, hdc, dc,5tr, dc, hdc, sc, sc
- Join with sl st to the first sc. Fasten off and leave a long tail for sewing.
👉 You can block the leaves lightly to help them hold their shape.
🔳 Joining the Leaves into Squares:
Option 1: Seamless Join-As-You-Go Squares
- Use white yarn.
- Begin a solid granny square or basic square pattern.
- Sew or crochet the leaf into the center of the square using a tapestry needle and white yarn or matching thread.
- Continue building your square around the leaf, ensuring it stays centered.
🧩 Option 2: Turn the Leaf into a Granny Square (Follow Chart)
Instead of sewing the leaf motif onto a separate square, you can build the square directly around the leaf. Here’s how to do it:
🧷 Leaf to Granny Square Join – Method:
After completing your leaf motif using the original chart or written instructions, do the following:
Start from one pointy edge of the leaf:
- sc in next chain,
- skip 1 st,
- sc in next,
- hdc, hdc,
- dc, dc,
- 2 tr in same stitch,
- 2 tr in same stitch,
- 2 tr in same stitch,
- dc, dc,
- hdc, hdc,
- sc, sc,
- skip 1 st,
- sc, sc,
- hdc, hdc,
- dc, dc,
- 2 tr in same stitch,
- 2 tr in same stitch,
- 2 tr in same stitch,
- dc, dc,
- hdc, hdc,
- sc, sc,
- Join with a sl st to the starting point.
You now have one full square built directly from the leaf base. 🟩
Make four more of these and join them together — 2 on top, 2 on bottom to create a larger granny square unit featuring your colorful leaves.
📏 Sizing Guide
- Each finished square (with a leaf) may be approx. 4–5 inches wide.
- For a small throw, aim for 6 x 8 squares (48 total).
- Adjust to your preferred size and layout.
🌈 Customization Ideas
- Use pastel colors for spring themes.
- Make a monochrome version with shades of green for a botanical look.
- Add stem embroidery with green yarn to each leaf.
🧺 Care Instructions
- Hand wash or gentle machine wash (check your yarn label).
- Lay flat to dry.
- Store flat to avoid creasing.
❓FAQs
Q: Can I use cotton yarn for this?
A: Absolutely! Cotton yarn gives great stitch definition for leaves and holds the shape beautifully.
Q: Can I turn this into a pillow cover?
A: Yes! Use the front side with the leaves and back it with a plain square or fabric to create a pillow.
Q: How do I keep the leaves from curling?
A: Light blocking with steam or wet blocking helps keep the leaf motifs flat and neat.