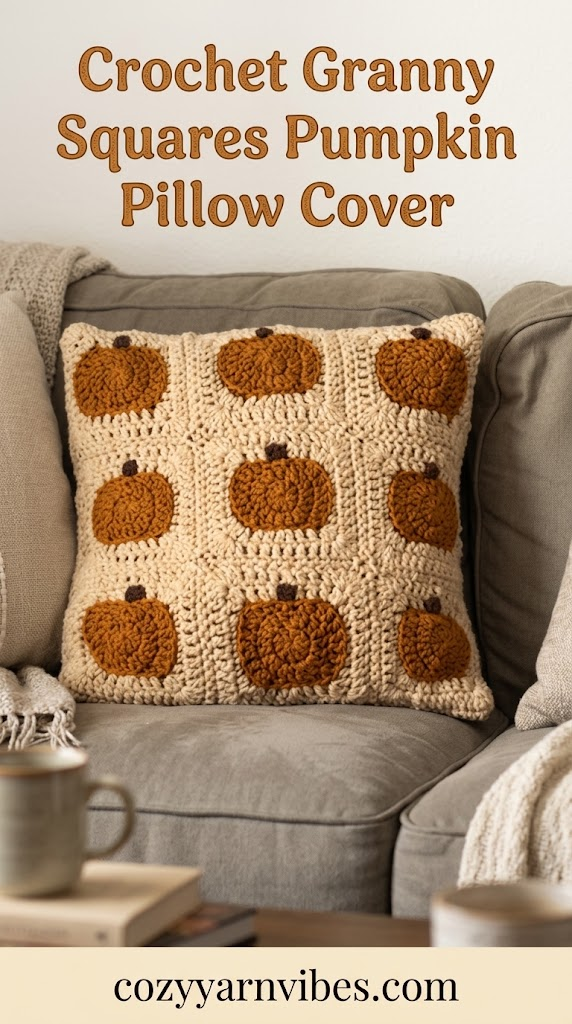
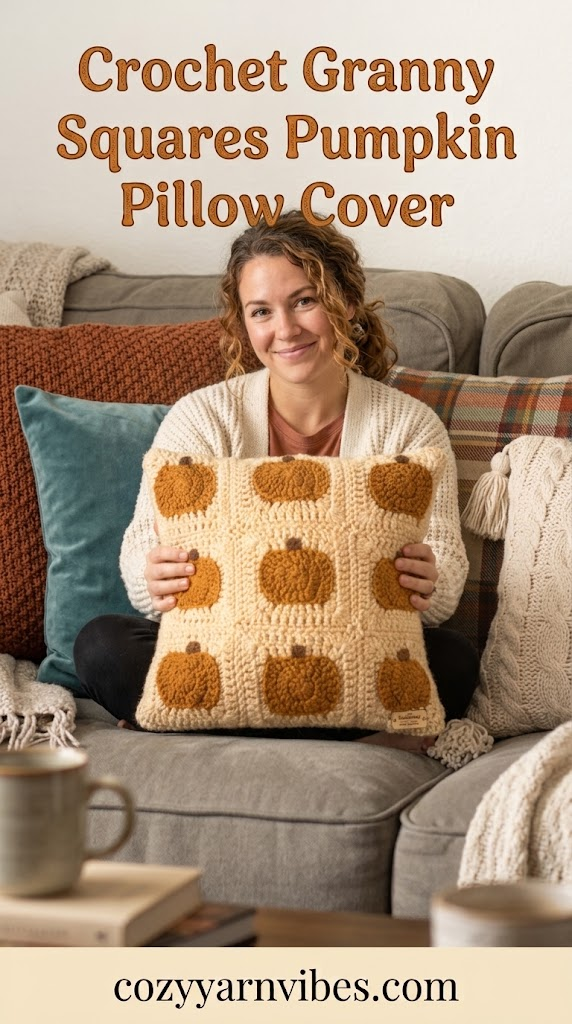
Looking for a cozy crochet project to decorate your home for autumn? This Granny Squares Pumpkin Pillow is a charming way to bring handmade warmth and classic fall colors into your space. Combining traditional granny squares with a playful pumpkin shape, this pillow makes a lovely addition to sofas, armchairs, beds, and seasonal displays.
The Granny Squares Pumpkin Pillow is also a great project for using small amounts of leftover yarn. Choose traditional pumpkin orange, warm rust, cream, brown, mustard, or olive green to create a cozy autumn color palette. You can make one pillow as an accent piece or crochet several in different colors for a coordinated fall collection.
Easy Granny Squares Pumpkin Pillow Tutorial
This Granny Squares Pumpkin Pillow combines individual crochet granny squares to create a larger pumpkin-inspired pillow. The squares are crocheted separately and arranged to form the rounded pumpkin body before being joined together.
Once the pumpkin body is assembled, a small stem and optional leaf can be added at the top. The finished Granny Squares Pumpkin Pillow has a classic handmade look that works beautifully with other fall crochet decorations.
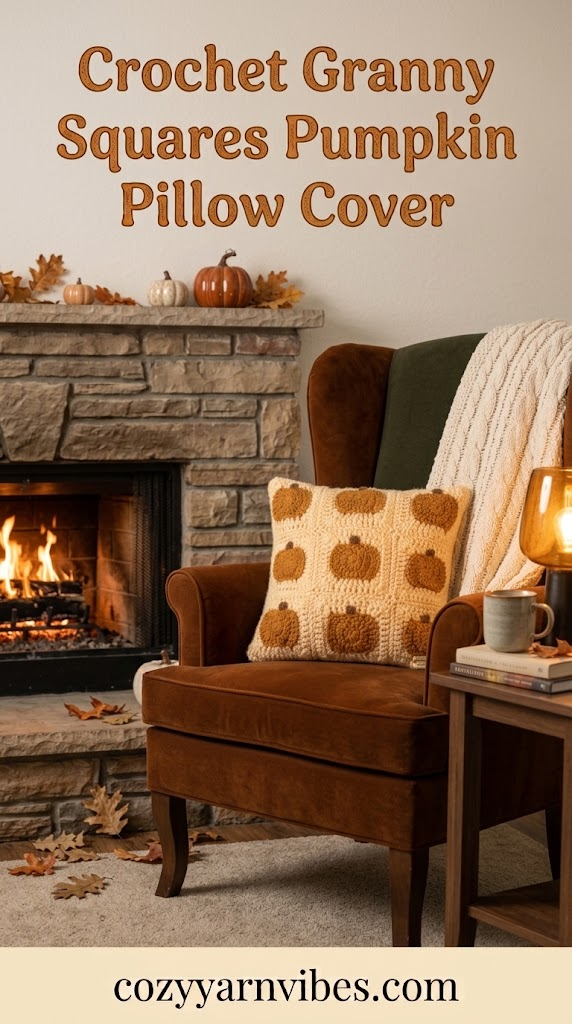
Why You’ll Love This Pattern
- Classic granny square design
- Perfect for fall and Thanksgiving decor
- Uses small amounts of yarn
- A great project for using leftover yarn
- Easy to customize with different colors
- Makes a cozy seasonal pillow
- Great for beginners familiar with granny squares
- Can be made as a handmade fall gift
Skill Level
Beginner to Easy Intermediate
If you already know how to crochet basic granny squares and join crochet pieces together, you can follow this Granny Squares Pumpkin Pillow project with ease.
Finished Size
The finished size will depend on the size and number of granny squares used.
For a standard decorative pillow, you can adjust the granny squares to create a finished piece approximately 14–18 inches wide.
Use larger or smaller granny squares if you want to make your Granny Squares Pumpkin Pillow in a different size.
Materials Needed
Yarn
- Worsted weight yarn (#4)
- Orange or pumpkin-colored yarn for the main body
- Cream, beige, mustard, rust, brown, or other colors for granny square accents
- Green or brown yarn for the stem and optional leaf
- Yarn for joining the squares
Cotton or acrylic yarn can be used depending on the look and feel you want for your pillow.
Color
For a traditional fall Granny Squares Pumpkin Pillow, try:
- Pumpkin orange
- Rust
- Cream
- Mustard
- Brown
- Olive or sage green
You can use one main color throughout the squares or alternate several shades to create a colorful patchwork effect.
Additional Supplies
- Crochet hook suitable for your yarn
- Yarn needle
- Scissors
- Stitch markers
- Pillow insert or fiberfill
- Measuring tape
Stitches & Abbreviations
This pattern uses US crochet terms.
Ch chain
Dc double crochet
Sc single crochet
sl st slip stitch
St stitch
Sts stitches
Rep repeat
Rnd round
FO fasten off
BLO back loop only
How to Make These Stitches
Chain (ch)
Yarn over and pull the yarn through the loop on your hook to create a chain.
Single Crochet (sc)
Insert the hook into the stitch, yarn over, and pull up a loop. Yarn over again and pull through both loops on the hook.
Double Crochet (dc)
Yarn over and insert the hook into the stitch. YO and pull up a loop. Yarn over and pull through two loops. YO again and pull through the remaining two loops.
Slip Stitch (sl st)
Insert the hook into the stitch, yarn over, and pull the yarn through both the stitch and the loop on your hook.
Pattern Notes
- The Granny Squares Pumpkin Pillow is made from individual granny squares.
- Keep your square sizes consistent so the finished pillow joins neatly.
- Use the same yarn weight throughout the project for more even squares.
- Block the granny squares before joining if necessary.
- Arrange the colors before sewing or crocheting the squares together.
- The pumpkin shape is created through the arrangement of the squares.
- The stem can be crocheted separately and attached after the pillow body is completed.
- Leave an opening when joining the pillow pieces so the insert can be added.
Granny Squares Pumpkin Pillow Step-by-Step
The front of the pillow cover is made from individual pumpkin granny squares. Make sure each square is worked to the same size so the finished panel joins evenly.
Round 1: Create the Pumpkin Center
Begin with a magic ring.
Chain 3. This chain counts as the first double crochet. Alternatively, use a chainless double crochet if you prefer.
Work 9 more double crochets into the magic ring.
You should have 10 double crochet stitches in total.
Slip stitch into the first stitch to close the round.
Round 2: Increase the Pumpkin Center
Chain 3, or begin with a chainless double crochet.
Work 2 double crochets into each stitch around the entire round.
Because Round 1 contains 10 stitches, you will have 20 double crochet stitches after completing this round.
Slip stitch to the beginning stitch to close the round.
Round 3: Shape the Pumpkin
Chain 1 and work 1 single crochet into the first stitch.
Continue following the pumpkin shaping sequence, using a combination of single crochet and double crochet stitches to create the rounded pumpkin sections.
Work 3 slip stitches in the designated area to create the characteristic indentation between the pumpkin sections.
These slip stitches help give the pumpkin center a more defined shape rather than leaving it as a simple circle.
At the end of the round, cut the yarn and fasten off.
Round 4: Add the Granny Square Border
For Round 4, change to your chosen corner or border color.
Attach the new yarn to the back loop of the last slip stitch from the previous round.
Begin forming the square shape by working the designated corner groups of 3 double crochets together.
Along the sides, use the specified combination of half double crochet and single crochet stitches. These stitches help transition the rounded pumpkin center into the four-sided granny square shape.
Continue working around the pumpkin until all four sides and corners have been formed.
Slip stitch to join at the end of the round.
Check that the square lies flat before beginning the final round.
Round 5: Complete the Granny Square
Begin with chain 3, or use a chainless double crochet.
Work 1 double crochet into each of the next 4 stitches.
When you reach the center of the corner, work 6 double crochet stitches into the corner space.
Continue working double crochets along the next side, following the established pattern.
Work 8 double crochet stitches along each side and 6 double crochet stitches in the center of each corner.
Continue around the entire square, maintaining the same stitch placement at each side and corner.
Slip stitch to join at the end of the round.
Fasten off and weave in the ends securely.
Adding the Stem
Use brown yarn to create the small stem at the top of the pumpkin.
Attach the brown yarn and chain 5.
Work a double crochet into the second chain from the hook and another double crochet into the third chain from the hook.
Cut the yarn and fasten off.
Use a yarn needle or crochet hook to attach the stem securely to the top of the pumpkin granny square.
Position the stem centrally so that it sits naturally above the pumpkin motif.
Making the Remaining Granny Squares
Repeat the same pumpkin granny square pattern until you have enough squares for your pillow cover.
For a one-sided pillow, make 9 granny squares.
For a two-sided pillow, make 18 granny squares.
Keep your stitch tension consistent throughout every square. Matching square dimensions are important because uneven squares can make the finished pillow panel difficult to assemble.
Joining the Granny Squares
Arrange 9 completed pumpkin granny squares in a 3 × 3 layout.
Before joining, place all the squares on a flat surface and arrange the colors so the pumpkin motifs and border shades are balanced.
Join the squares together using single crochet stitches.
Work the joining stitches on the back side of the squares. This keeps the front of the pillow panel neat while creating a subtle raised seam on the reverse.
Continue joining the squares row by row until all 9 squares form one complete front panel.
Weave in the remaining joining tails on the wrong side.
Making the Back Panel
The back of the pillow cover is made from two separate crochet rectangles. These pieces overlap to create an envelope-style opening for inserting and removing the pillow form.
Back Rectangle 1
Chain 42, or make enough chains to match the width of your completed front panel.
Add 2 additional chains for turning.
Work half double crochet stitches across the row.
Continue working rows of half double crochet until the rectangle is slightly longer than half the height of the front panel.
Fasten off and weave in the ends.
Back Rectangle 2
Repeat the same process to create the second back rectangle.
Chain the same number of stitches as the first rectangle, plus 2 turning chains.
Work half double crochet across the row.
Continue working rows until the second rectangle matches the size of the first.
The two rectangles should overlap when placed against the front panel.
Assembling the Pillow Cover
Place the completed pumpkin granny square front panel flat with the right side facing upward.
Position the two back rectangles over the front panel with their right sides facing the front panel.
Arrange the rectangles so they cover the back of the front panel and overlap each other in the center.
The overlap creates the opening through which the pillow form can be inserted later.
Make sure all four outer edges are aligned before joining.
Join the Three Layers
Using your chosen yarn, work single crochet stitches around the entire outside edge of the pillow cover.
When working along the overlapping back section, insert your hook through all three layers so that the front panel and both back rectangles are joined securely.
Continue single crocheting around all four sides.
Keep your tension even around the corners. Work carefully so the edges do not become too tight or cause the pillow cover to curl.
When you reach the beginning of the round, slip stitch to join.
Fasten off and weave in the remaining yarn tail.
Turn and Finish the Pillow Cover
Turn the pillow cover right side out through the envelope opening.
Gently push out the corners and straighten the granny square panel.
Insert the pillow form through the opening at the back.
Adjust the pillow form inside the cover so that it fills the pumpkin granny square panel evenly.
The overlapping back panels should hold the pillow form securely inside the finished crochet pillow cover.
Your crochet pumpkin pillow cover is now complete and ready for fall decorating.
Customization Ideas
Classic Orange Pumpkin
Use orange granny squares with brown or green details for a traditional pumpkin look.
Rustic Fall Pumpkin
Combine rust, burnt orange, cream, mustard, and brown granny squares for a warm farmhouse-inspired Granny Squares Pumpkin Pillow.
Neutral Pumpkin
Try cream, beige, taupe, brown, and muted orange for a softer neutral fall decoration.
Colorful Pumpkin
Mix several autumn shades throughout the granny squares to create a playful patchwork design.
Halloween Pumpkin
Use orange and black squares and add a small embroidered jack-o’-lantern face to create a Halloween-inspired pillow.
Styling Ideas
Your Granny Squares Pumpkin Pillow can be displayed in many areas around your home during fall.
Place it on:
- Sofas
- Armchairs
- Beds
- Reading chairs
- Entryway benches
- Window seats
- Cozy reading corners
Pair the Granny Squares Pumpkin Pillow with crocheted leaves, small pumpkins, fall blankets, candles, and warm-colored cushions for a coordinated seasonal display.
For Thanksgiving, combine the pillow with cream, rust, brown, mustard, and orange decorations to create a warm autumn arrangement.
Other Variations to Try
- Make several pumpkins using different granny square color combinations.
- Add a crocheted leaf beside the stem.
- Embroider a jack-o’-lantern face for Halloween.
- Use smaller squares to create a miniature pumpkin pillow.
- Use larger granny squares for a larger decorative pillow.
- Add a contrasting crochet border around the pillow.
- Make the back panel in a solid autumn color.
- Create matching pumpkin pillows in orange, rust, cream, and mustard.
- Use leftover yarn scraps to create a colorful patchwork Granny Squares Pumpkin Pillow.
Care Instructions
Check the washing instructions for the yarn you use before cleaning your Granny Squares Pumpkin Pillow.
If the pillow cover is removable, take out the pillow insert before washing.
For a handmade crochet pillow, gentle hand washing is a good option when the yarn allows it.
Avoid harsh detergents and bleach because they may fade the colors.
Do not wring the pillow cover. Gently squeeze out excess water and lay it flat to dry.
Keep the finished Granny Squares Pumpkin Pillow away from prolonged direct sunlight to help preserve its autumn colors.
Conclusion
This Granny Squares Pumpkin Pillow is a fun way to combine the classic beauty of granny squares with one of the most recognizable symbols of fall. The colorful squares create a cozy patchwork appearance, while the pumpkin shape makes the finished pillow perfect for seasonal decorating.
You can customize your Granny Squares Pumpkin Pillow with traditional orange shades, rustic neutrals, bright Halloween colors, or a combination of your favorite autumn yarns.
Whether you make one pillow for your sofa or create a collection for different rooms, this project is a lovely addition to your fall crochet list.
We have a lot of fall inspired crochet patterns and tutorials for you. After this pillow, try the Crochet Pumpkin Garland For Halloween.
Frequently Asked Questions
Is the Granny Squares Pumpkin Pillow beginner-friendly?
Yes. The Granny Squares Pumpkin Pillow is suitable for beginners who already know how to crochet basic granny squares and join crochet pieces. The individual squares are worked separately before being assembled into the pumpkin shape.
What yarn is best for a Granny Squares Pumpkin Pillow?
Worsted weight yarn is a versatile choice for this project. You can use cotton or acrylic yarn depending on the texture, appearance, and care requirements you prefer.
Can I make the Granny Squares Pumpkin Pillow larger?
Yes. You can make a larger Granny Squares Pumpkin Pillow by using larger granny squares or adding more squares to the pumpkin design. Keep the proportions consistent so the pumpkin shape remains recognizable.
Can I use different colors for the granny squares?
Absolutely. The granny squares are easy to customize with different autumn shades. Try orange, rust, mustard, cream, brown, olive, or burgundy for a traditional fall palette.
Can I make a Halloween version of the Granny Squares Pumpkin Pillow?
Yes. Use orange and black granny squares and add embroidered facial details to turn your Granny Squares Pumpkin Pillow into a festive Halloween decoration.