
The bean stitch is a beautiful crochet stitch that creates a raised, textured fabric with small, rounded clusters that resemble beans. It has a soft, dimensional appearance and works especially well when you want to add texture and visual interest to a crochet project.
Although the bean stitch looks intricate, it is made using basic crochet techniques. Once you understand how to work the repeated loops into one stitch, the pattern becomes easy to follow.
In this guide, you’ll learn what the bean stitch is, how to crochet it step by step, helpful tips for keeping your stitches even, common mistakes to avoid, and project ideas for using this textured stitch.
Bean Stitch Definition
The bean stitch is a textured crochet stitch made by working several yarn-over and pull-up-loop movements into the same stitch before drawing the yarn through all the loops on the hook. The completed stitch forms a compact, rounded cluster that gives the fabric its distinctive bean-like appearance.
Unlike a simple single or double crochet, the bean stitch builds several loops before they are closed together. This creates a raised texture on the surface of the fabric.
The bean stitch is usually worked between single crochet stitches. Starting and ending each row with a single crochet helps create neat, straight edges, while the bean stitches provide the textured pattern across the center of the row.
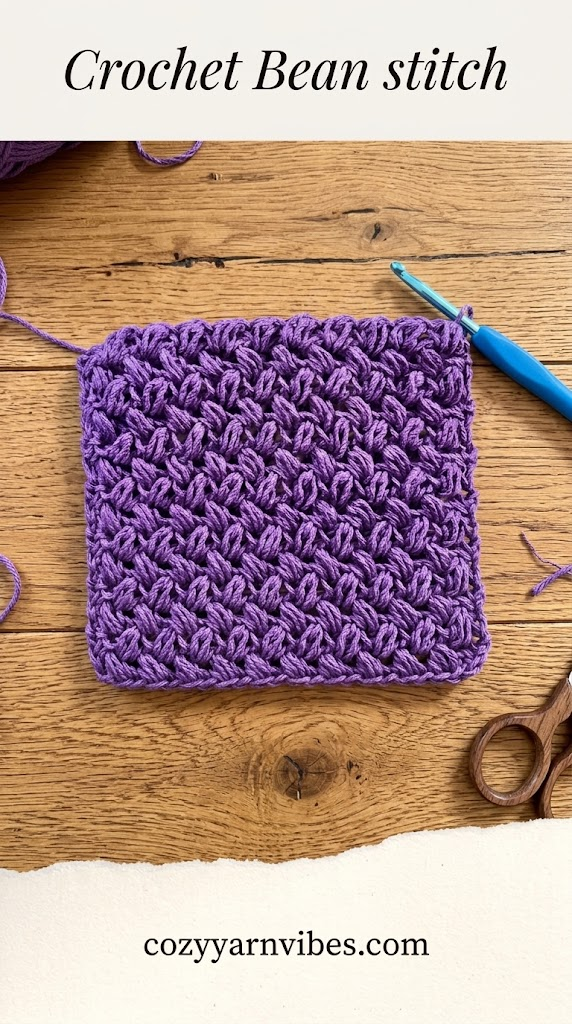
How to Make the Bean Stitch
Follow these steps to crochet the bean stitch using the stitch pattern shown in the chart.
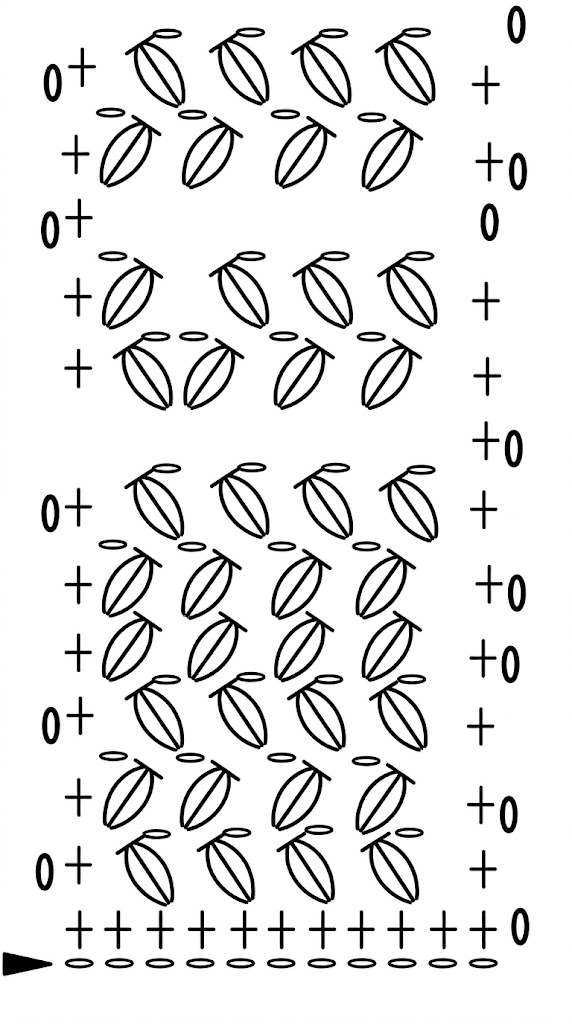
Step 1: Make a Foundation Chain
Start with an even number of foundation chains.
For practice, you can make a foundation chain of any even length that gives you enough stitches to work several repeats. Insert your hook into the second chain from the hook and work a single crochet.
Continue working one single crochet into each chain across the row. Because you skip the first chain when making the first single crochet, the finished row will contain an odd number of stitches.
Step 2: Work the First Row
Once you have completed the foundation row, chain 1 and turn your work.
The first row is made entirely of single crochet stitches. This creates a firm base for the textured bean stitches in the following row.
Step 3: Create the First Bean Stitch
Begin Row 2 with a single crochet in the first stitch.
Skip the next stitch. Insert your hook into the following stitch.
Yarn over and pull up a loop. You now have two loops on your hook.
Yarn over again and insert your hook into the same stitch. Yarn over and pull up another loop. You now have four loops on your hook.
Repeat the same movement one more time. Yarn over, insert your hook into the same stitch, yarn over, and pull up a loop. You should now have six loops on your hook.
Yarn over and pull the yarn through all six loops on your hook.
Chain 1 to complete the first bean stitch.
This combination of multiple loops worked into the same stitch and then closed together creates the raised bean-shaped texture.
Step 4: Repeat the Bean Stitch
After completing the first bean stitch, skip the next stitch.
Insert your hook into the following stitch and work another bean stitch using the same method: yarn over, pull up a loop three times in the same stitch, then yarn over and pull through all six loops.
Chain 1 after completing the bean stitch.
Continue working the pattern of skipping one stitch, making a bean stitch in the next stitch, and chaining 1 after each bean stitch.
Step 5: Finish the Row
Continue repeating the bean stitch pattern until you reach the final stitches of the row.
After making your last bean stitch, you should have two stitches remaining.
Skip the second-to-last stitch and work one single crochet into the final stitch.
Chain 1 and turn your work.
Starting and ending each row with a single crochet gives the project clean, defined edges.
Step 6: Work the Next Row
For Row 3, begin with one single crochet in the first stitch.
As you spread the row, you will notice the chain spaces created after each bean stitch. These spaces are where the next bean stitches are worked.
After the first single crochet, skip the next stitch and work a bean stitch into the appropriate chain space.
Remember to chain 1 after completing each bean stitch.
Step 7: Repeat the Pattern
Continue across the row by skipping the next stitch and working a bean stitch into the next chain space.
Keep repeating this sequence until you reach the final stitch.
You should have one stitch remaining at the end of the row. Work one single crochet into the last stitch.
Chain 1 and turn your work.
Repeat this row until your project reaches the desired length. Continue working a single crochet at the beginning and end of each row, with bean stitches worked between them.
Pro Tip: The bean stitch becomes much easier to recognize after a few rows. Look for the small chain spaces between the raised bean stitches and use them as guides for placing the next row.
Tips for Perfect Bean Stitches
- Keep your yarn tension consistent so every bean stitch has a similar size.
- Make sure each bean stitch contains six loops before pulling the yarn through them.
- Always chain 1 after completing a bean stitch.
- Count your stitches carefully, especially when working the first few rows.
- Remember to skip the required stitch before making each bean stitch.
- Start and end each row with a single crochet for clean edges.
- Use a hook size that works well with your chosen yarn.
- Practice on a small swatch before beginning a larger project.
Common Mistakes to Avoid
The bean stitch involves several movements in the same stitch, so it is easy to lose track of your loops while learning.
Here are some common mistakes to watch for:
- Pulling through before you have six loops on the hook.
- Forgetting to chain 1 after completing a bean stitch.
- Working the bean stitch into the wrong stitch or space.
- Forgetting to skip the stitch between bean stitches.
- Adding or losing stitches at the beginning or end of a row.
- Making some loops tighter than others.
- Forgetting the single crochet at the beginning or end of the row.
If your bean stitches do not line up, count the stitches and chain spaces before continuing. Correct placement becomes easier once you can clearly identify the bean stitch and the space beside it.
Projects You Can Make with the Bean Stitch
The bean stitch creates a dense, textured fabric that works well for projects where you want both visual interest and a substantial feel.
Blankets
Use the bean stitch to create textured baby blankets, lap blankets, throw blankets, and cozy afghans. The raised clusters give simple blankets an attractive patterned surface.
Scarves and Shawls
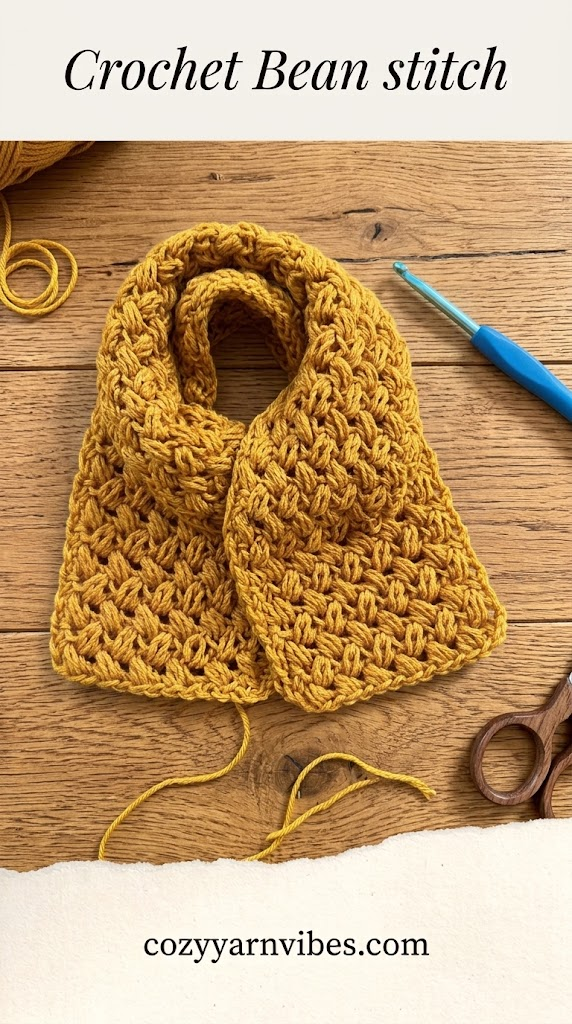
Bean stitch works beautifully for scarves and shawls when you want a textured design. Choose a soft yarn to create a comfortable accessory with plenty of visual detail.
Garments
You can use the bean stitch for sweaters, cardigans, vests, ponchos, and other garments. It can be used throughout a project or combined with simpler stitches to create contrasting sections.
Baby Items
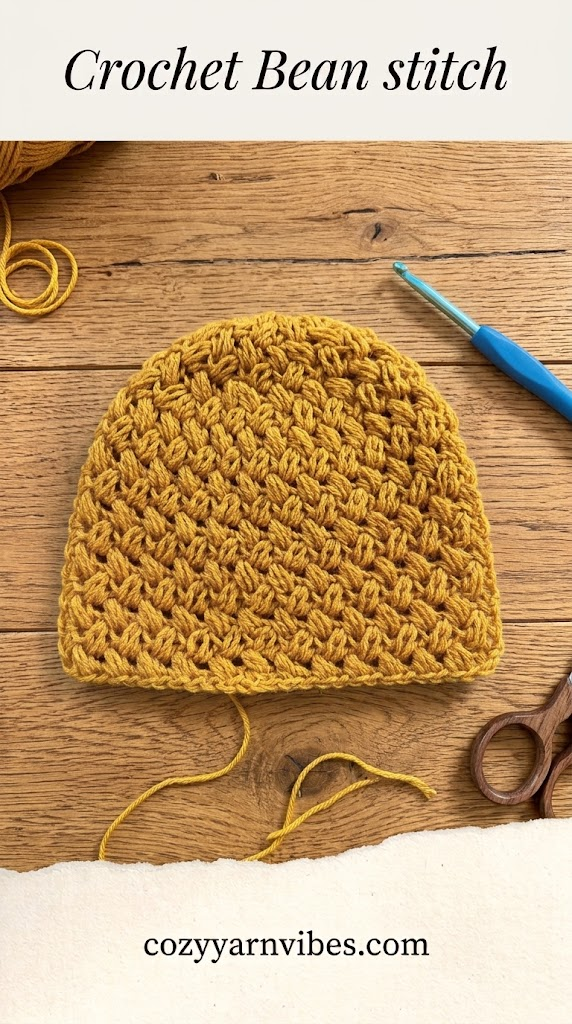
The soft, raised texture makes the bean stitch suitable for baby blankets, sweaters, hats, and other handmade items. Choose a soft, washable yarn for projects that will need frequent cleaning.
Home Décor
Add texture to cushion covers, pillow covers, table runners, baskets, and other decorative pieces with the bean stitch. Its raised surface can make simple home accessories look more detailed.
Accessories
The stitch can also be used for bags, purses, headbands, cowls, hats, and other accessories. The textured pattern works especially well on smaller projects where the stitch design can stand out.
Variations of the Bean Stitch
Once you are comfortable with the basic bean stitch, you can experiment with different combinations to create new textures and patterns.
- Alternate the bean stitch with rows of single crochet for a simpler textured fabric.
- Use different yarn colors between rows to make the bean clusters stand out.
- Combine bean stitches with other textured crochet stitches.
- Adjust the spacing between bean stitches to create different visual effects.
- Use the bean stitch as a decorative panel instead of working it throughout an entire project.
Changing the yarn weight, color, stitch spacing, or surrounding stitches can give the same basic bean stitch a completely different appearance.
More Crochet Stitch Tutorials
Continue building your crochet skills with these beginner-friendly stitch guides:
- Single Crochet Stitch (sc)
- Half Double Crochet Stitch (hdc)
- Double Crochet Stitch (dc)
- Treble Crochet Stitch (tr)
Learning different crochet stitches makes it easier to combine textures and create your own unique crochet designs. Once you are comfortable with the bean stitch, try pairing it with basic stitches to create interesting patterns.
Conclusion
The bean stitch is a beautiful textured crochet stitch that looks more complicated than it actually is. Its distinctive raised clusters are created by working multiple loops into the same stitch and closing them together.
The key to mastering this stitch is keeping your tension even, counting the loops carefully, and remembering the repeat of single crochet, skipped stitch, bean stitch, and chain 1.
With a little practice, you can use the bean stitch to add texture to blankets, scarves, garments, baby items, accessories, and home décor projects. Once you become comfortable with the basic pattern, experiment with colors and stitch combinations to create your own designs.
Frequently Asked Questions (FAQs)
1. Is the bean stitch suitable for beginners?
Yes. The bean stitch is suitable for beginners who already know basic crochet techniques such as chain stitch and single crochet. The stitch involves several steps, but the repeated movement becomes easier with practice.
2. How many loops should be on the hook when making a bean stitch?
You should have six loops on your hook before completing the bean stitch. After the final yarn over, pull the yarn through all six loops at once.
3. Why do I chain 1 after every bean stitch?
The chain 1 helps define the bean stitch and creates the spaces used for placing stitches in the following rows. It is an important part of the stitch pattern, so make sure you do not skip it.
4. Why does my bean stitch look uneven?
Uneven bean stitches are usually caused by inconsistent tension or pulling up loops to different heights. Try to make each loop the same height and avoid pulling some loops tighter than others.
5. Do I need to start and end every row with a single crochet?
For this particular bean stitch pattern, yes. The single crochet at the beginning and end of each row helps create clean, straight edges and keeps the textured stitches centered between them.
6. Can I use different types of yarn for the bean stitch?
Yes. The bean stitch can be worked with different yarn weights and fiber types. A smooth, medium-weight yarn is a good choice for beginners because it makes the individual loops easier to see while practicing.
7. What can I make with the bean stitch?
You can use the bean stitch for blankets, scarves, shawls, garments, baby items, bags, hats, cushion covers, baskets, and other accessories or home décor projects.
8. How do I repeat the bean stitch for more rows?
After completing the first textured row, begin each new row with a single crochet, skip the next stitch, and work the bean stitch into the appropriate chain space. Chain 1 after each bean stitch and continue across the row. Finish with a single crochet in the last stitch, then chain 1 and turn.