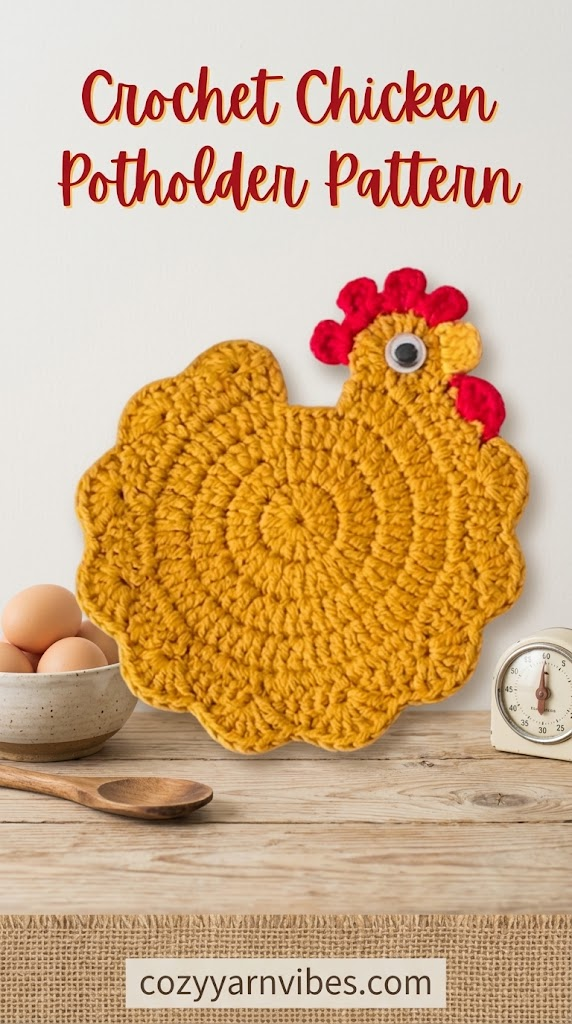
Looking for a fun and useful crochet project for your kitchen? This Crochet Chicken Potholder is a cute and practical project that adds a handmade touch to your kitchen. With its simple shape and adorable chicken-inspired details, it is a great project for beginners who want to make something they can actually use.
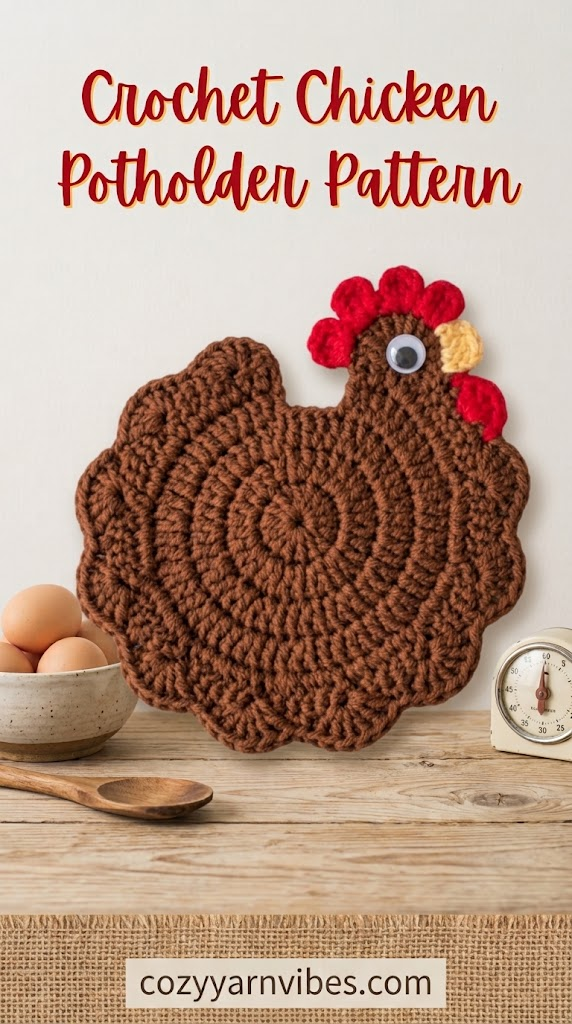
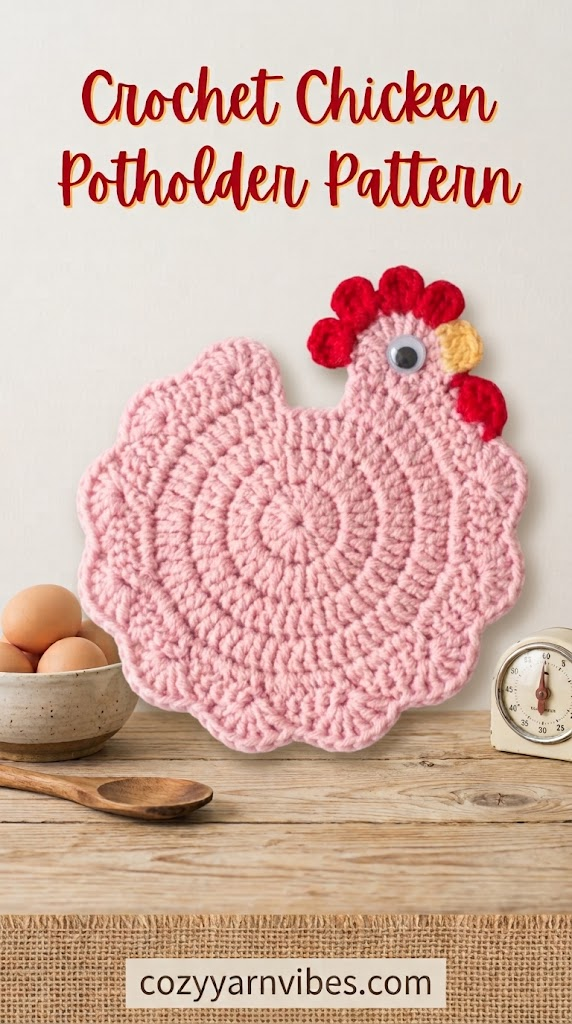
This crochet potholder can be made in different colors to match your kitchen décor. You can keep it simple with classic white and yellow or experiment with bright colors for a more playful look.
Easy Crochet Chicken Potholder Tutorial
This Crochet Chicken Potholder is a fun way to combine crochet and kitchen décor. The main body is worked to create a flat potholder, while small details such as the beak, comb, eye, and other features give it the appearance of a cute chicken.
The project is easy to customize, so you can choose your favorite yarn colors and adjust the size if needed. It can also make a thoughtful handmade gift for someone who enjoys farmhouse-style or animal-themed kitchen décor.
Why You’ll Love This Pattern
- Cute and practical kitchen project
- Beginner-friendly design
- Great for practicing basic crochet stitches
- Easy to customize with different colors
- Makes a lovely handmade gift
- Perfect for farmhouse-style kitchens
- Can be made in different sizes
- Uses simple crochet techniques
Skill Level
Beginner
If you know how to make basic crochet stitches such as chain, single crochet, half double crochet, double crochet, and slip stitch, you can follow this project. Beginners should work slowly and count their stitches carefully while shaping the potholder.
Finished Size
The finished size will depend on the yarn, hook size, crochet tension, and the number of stitches used in the pattern.
For a useful kitchen potholder, make sure the finished piece is large enough to comfortably hold a warm dish or kitchen handle.
Materials Needed
Yarn
Use medium-weight cotton yarn for the main potholder.
Cotton is a good choice for kitchen projects because it is durable and washable. Avoid using synthetic yarns that can melt or become damaged when exposed to heat.
Color
White, cream, yellow, orange, red, and black are useful colors for creating a traditional chicken design.
You can also choose colors that match your kitchen décor or create a colorful chicken using your favorite shades.
Additional Supplies
- Crochet hook suitable for your yarn
- Yarn needle
- Scissors
- Stitch marker, if needed
Stitches & Abbreviations (US Terms)
ch = chain
sc = single crochet
hdc = half double crochet
dc = double crochet
sl st = slip stitch
st = stitch
sp = space
rep = repeat
inc = increase
dec = decrease
How to Make These Stitches
Chain (ch)
Make a slip knot and place it on your hook. Yarn over and pull the yarn through the loop on your hook. Continue making chains until you have the required number.
Single Crochet (sc)
Insert your hook into the stitch. Yarn over and pull up a loop. You will have two loops on your hook. Yarn over again and pull through both loops.
Half Double Crochet (hdc)
Yarn over and insert your hook into the stitch. Pull up a loop to make three loops on your hook. Yarn over and pull through all three loops.
Double Crochet (dc)
Yarn over and insert your hook into the stitch. Pull up a loop. Yarn over and pull through two loops. Yarn over again and pull through the remaining two loops.
Slip Stitch (sl st)
Insert your hook into the stitch, yarn over, and pull the yarn through both the stitch and the loop already on your hook. This creates a short, flat stitch.
Pattern Notes
This Crochet Chicken Potholder is worked as a flat kitchen accessory. Keep your stitches even throughout the project so the finished potholder lies flat.
Pay close attention to the stitch count when shaping the chicken. Increases can make the piece wider, while decreases help create curves and narrower sections.
For a potholder that will be used around heat, cotton yarn is recommended. Make sure the finished piece provides enough thickness and coverage for its intended use.
How to Crochet a Chicken Potholder: Step-by-Step
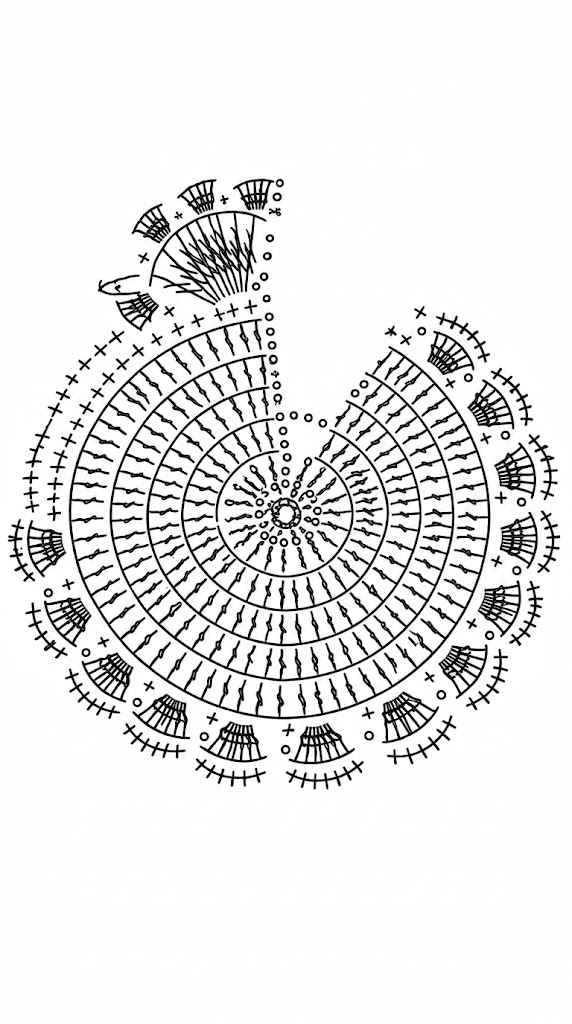
Round 1 – Magic Ring
Using your main color yarn, make a magic ring.
Ch 3. This counts as the first dc.
Work dc into the magic ring until you have 15 dc total, including the beginning ch 3.
Pull the yarn tail gently to close the center of the ring.
Sl st to the top of the beginning ch 3 to join the round.
Total: 15 dc
Round 2 – Increase Round
Ch 3. This counts as the first dc.
Make 1 dc in the same stitch.
Continue working 2 dc in each stitch around the entire round.
Sl st to the top of the beginning ch 3 to join.
Total: 30 dc
Round 3 – Increase Round
Ch 3. This counts as the first dc.
Make 1 dc in the same stitch.
Then repeat the following sequence around the round:
1 dc in the next stitch, 2 dc in the next stitch.
Continue this increase pattern until you reach the beginning of the round.
Sl st to the top of the beginning ch 3.
Total: 45 dc
Round 4 – Increase and Shape
Ch 3. This counts as the first dc.
Make 1 dc in the same stitch.
Repeat the following sequence around:
1 dc in each of the next 2 stitches, 2 dc in the next stitch.
Continue working this pattern until you have 56 dc.
You should have 3 stitches remaining.
Work 2 sc to finish the round.
Total: 56 dc + 2 sc
Round 5 – Final Base Round
Ch 3 and turn your work.
Starting from the top of the second stitch, make 2 dc.
Including the beginning ch 3, you should now have 3 dc.
Continue around the round using the following sequence:
2 dc in the next stitch, 1 dc in each of the next 3 stitches.
Repeat this pattern around the base.
At the end of the round, instead of making 3 dc, work 4 dc to complete the shaping.
Work the final dc into the top of the beginning chain.
Total: 69 dc
Shell Edge
The shell edge gives the chicken potholder a decorative, scalloped border.
Ch 1 and turn your work.
Make 6 dc into the top of the third stitch.
Skip the next 2 stitches.
Sc in the next stitch.
Repeat the following sequence around:
Skip 2 stitches, 6 dc in the next stitch, skip 2 stitches, sc in the next stitch.
Continue until you have created 10 shell groups.
Chicken Head
After completing the 10 shell groups, continue with the chicken head.
Skip 2 stitches.
Make 5 sc.
Skip 2 stitches.
Into the same space, make 10 tr to form the chicken head.
Sl st to the top of the chain.
Ch 1, cut the yarn, and weave in the ends securely.
First Comb – Red Yarn
Now add the first part of the chicken’s comb using red yarn.
Join the red yarn with a sl st to the top of the first of the 5 sc stitches.
Skip 1 stitch.
Make 4 dc into the next stitch.
Skip 1 stitch.
Sl st into the next stitch.
Ch 1 and cut the yarn.
Beak – Yellow Yarn
Use yellow yarn to create the chicken’s beak.
Join the yellow yarn to the top of the first treble crochet of the chicken head.
Ch 3.
Make 2 hdc side by side, then close all the loops together.
Ch 3.
Sl st into the next treble crochet.
Ch 1, cut the yarn, and weave in the ends.
Upper Comb – Red Yarn
The upper comb is worked with red yarn in the space where you made the slip stitch with the yellow yarn.
Ch 3.
Make 1 dc in the same space.
Ch 3.
Sl st back into the same space.
Then work:
Sc in the next stitch, sl st in the next stitch.
Repeat the point section:
Ch 3, dc in the same space, ch 3, sl st in the same space.
Then work:
Sc in the next stitch, sl st in the next stitch.
Repeat the point section once more if needed to complete the shape of the upper comb.
Ch 1, cut the yarn, and weave in all loose ends.
Adding the Eye
To complete the chicken’s face, attach one googly eye above the beak.
Use a small amount of cold silicone adhesive to secure the eye in place.
Make sure the adhesive has fully set before using the potholder.
Finishing the Chicken Potholder
Once all the parts are complete, weave in any remaining loose yarn ends on the back of the potholder.
Gently flatten the piece and lightly block it if needed to improve its shape.
Make sure the chicken head, comb, and beak are securely attached.
Your Crochet Chicken Potholder is now finished and ready to add a fun handmade touch to your kitchen.
Important Pattern Notes
Count your stitches at the end of each row or round. Keeping the correct stitch count is especially important when working increases and decreases.
Try to maintain even tension throughout the project. Uneven tension can make one side of the potholder larger than the other.
If you are making the potholder for actual kitchen use, cotton yarn is the safest practical choice among common crochet yarns. Keep the finished potholder away from direct flames and use it only as a protective kitchen layer.
Make sure all decorative pieces are securely attached before using or washing the potholder.
Other Variations to Try
Make a white chicken with a red comb for a classic farmhouse look.
Use yellow yarn to create a cute chick-inspired potholder.
Make a black, brown, or gray chicken for a different look.
Create a pair of matching chicken potholders for your kitchen.
Make several chickens in different colors and display them together as part of your kitchen décor.
Customization Ideas
Classic Farmhouse Chicken
Use white or cream yarn for the body, red for the comb, and orange or yellow for the beak. This gives the potholder a simple farmhouse appearance.
Colorful Chicken
Choose bright colors for the body and details. This is a fun option if you want your potholder to stand out in the kitchen.
Mini Chicken Potholder
Use thinner yarn and a smaller hook to make a smaller version. A mini chicken can be used as a decorative appliqué or small kitchen accent.
Large Chicken Potholder
Use thicker cotton yarn and a larger hook to create a larger potholder. Make sure the finished fabric is thick enough for its intended purpose.
Matching Kitchen Set
Make several chicken-themed pieces using the same colors. You could create matching potholders, coasters, dishcloths, or other kitchen accessories.
Where to Use Your Crochet Chicken Potholder
The most obvious place to use your Crochet Chicken Potholder is in the kitchen. Keep it near your stove or oven so it is easy to reach when handling warm cookware.
You can also hang it from a kitchen hook as a decorative piece. Its chicken shape makes it especially suitable for farmhouse, country, rustic, or animal-themed kitchen décor.
These potholders also make thoughtful handmade gifts. Make a matching pair and package them with other handmade kitchen accessories for a simple crochet gift set.
Care Instructions
Cotton crochet potholders can usually be washed when needed. Follow the care instructions for the yarn you choose.
Wash gently and avoid harsh chemicals that could damage the yarn or fade the colors.
Allow the potholder to dry completely before storing it.
Do not use a crochet potholder as protection against direct flames or extremely hot surfaces. Always use appropriate heat protection for very hot cookware.
Frequently Asked Questions
Is this Crochet Chicken Potholder suitable for beginners?
Yes. The project is suitable for beginners who are comfortable with basic crochet stitches. Work slowly through the shaping sections and keep track of your stitches.
What yarn is best for a crochet potholder?
Cotton yarn is a good choice for potholders because it is durable and washable. It is also better suited to kitchen use than many synthetic yarns.
Can I make the chicken potholder in different colors?
Yes. You can use any color combination you like. White, cream, yellow, orange, red, brown, and black are all useful for creating different chicken designs.
Can I make the potholder larger or smaller?
Yes. Changing your yarn weight and hook size can change the finished size. You can also adjust the pattern if you are comfortable modifying crochet shaping.
Can I use acrylic yarn for a potholder?
It is better to choose cotton for a potholder that will be used around heat. Acrylic and other synthetic fibers can soften or melt when exposed to high temperatures.
Can I use the chicken as kitchen decoration instead?
Yes. If you prefer not to use it around heat, the finished chicken can simply be displayed as a decorative kitchen accent or hung on a wall or hook.
Conclusion
This Crochet Chicken Potholder is a fun project for anyone who loves making handmade kitchen accessories. Its cute chicken shape adds personality to your kitchen while giving you an opportunity to practice basic crochet stitches and shaping.
Choose your favorite colors, add your own decorative details, and make a chicken potholder that fits your style. You can also make several matching pieces to create a complete handmade kitchen collection.
For more amazing home decor ideas, read our latest blog Crochet Moon Granny Square Pattern.