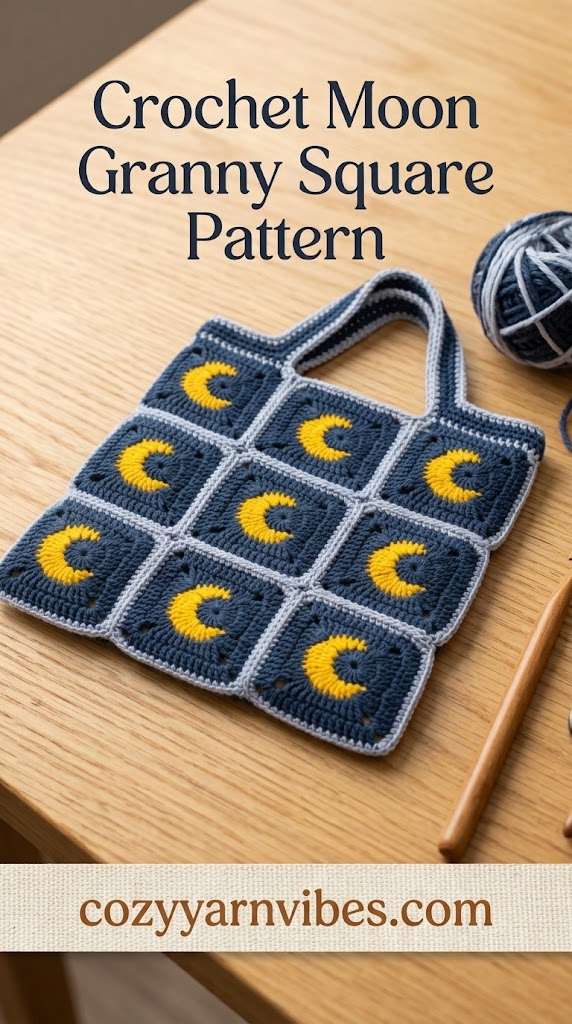
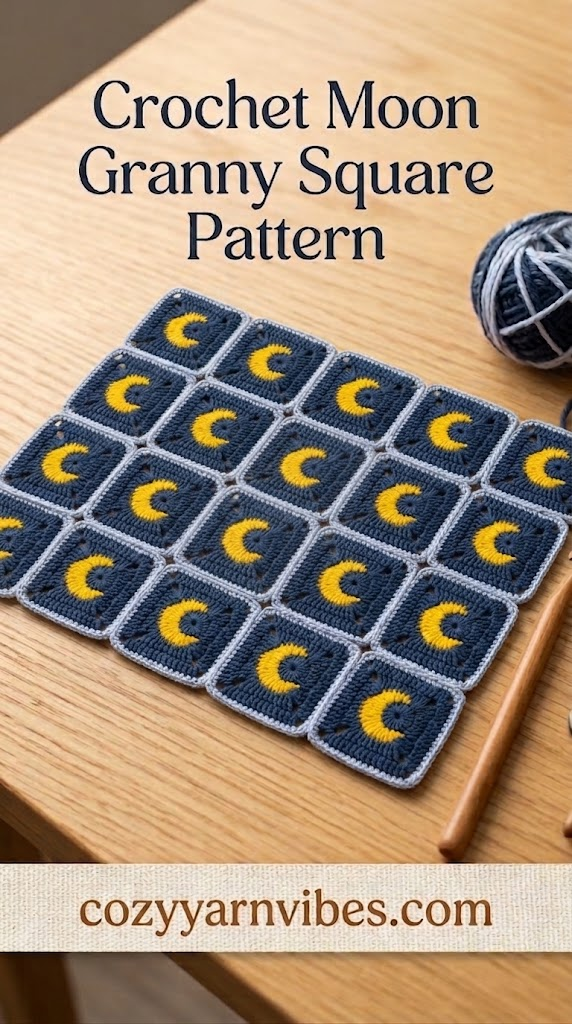
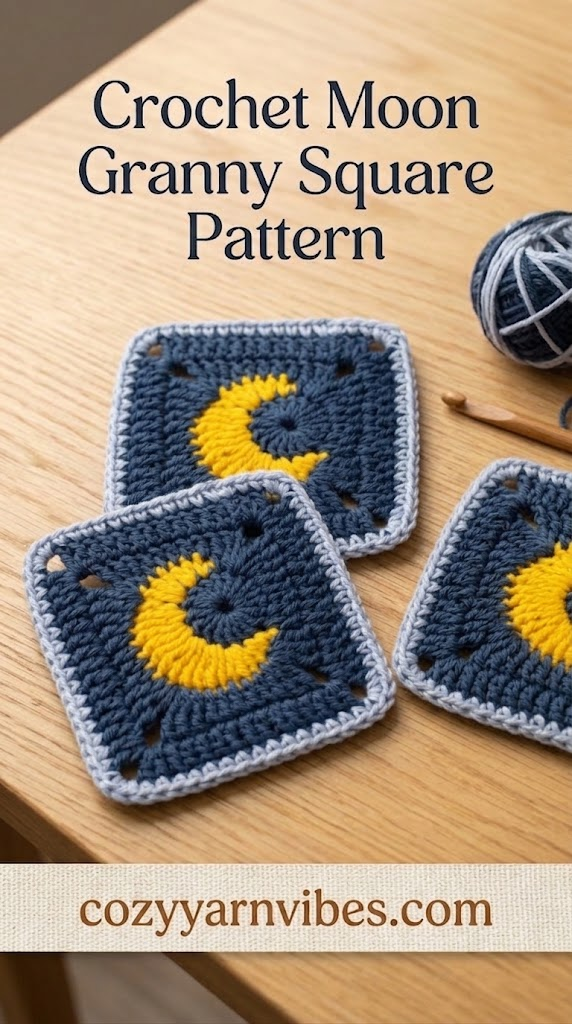
If you love celestial crochet designs, this Crochet Moon Granny Square is a beautiful project to add to your handmade collection. Featuring a crescent moon at the center and a classic square border around it, this granny square combines simple stitches with carefully placed increases and chain spaces to create its distinctive shape.
The Crochet Moon Granny Square is worked in five rounds. The first round creates the center with double crochet stitches, while the second round shapes the crescent moon using single crochet, half double crochet, double crochet, and treble crochet stitches. The following rounds gradually transform the moon into a square, finishing with a simple single crochet border.
You can use this celestial square for blankets, bags, cushion covers, wall hangings, sweaters, cardigans, crochet garments, and other projects made from granny squares.
Easy Crochet Moon Granny Square Tutorial
This Crochet Moon Granny Square starts with a magic ring and 18 double crochet stitches. The second round is where the crescent moon takes shape. Different stitch heights are strategically worked around the center, moving from single crochet and half double crochet to double crochet and treble crochet.
Once the moon is formed, the next two rounds build outward with double crochet stitches and chain spaces. The final round uses single crochet stitches to create a neat finished border.
Although the square contains several different stitch combinations, each round follows a specific repeat. Beginners should work slowly through the instructions and keep track of where each group begins and ends.
Why You’ll Love This Pattern
- Beautiful celestial-inspired design
- Creates a crescent moon in the center
- Works well as part of a larger granny square project
- Uses a combination of basic crochet stitches
- Only requires five rounds
- Easy to customize with different colors
- Great for blankets, bags, pillows, and garments
- A fun project for practicing stitch height and shaping
Skill Level
Easy to Intermediate
The Crochet Moon Granny Square uses familiar crochet stitches, but Round 2 requires careful attention because several different stitch heights are used to shape the crescent moon. Once the moon is complete, the remaining rounds are more repetitive and straightforward.
Finished Size
The finished size is not specified in the supplied pattern. Your final square size will depend on your yarn weight, crochet hook size, and individual tension.
For a consistent project, use the same yarn and hook throughout all five rounds.
Materials Needed
Yarn
Choose yarn in one or more colors that complement your celestial theme. A contrasting color for the moon can make the center stand out beautifully against the square background.
Color Ideas
For a classic moon-inspired look, try a dark blue, navy, or black background with a yellow, cream, white, or golden moon.
You can also create a soft celestial square using shades of blue, gray, cream, lavender, or dusty purple. For a more colorful design, try a bright moon against a deep contrasting background.
Additional Supplies
- Crochet hook suitable for your yarn
- Yarn needle
- Scissors
- Stitch marker, if desired
- Measuring tape, if desired
Stitches & Abbreviations
The following abbreviations are used in the supplied pattern.
MR Magic ring
Ch Chain stitch
Sl.st. Slip stitch
Sc Single crochet
Hdc Half double crochet
Dc Double crochet
Tr Treble crochet
How to Make the Stitches
Magic Ring (MR)
Make an adjustable loop with your yarn and work the required stitches into the center of the ring. Pull the yarn tail to close the center once the stitches have been worked.
Chain (ch)
Yarn over and pull the yarn through the loop on your hook to make one chain stitch.
Slip Stitch (sl.st.)
Insert the hook into the indicated stitch or space, yarn over, and pull the yarn directly through both the stitch and the loop already on your hook.
Single Crochet (sc)
Insert the hook into the indicated stitch or space, yarn over, and pull up a loop. Yarn over again and pull through both loops on the hook.
Half Double Crochet (hdc)
Yarn over, insert the hook into the indicated stitch, yarn over, and pull up a loop. Yarn over again and pull through all three loops on the hook.
Double Crochet (dc)
Yarn over and insert the hook into the indicated stitch. YO and pull up a loop. Yarn over and pull through two loops, then yarn over again and pull through the remaining two loops.
Treble Crochet (tr)
Yarn over twice and insert the hook into the indicated stitch. Yarn over and pull up a loop. Work off the loops two at a time until one loop remains on the hook.
Pattern Notes
- This pattern is worked in five rounds.
- The center begins with a magic ring.
- Round 1 contains 18 double crochet stitches.
- Round 2 uses different stitch heights to create the crescent moon shape.
- Rounds 3 and 4 gradually transform the circular moon motif into a square.
- Round 5 creates the final single crochet border.
- Pay close attention to the stitch groupings and chain spaces.
- The supplied pattern does not provide stitch counts for Rounds 2 through 5, so no additional counts have been added here.
- The × symbol means to work the preceding stitch or instruction the indicated number of times.
- Bracketed instructions followed by ×3 or ×4 are repeated as written.
Crochet Moon Granny Square Step-By-Step Process
The Moon Granny Square is worked in five rounds, beginning with a simple double crochet center and gradually shaping the moon motif with different stitch heights. Round 2 is the key shaping round. The combination of single crochet, half double crochet, double crochet, and treble crochet creates the curved moon shape. The following rounds build around these varying heights and transform the motif into a flat granny square.
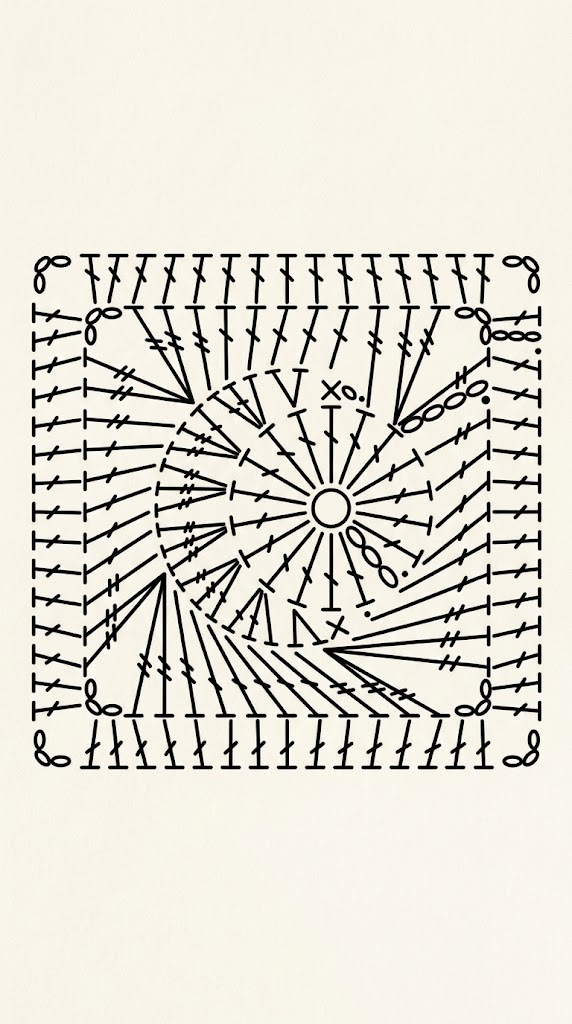
Round 1: Create the Center
Begin with a magic ring (MR). Chain 3, which counts as the first double crochet throughout the round. Work 17 double crochets (dc) into the magic ring.
You should have 18 double crochets in total, including the beginning chain-3. Join the round with a slip stitch (sl st) to the top of the beginning chain-3.
Stitch count: 18 dc
Round 2: Shape the Moon
Round 2 creates the distinctive crescent or moon shape. The stitches gradually increase in height as you move around the center, then decrease again. This change in stitch height is what gives the motif its curved appearance.
Begin with a slip stitch, then chain 1. Work 1 single crochet (sc), followed by 2 half double crochets (hdc). Continue with 1 hdc and 2 double crochets (dc), then 1 dc and 2 treble crochets (tr).
Next, work 3 treble crochets, followed by another group of 3 treble crochets. Continue with 2 treble crochets and 1 double crochet. Then work 2 double crochets and 1 half double crochet, followed by 2 half double crochets. Finish the shaping with 1 single crochet and a slip stitch.
At this stage, the motif will not look flat. It may curve upward and have a bowl-like or cupped appearance. This is intentional. The varying stitch heights are creating the moon shape, and the next two rounds will use that uneven edge to form the square.
Round 3: Begin Forming the Square
Round 3 starts turning the curved moon motif into a square. Begin with 4 chains, then work 1 treble crochet, chain 3, and 2 treble crochets in the indicated starting space.
Continue with 1 treble crochet. Work 5 double crochets, followed by 1 treble crochet. Then create the first corner by working 2 treble crochets, chain 3, and 2 treble crochets.
Repeat the following sequence three times around the motif: work 1 treble crochet, 5 double crochets, 1 treble crochet, then 2 treble crochets, chain 3, and 2 treble crochets to form the corner.
After completing the final repeat, work 5 double crochets and 1 treble crochet to finish the round.
The chain-3 spaces created in this round form the four corners of the developing square. As you work around the different stitch heights from Round 2, the motif should begin to straighten and spread outward.
Round 4: Establish the Square Shape
Round 4 further defines the four sides and corners of the granny square. Begin with chain 3, then work 1 double crochet, chain 3, and 2 double crochets in the starting corner space.
Continue along the first side by working 11 double crochets. In the next corner space, work 2 double crochets, chain 3, and 2 double crochets.
Repeat this sequence around the square: work 11 double crochets along the side, followed by 2 double crochets, chain 3, and 2 double crochets in the next corner space.
Continue until all four sides and four corners have been completed. Finish the round with the final 11 double crochets.
At the end of Round 4, the moon motif should have been transformed into a recognizable square. The stitch heights from the earlier rounds have now been worked into a more uniform structure, while the chain-3 spaces clearly define the four corners.
Round 5: Finish the Border
The final round adds a simple single crochet border around the square and gives the edges a clean, finished appearance.
Begin with chain 1. Work 3 single crochets, followed by 15 single crochets along the first side. Repeat this sequence around the entire square, working 3 single crochets in each corner and 15 single crochets along each side.
Continue until all four corners and four sides have been bordered. Join the round with a slip stitch to the beginning stitch.
Fasten off and weave in all ends securely. Gently block the finished Moon Granny Square if needed to help define the corners and create an even, flat shape.
Finished Moon Granny Square
Your Moon Granny Square is now complete. The design begins with a circular center, uses varying stitch heights to create the moon motif, and gradually builds outward into a classic square shape. The final single crochet border gives the piece a neat edge and makes it ready to join with other granny squares for blankets, bags, garments, pillows, and other crochet projects.
Color Combination Ideas
Classic Moon and Night Sky
Use a deep navy or dark blue for the background and a warm yellow or golden shade for the crescent moon. This combination gives the square a traditional night-sky appearance.
Midnight Celestial
Try black or very dark blue for the square with a pale cream or white moon. This creates a simple and elegant celestial design.
Soft Moonlight
Use dusty blue, light gray, cream, and pale yellow for a softer version of the Crochet Moon Granny Square .
Purple Galaxy
Create a magical galaxy-inspired square using dark purple for the background and yellow or cream for the moon.
Monochrome Moon
For a minimalist look, use different shades of the same color. A light and dark blue combination can create a subtle moonlit effect.
What Can You Make With a Moon Granny Square?
Once you have made one Crochet Moon Granny Square , you can make multiple squares and join them together for larger projects.
- Crochet blankets
- Afghans
- Pillow covers
- Tote bags
- Crossbody bags
- Sweaters
- Cardigans
- Vests
- Scarves
- Wall hangings
- Table runners
- Decorative panels
You can also combine moon squares with other celestial granny squares featuring stars, suns, clouds, planets, or other night-sky motifs.
Other Variations to Try
- Use a different color for every round.
- Make the moon in a contrasting color.
- Use a dark background with a bright yellow moon.
- Try pastel colors for a softer celestial style.
- Combine several moon squares into a blanket.
- Use metallic or textured yarn for the moon.
- Create matching celestial squares with different motifs.
- Experiment with different yarn weights to create different-sized squares.
Care Instructions
Care for your finished Crochet Moon Granny Square according to the washing instructions recommended for your yarn.
When washing is suitable, use cool or lukewarm water and a gentle detergent. Avoid harsh chemicals and excessive agitation.
Do not wring or twist the square. Gently squeeze out excess water and lay it flat to dry. Reshape the corners and edges while the square is damp if necessary.
If you plan to join several squares into a larger project, blocking them before joining can help keep the finished piece more uniform.
Conclusion
The Crochet Moon Granny Square is a beautiful way to bring a little celestial charm into your crochet projects. The design begins with a simple magic ring and 18 double crochet stitches before using different stitch heights to create the crescent moon.
The following rounds gradually transform the circular moon motif into a square, while the final single crochet round provides a clean border. With only five rounds, this is a manageable project that also gives you an opportunity to practice several different crochet stitches.
Make a single Crochet Moon Granny Square for a small decorative project or crochet several to create a larger blanket, bag, pillow, garment, or home decor piece.
Frequently Asked Questions
Is the Crochet Moon Granny Square beginner-friendly?
Yes. The square is suitable for beginners who are familiar with basic crochet stitches. Round 2 requires extra attention because it uses sc, hdc, dc, and tr stitches in a specific sequence to shape the crescent moon.
How many rounds does the Crochet Moon Granny Square have?
The supplied pattern has five rounds. Round 1 creates the center, Round 2 shapes the moon, Rounds 3 and 4 build the square, and Round 5 finishes the outer border.
What stitches are used in this moon granny square?
The pattern uses single crochet, half double crochet, double crochet, and treble crochet, along with chain stitches and slip stitches. It begins with a magic ring.
How do I make the crescent moon shape?
The crescent is created in Round 2 by gradually changing stitch heights. Shorter stitches such as sc and hdc are combined with dc and taller tr stitches to form the curved moon shape.
Can I use different colors for the moon and background?
Yes. Using a contrasting color for the crescent moon can make it stand out clearly against the surrounding square. Yellow, cream, and white are particularly suitable for a moon-inspired design.
Can I make the square larger?
The supplied pattern ends after Round 5, so no additional enlargement rounds are included. You can make multiple squares and join them together to create a larger project.
What yarn is best for a Crochet Moon Granny Square?
The supplied pattern does not specify a particular yarn weight or fiber. Choose a yarn and crochet hook that work well together, and keep your tension consistent throughout the square.
What can I make with Crochet Moon Granny Squares?
These squares can be joined to make blankets, bags, pillow covers, garments, wall hangings, table runners, and other decorative crochet projects. They can also be combined with other celestial-themed granny squares for a larger design.