🧵 Introduction
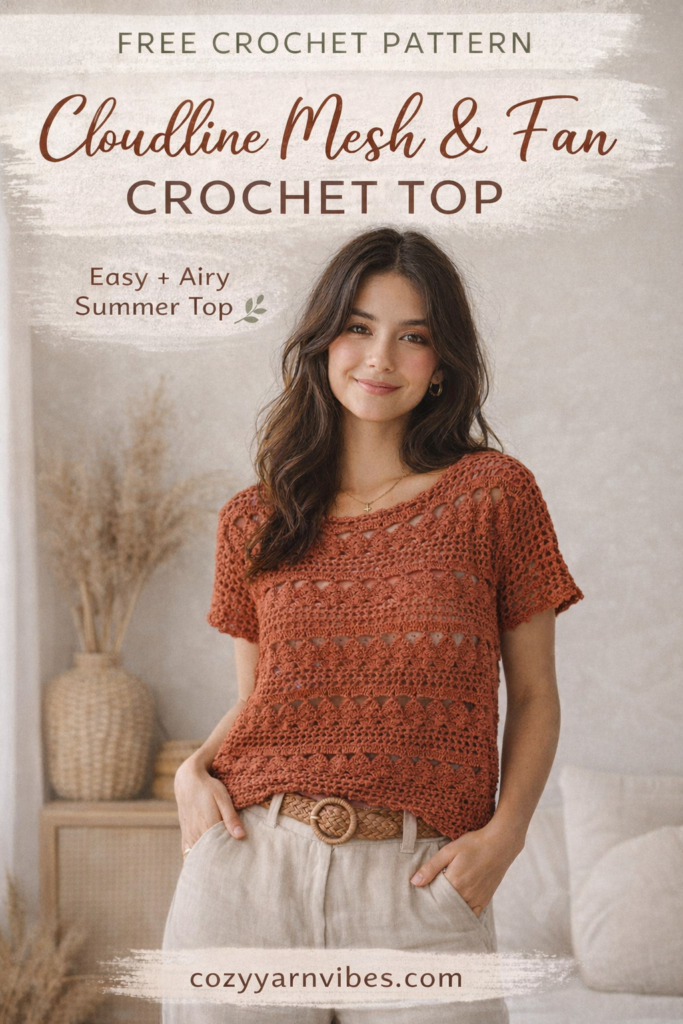
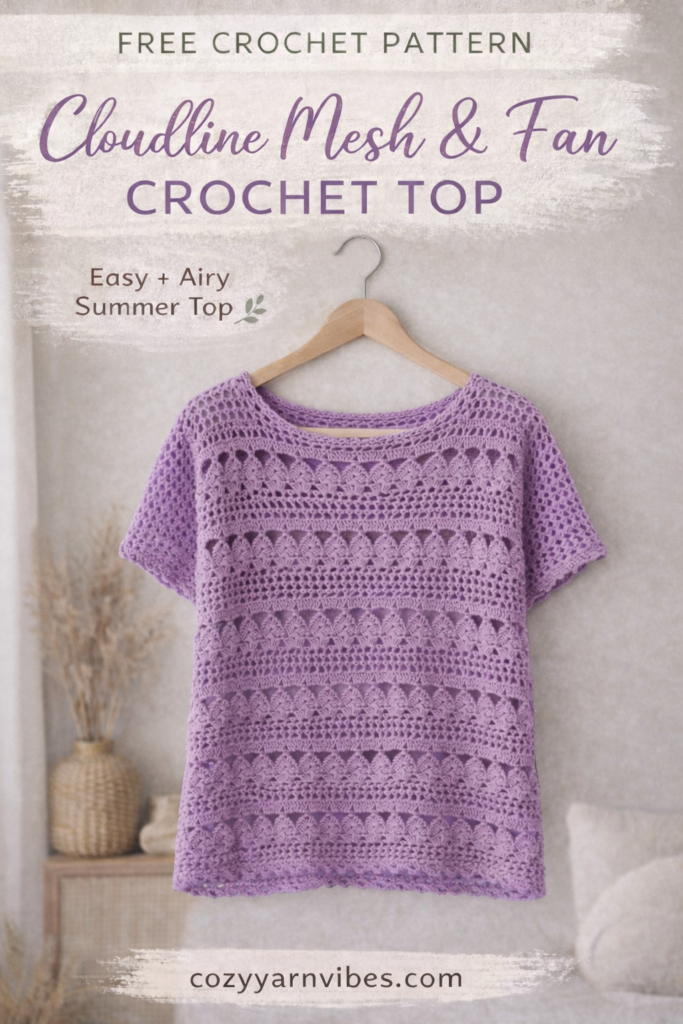
The Cloudline Mesh & Fan Top is a beautifully airy crochet design that combines open mesh rows with delicate fan stitches, creating a soft flowing texture that looks intricate but is surprisingly simple to make.
This pattern is built using easy repeating sections, making it perfect for relaxing crochet sessions while still giving a polished, boutique-style finish.
📏 Skill Level
Beginner to Intermediate
✔ Best for crocheters who know basic stitches and want to try lace patterns.
📐 Sizing Guide
- Fully customizable
- Start chain = width of your shirt
👉 Measure your bust and chain accordingly
🧶 Materials
- Cotton yarn (DK / light worsted)
- 4.0–4.5 mm hook
- Scissors
- Tapestry needle

Original Squishmallows Bebe the Bluebird Crochet Kit, Includes Yarn, Crochet Hook, Starter Hooks, Step-By-Step Tutorials, Exclusive Crochet Kit For Beginners, DIY Craft, Crochet Kits, Great Teen Gifts
$13.09 (as of April 2, 2026 10:31 GMT +00:00 – More infoProduct prices and availability are accurate as of the date/time indicated and are subject to change. Any price and availability information displayed on [relevant Amazon Site(s), as applicable] at the time of purchase will apply to the purchase of this product.)
Coopay Crochet Kit Beginners Crochet Hook Set with Crochet Yarn,58PCS Portable Crochet Set Ergonomic Crochet Hooks Travel Knitting Crochet Supplies
$17.98 (as of April 2, 2026 10:31 GMT +00:00 – More infoProduct prices and availability are accurate as of the date/time indicated and are subject to change. Any price and availability information displayed on [relevant Amazon Site(s), as applicable] at the time of purchase will apply to the purchase of this product.)
Yizzvb Crochet Kit for Beginners, 5 Pcs Coasters Plant Pot Crochet Start Kit for Adults, Complete Knitting Crochet Supplies with Step-by-Step Instruction, Crochet Hooks, Yarn for DIY Craft Supplies
$11.98 (as of April 2, 2026 10:31 GMT +00:00 – More infoProduct prices and availability are accurate as of the date/time indicated and are subject to change. Any price and availability information displayed on [relevant Amazon Site(s), as applicable] at the time of purchase will apply to the purchase of this product.)
Crochet Kit for Beginner-2PCS Animals Brown and Beige Capybara Crochet Kit with Step-by-Step Video Tutorials,Stuffed Animal Knitting Kit for Adult,Capybara Party Crocheting Kit for Birthday
$17.99 (as of April 2, 2026 10:31 GMT +00:00 – More infoProduct prices and availability are accurate as of the date/time indicated and are subject to change. Any price and availability information displayed on [relevant Amazon Site(s), as applicable] at the time of purchase will apply to the purchase of this product.)🔤 Stitches & Abbreviations (US Terms)
- ch – chain
- sc – single crochet
- dc – double crochet
- sk – skip
- st – stitch
🧠 Pattern Notes
- Pattern is worked flat in rows
- Repeat sections create full design
- Make 2 panels (front + back)
- Join using slip stitch
⚠️ Important:
Keep your stitch count consistent — do not accidentally increase stitches or your width will change.
🧵 Construction Overview
- Chain your desired width
- Work mesh base rows
- Add fan stitch section
- Add spacing + structure rows
- Repeat pattern for length
- Make 2 panels
- Join together
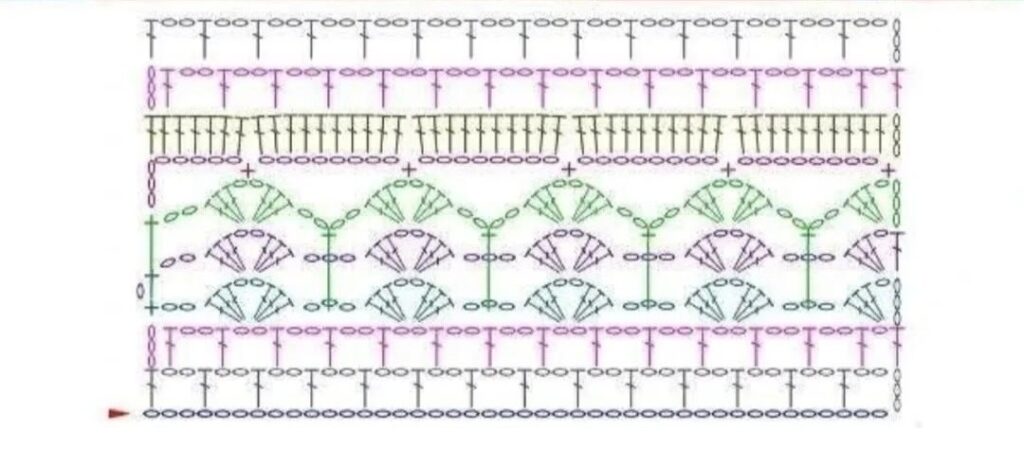
🪡 Step-by-Step Pattern
Foundation
👉 Chain the width of your shirt
Row 1 (Mesh Base)
- ch 3 (counts as dc)
- skip 2 ch
- dc in 3rd stitch
- ch 2, skip 2
- dc in next
- repeat across
✔ Creates open mesh
Row 2 (Aligned Mesh)
- ch 3
- dc in first stitch
- ch 2, skip 2
- dc in next
- repeat across
✔ Keeps mesh structure consistent
Row 3 (Transition + Fan Start)
- ch 4
- 3 dc in next stitch
- skip 3 stitches
- ch 3
- in next ch-2 space:
👉 (3 dc, ch 2, 3 dc) = fan stitch - repeat across
Row 4 & Row 5 (Fan Build Rows)
- Continue making fan stitches directly above fan stitches
- Maintain spacing between sections
⚠️ Follow your graph carefully here — this is where alignment matters most
Row 6 (Open Loop Row)
- sc in first stitch
- ch 8
- sc in space between next fan stitches
- repeat across
✔ Creates airy loop spacing
Row 7 (Structure Row)
- ch 3
- dc in each stitch across
⚠️ Important warning:
Do NOT increase stitches — keep count consistent
Repeat Pattern
Now repeat:
👉 Row 1 → Row 2 → Row 3 → Row 4 → Row 5 → Row 6 → Row 7
Continue until desired shirt length
👚 Shaping & Finishing
Panels
- Make 2 identical panels
Neckline
- Use Row 1 & 2 mesh pattern to shape neckline if needed
Assembly
- Join shoulders with slip stitch
- Join sides, leaving armholes
🎨 Customization Ideas
- 🌸 Add scalloped edging
- 🌿 Make cropped or oversized
- 🌊 Use pastel or ombré yarn
- 🧡 Add sleeves using mesh rows

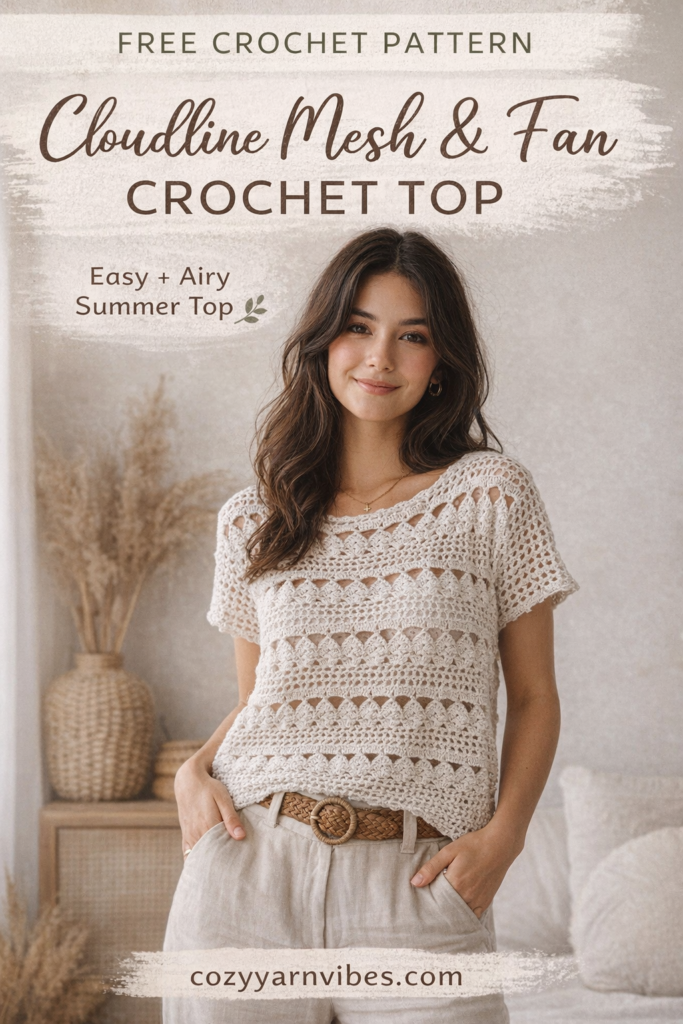
👗 Styling Ideas
- With denim shorts → casual summer look
- Over a dress → layered aesthetic
- With linen pants → cozy minimalist vibe
🧼 Care Tips
- Hand wash recommended
- Dry flat
- Avoid stretching while wet
❓ FAQs
Why is my top getting wider?
You are likely adding extra stitches — keep count consistent.
Can beginners make this?
Yes! Just follow rows carefully, especially fan sections.
Can I change yarn weight?
Yes, but adjust hook size accordingly.
Even the Good Girls Will Cry: A ’90s Rock Memoir
$25.19 (as of April 2, 2026 10:31 GMT +00:00 – More infoProduct prices and availability are accurate as of the date/time indicated and are subject to change. Any price and availability information displayed on [relevant Amazon Site(s), as applicable] at the time of purchase will apply to the purchase of this product.)