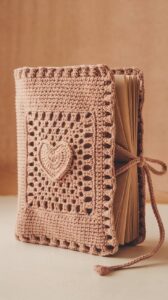
Handmade Crochet Book Cover with Heart Pocket – Step-by-Step Guide
A crochet book cover is a great way to protect your books while adding a touch of handmade charm. This guide walks you through creating a crochet book sleeve with a pocket featuring a heart motif. It’s perfect for book lovers and makes a thoughtful gift!
What You’ll Need:
- Medium-weight cotton or acrylic yarn (two colors: main color & contrasting color for heart)
- Crochet hook (recommended size: 4mm-5mm)
- Scissors
- Tapestry needle
- Measuring tape
- Buttons or ties (optional for closure)
How to Crochet the Book Cover
Step 1: Measure Your Book
- Lay your book flat and measure its height, width, and spine thickness.
- Add 1 inch to the width and height to allow for a snug fit.
Step 2: Create the Base Panel
- Start with a foundation chain matching the width of your book.
- Work rows of half double crochet (HDC) until the piece measures the height of the book.
- Fasten off and weave in ends.
Step 3: Make the Side Flaps
- On each short side, attach yarn and work half the book’s width in HDC rows.
- Continue until the flap is wide enough to hold the book in place.
- Fold the flaps inwards and seam the edges using a slip stitch or whip stitch.
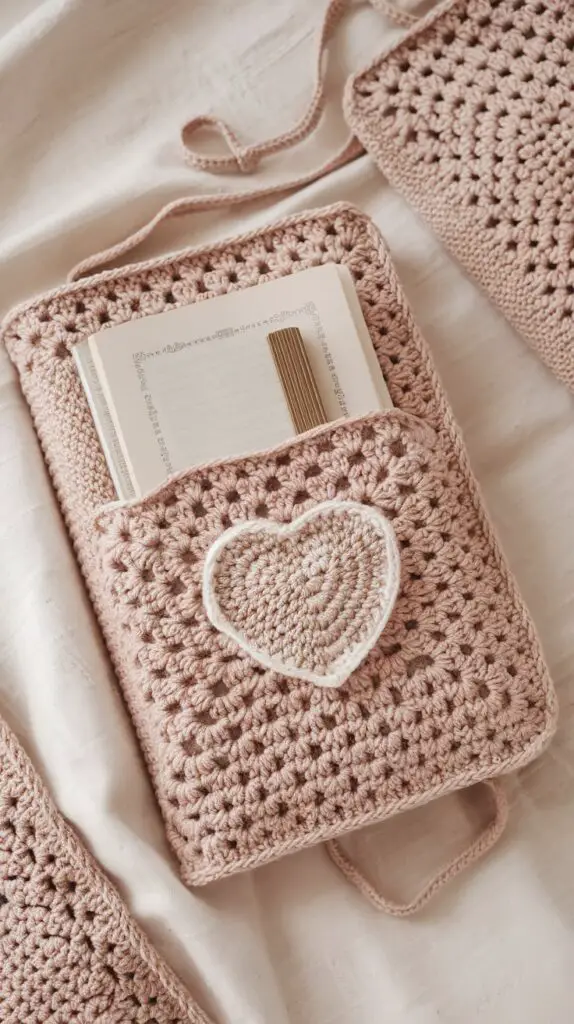
How to Make the Heart Pocket
Step 4: Crochet a Granny Square Pocket
- Begin with a magic ring, chain 2, and work 12 double crochets (DC) into the ring.
- Join with a slip stitch and start forming the square by working cluster stitches in the corners.
- Continue in rounds until the square reaches your desired pocket size.
Step 5: Crochet the Heart Motif
- Use a contrasting color yarn and work the following steps inside a magic ring:
- Chain 3, make 3 treble crochets (TRC) into the ring.
- Make 3 double crochets (DC), chain 1, 1 treble crochet (TRC) (center of the heart).
- Chain 1, make 3 DCs, 3 TRCs, and chain 3.
- Slip stitch to close the heart shape and pull tight.
- Sew or crochet the heart onto the pocket.
Step 6: Attach the Pocket
- Position the pocket onto the front of the book cover.
- Use a whip stitch or slip stitch to securely attach it.
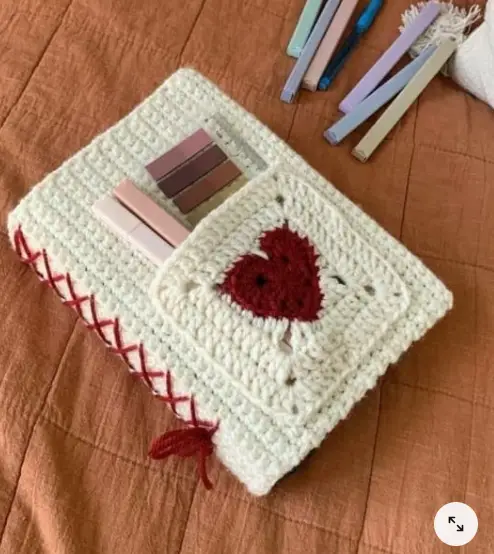
Finishing Touches
Step 7: Side Stitching and Decoration
- Use a contrasting color yarn to add decorative stitching along the edges.
- Optionally, add buttons, ties, or a ribbon closure for extra security.
Step 8: Final Adjustments
- Insert your book and check the fit.
- Adjust any stitches if needed and secure loose ends.
Crochet Stitch Guide
Half Double Crochet (HDC)
- Yarn over, insert hook into stitch, yarn over and pull through (3 loops on hook).
- Yarn over, pull through all 3 loops.
Magic Ring
- Wrap yarn around fingers, insert hook into loop, yarn over and pull through.
- Chain 2, work stitches into the loop, pull tail to close.
Treble Crochet (TRC)
- Yarn over twice, insert hook into stitch, yarn over and pull through (4 loops on hook).
- Yarn over, pull through two loops at a time until one loop remains.
Whip Stitch (For Sewing Edges)
- Align two edges together, insert needle through both loops, and pull yarn through.
- Repeat along the edge to secure the seam.
Final Thoughts
Your handmade crochet book cover is now complete! With its heart pocket and sturdy design, this project is both functional and stylish. You can customize the size, color, and details to make it uniquely yours.
We’d love to see your creations! Share your work on Instagram with #CozyYarnVibes.
Happy Crocheting! 🧶