Bright, playful, and ultra-practical — this crochet notebook cover is the perfect handmade project to protect your journal or planner while keeping your favorite pens handy. Using simple single crochet stitches and color changes, you can create this cheerful checkered design that’s both charming and functional.
Color-Block Gingham Crochet Notebook Cover with Pen Pocket – A Fun & Functional DIY by cozy yarn vibes

Looking for a charming way to protect your notebook while adding a pop of color to your desk or school bag? This gingham-style crochet notebook cover is a vibrant and practical project that combines utility with creativity! Featuring a built-in pen pocket and an adorable animal bookmark tab, it’s perfect for journaling, note-taking, or gifting.
🧶 Materials Needed:
- Yarn: DK weight cotton yarn in at least three contrasting colors (here: cream, mustard yellow, and dusty pink)
- Hook: 3.5mm or 4mm crochet hook
- Notebook: A5 size or adjust to fit your notebook
- Yarn needle & scissors
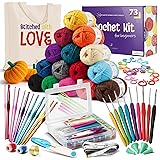
Crochet Kit for Beginners Adults and Kids, 73 Piece Knitting & Crochet Supplies Includes 1500 Yards Assorted Yarn, 21 Ergonomic Hooks, Plus Many Accessories – Beginner Crochet Kits Ideal for Amigurumi
$30.00 (as of March 3, 2026 10:19 GMT +00:00 – More infoProduct prices and availability are accurate as of the date/time indicated and are subject to change. Any price and availability information displayed on [relevant Amazon Site(s), as applicable] at the time of purchase will apply to the purchase of this product.)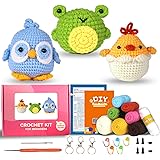
Atofoi Crochet Kit for Beginners, Crochet Animal Kit – Chick,Bird,Frog, Crochet Knitting Kit for Learn to Adults and Children,with Step-by-Step Video Tutorials,DIY Knitting Supplies
(as of March 3, 2026 10:19 GMT +00:00 – More infoProduct prices and availability are accurate as of the date/time indicated and are subject to change. Any price and availability information displayed on [relevant Amazon Site(s), as applicable] at the time of purchase will apply to the purchase of this product.)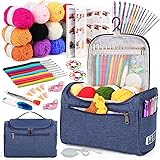
Aeelike Crochet Kit for Beginners Young and Old, First Crochet Kit for Adults Include 23pcs Crochet Hooks, 655 Yards Yarn Set for Crocheting, Instruction, Bag, Crochet Accessories and Supplies, Navy
$23.99 (as of March 3, 2026 10:19 GMT +00:00 – More infoProduct prices and availability are accurate as of the date/time indicated and are subject to change. Any price and availability information displayed on [relevant Amazon Site(s), as applicable] at the time of purchase will apply to the purchase of this product.)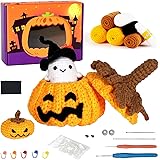
Beginners Easy to Start Crochet Kits for Beginners Halloween Pumpkin Animals Candy Bag Case Crochet Set DIY Gift for Starters Adult Kids Instruction and Video Tutorials
$9.49 (as of March 3, 2026 10:19 GMT +00:00 – More infoProduct prices and availability are accurate as of the date/time indicated and are subject to change. Any price and availability information displayed on [relevant Amazon Site(s), as applicable] at the time of purchase will apply to the purchase of this product.)
🧵 Pattern Overview:
- Base Stitch: Single Crochet (sc)
- Technique: Color changing every few stitches to create a gingham or checkered effect.
- Pocket: Made separately using back loop only (BLO) rows for a ribbed look.
- Closure Tab: Add a small crochet motif or a button tab with a character face for fun!
🧩 Step-by-Step Instructions:
- Measure & Chain:
- Measure the notebook height + width (including spine + extra for seam allowance). Chain enough stitches to match this length.
- Create the Gingham Body:
- Work SC rows, changing color every few stitches (typically 3–5) to alternate blocks of color.
- Repeat for each row, alternating the starting block color to form the classic gingham check pattern.
- Maintain clean color changes by carrying the unused yarn along the back.
- Add the Pen Pocket:
- Chain the width of the pocket and work in SC for the desired height.
- Use the same color or contrast it for visual appeal (as in the pink pocket shown).
- Stitch the pocket onto the center or side of the cover front using a yarn needle.
- Bookmark Tab (Optional):
- Crochet a small oval or circle in SC and embellish with embroidered or crocheted face details.
- Attach to the bottom edge for a whimsical bookmark.
- Seam & Finish:
- Fold the sides over the notebook and sew the top and bottom edges to form a sleeve.
- Weave in all ends securely.
🧩 Assembly Instructions:
- Create the Main Cover:
Crochet a rectangle using single crochet with color changes to match the notebook’s open spread (including spine width). - Make the Pocket:
Use pink yarn to crochet a small rectangular panel in single crochet through back loops only. Size it to fit pens/snacks/notes. - Sew the Pocket:
Stitch the pocket onto the front panel using a yarn needle, securing three sides (leave top open). - Add Closure Tab:
Crochet a small flap or motif like the sleeping lion seen in the original image. Attach it to the bottom edge or back panel. - Join Sides (Optional):
Add a single crochet border around the entire piece for polish. Seam the sides if you want a snug slip-in style.

🪄 Tips & Variations:
- 🌈 Color Options: Use your school colors, favorite seasonal hues, or even a rainbow palette!
- 📏 Custom Fit: Measure your notebook’s front, back, and spine — then add 1–2 cm for ease.
- 🧶 Texture Play: Use BLO (back loop only) rows or popcorn stitches for more depth on the pocket.
- 🖍️ Multiple Pockets: Add small inner sleeves or additional front pockets for extra supplies.

🎁 Perfect For:
- Students and stationery lovers
- Handmade gift sets
- Journaling addicts
- DIY planners
- Custom school or college supplies
🧰 Customization Tips:
Embroider your initials or a cute phrase.
Add inner flaps to hold the notebook in place.
Sew in elastic loops for pen hold or page marking.
Add a zipper or magnetic button for a secure closure.
🧼 Care Instructions:
- Hand wash in cold water or machine wash on gentle.
- Lay flat to dry. Avoid tumble drying to prevent warping.
- Spot clean with a damp cloth for minor stains.
More Inspirations


