Starburst Doily Pattern
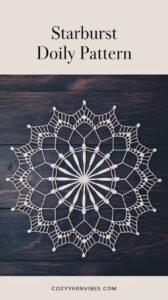
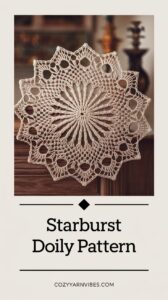
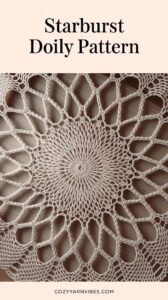
The Starburst Doily features a striking design inspired by radiating sunbursts. This doily is perfect for adding a touch of elegance to your home, whether as a table centerpiece or decorative accent. It’s beginner-friendly but also includes a few intermediate touches to help you expand your skills.


Finished Size
Approximately 8 inches in diameter (size may vary depending on yarn and hook).
Materials
- Yarn: #2 fine cotton yarn or #3 light-weight yarn in two contrasting colors (optional for a vibrant effect).
- Hook: 3.0 mm or 3.5 mm crochet hook.
- Other Supplies: Scissors, yarn needle, blocking pins, and a foam board (for blocking).
Abbreviations (US Terms)
- ch: Chain
- sl st: Slip Stitch
- sc: Single Crochet
- dc: Double Crochet
- tr: Treble Crochet
- fpdc: Front Post Double Crochet
- sp: Space
- st(s): Stitch(es)
How to Do These Stitches
Click here for stitches tutorial
Front Post Double Crochet (fpdc):
- Yarn over and insert your hook around the post of the indicated stitch (from front to back and around to the front).
- Yarn over again, pull up a loop (3 loops on the hook).
- Yarn over, pull through the first two loops.
- Yarn over again, pull through the last two loops.
Treble Crochet (tr):
- Yarn over twice, insert your hook into the stitch, and pull up a loop (4 loops on the hook).
- Yarn over, pull through the first two loops.
- Repeat twice more, pulling through two loops each time.
Key Tips for Success:
- Use a stitch marker to keep track of rounds, especially with intricate designs.
- Maintain consistent tension to avoid uneven radiating lines.
- Block your doily to highlight the starburst pattern and ensure the edges lay flat.
Pattern
Round 1:
- Start with a magic circle.
- Ch 3 (counts as dc), work 11 dc into the circle.
- Pull the loop tight and join with a sl st to the top of the ch-3. (12 dc)
Round 2:
- Ch 3 (counts as dc), fpdc around the first dc of the previous round.
- Dc in the next st, fpdc around the same st. Repeat from * to * around.
- Join with a sl st to the top of the ch-3. (24 sts: 12 dc, 12 fpdc)
Round 3:
- Ch 4 (counts as tr), tr in the same st, ch 2.
- Skip 1 st, work 2 tr in the next st, ch 2. Repeat from * to * around.
- Join with a sl st to the top of the first tr. (12 clusters with ch-2 spaces)
Round 4:
- Sl st into the first ch-2 sp, ch 3 (counts as dc), work 2 dc into the same ch-2 sp.
- Sc in the space between the next two tr clusters, work 3 dc into the next ch-2 sp. Repeat from * to * around.
- Join with a sl st to the top of the ch-3. (12 clusters)
Round 5:
- Ch 1, sc in the first st, ch 5.
- Skip 2 sts, sc in the next st, ch 5. Repeat from * to * around.
- Join with a sl st to the first sc. (12 ch-5 loops)
Round 6:
- Sl st into the first ch-5 loop, ch 3 (counts as dc), work 6 dc into the same ch-5 loop.
- Sc in the next ch-5 loop, work 7 dc into the next ch-5 loop. Repeat from * to * around.
- Join with a sl st to the top of the ch-3. (12 petals)
Round 7 (Optional Contrast Color):
- Attach a contrasting color to any sc between petals.
- Ch 1, sc in the same st, ch 7.
- Sc in the next sc between petals, ch 7. Repeat from * to * around.
- Join with a sl st to the first sc.
Finishing Touches
- Fasten off and weave in all loose ends.
- Block the doily by pinning it onto a foam board and lightly spraying it with water to shape it. Let it dry completely for a polished look.
Pingback: Pineapple Lace Doily Pattern - cozyyarnvibes.com
Pingback: 25 Crochet Doily Patterns: Timeless Designs for Every Skill Level - cozyyarnvibes.com