
The alligator crochet stitch is a beautiful textured stitch that creates overlapping scales across the surface of your crochet fabric. Its layered appearance resembles the scales of an alligator, which is where this eye-catching stitch gets its name.
Unlike simple crochet stitches that create a flat fabric, the alligator stitch builds a three-dimensional texture by working groups of stitches around the posts of double crochet stitches. The finished scales can look especially attractive when worked in a single color or with contrasting colors.
The stitch may look complicated at first, but it is made using basic crochet techniques such as chain stitches, double crochet, and working around stitch posts. Once you understand how to create the first scale, the rest of the pattern follows a repeating sequence.
In this guide, you’ll learn what the alligator crochet stitch is, how to crochet it step by step, helpful tips for beginners, common mistakes to avoid, project ideas, and different ways to customize the stitch.
Alligator Stitch Definition
The alligator crochet stitch is a highly textured crochet technique made by working pairs of elongated double crochet stitches around the posts of stitches from a previous row. These stitches overlap to form individual scales that resemble an alligator’s skin.
The stitch is sometimes also called the crocodile stitch because of its scale-like appearance. Each scale is made by working double crochet stitches down one side of a post and back up the other side.
The finished fabric is thicker than many basic crochet stitches because the scales sit on top of the foundation rows. This makes the stitch particularly useful for projects where you want a decorative, three-dimensional texture.
For this tutorial, we are using US crochet terms.
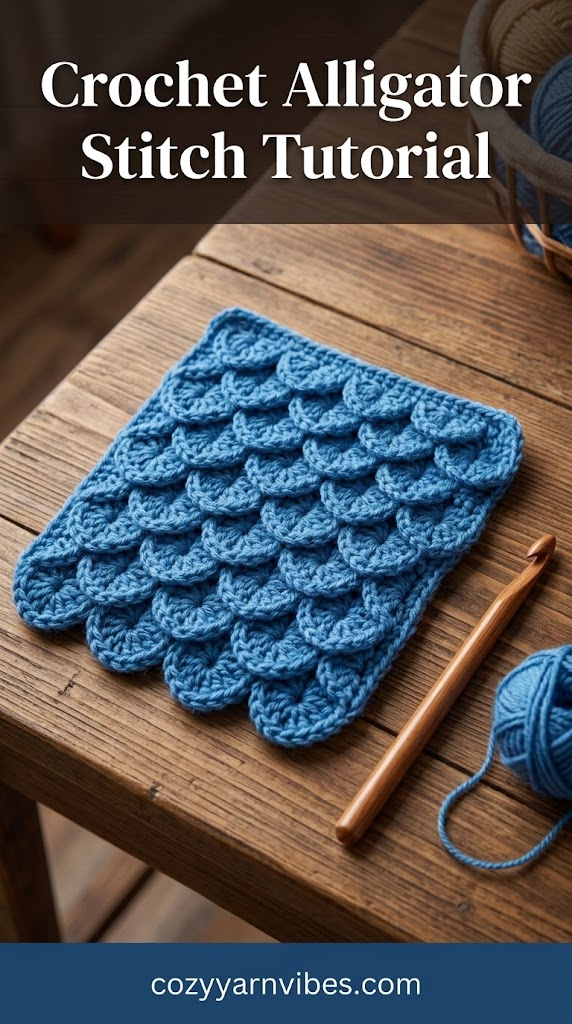
How to Make the Alligator Crochet Stitch
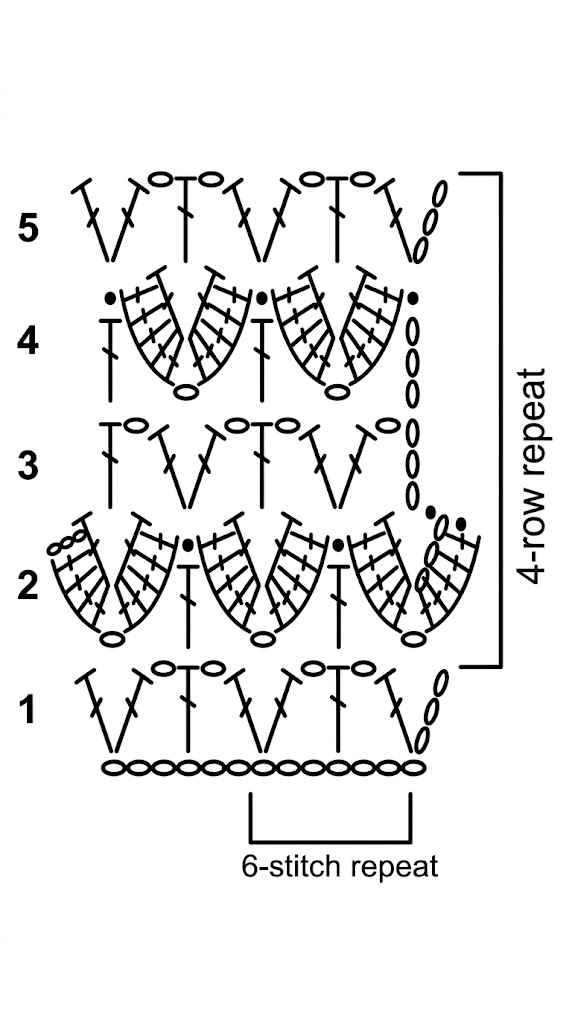
Before starting, make sure you know how to make chain stitches, double crochet, and slip stitches. The alligator stitch is created by working groups of double crochets around the posts of previous double crochet stitches to form overlapping scales.
Step 1: Make the Foundation Chain
The foundation chain follows this formula:
Multiple of 6 + 1 + 3 beginning chains
Step 2: Work Row 1
Row 1 (RS):
- Work 1 dc into the 4th chain from the hook.
- Chain 1.
- Skip the next 2 chains.
- Work 1 dc into the next chain.
- Chain 1.
- Skip the next 2 chains.
- Work 2 dc into the next chain.
- Repeat this sequence across the row.
- Do not turn your work.
This row creates the double crochet groups and chain spaces that will be used to make the first row of scales.
Step 3: Create the First Alligator Scale
Row 2 is where the characteristic scales begin.
Row 2:
Work from left to right across the previous row.
For the first scale, make a beginning scale (beg-scale):
- Chain 3, counting as the first double crochet.
- Work 4 dc down the post of the next dc.
- Rotate your work slightly so you can reach the other side of the next double crochet post.
- Chain 1.
- Work 5 dc up the post of the next dc.
You have now created the first alligator scale.
Step 4: Create the Remaining Scales
Continue across Row 2 using the regular scale.
- Make 1 slip stitch into the next dc.
- Work 5 dc down the post of the next dc.
- Chain 1 and rotate your work slightly.
- Work 5 dc up the post of the next dc.
- Repeat this sequence across the row.
- Do not turn.
Each group of double crochets forms one rounded scale. As you continue, the scales will begin to overlap and create the distinctive alligator texture.
Step 5: Work Row 3
Row 3 creates the foundation for the next row of scales.
- Make a slip stitch to the center of the first scale.
- Chain 3, counting as the first double crochet.
- Chain 1.
- Work 2 dc into the slip stitch from the previous row.
- Chain 1.
- Work 1 dc into the center of the next scale.
- Continue repeating ch 1, 2 dc in the slip stitch from the previous row, ch 1, 1 dc in the center of the next scale across the row.
- Do not turn.
This row creates the double crochet posts that will support the next set of scales.
Step 6: Work Row 4
Row 4 creates another layer of scales.
Work from left to right across the previous row.
- Skip the first dc.
- Work a scale around the next dc post:
- Work 5 dc down the post.
- Chain 1 and rotate your work slightly.
- Work 5 dc up the post.
- Make a slip stitch into the next dc.
- Work another scale around the following dc.
- Continue repeating sl st in the next dc, scale across the row.
- When you reach the turning chain, work a slip stitch into the turning chain.
- Do not turn.
The new scales should sit between the scales from the previous scale row, creating the layered appearance of alligator skin.
Step 7: Work Row 5
Row 5 creates the next foundation row for the scales.
- Chain 3, counting as the first double crochet.
- Work 1 dc into the same stitch.
- Chain 1.
- Work 1 dc into the center of the next scale.
- Chain 1.
- Work 2 dc into the slip stitch from the previous row.
- Repeat ch 1, 1 dc in the center of the next scale, ch 1, 2 dc in the slip stitch from the previous row across the row.
- Continue to the last scale.
- Chain 1.
- Work 1 dc into the center of the last scale.
- Chain 1.
- Work 2 dc into the last dc.
- Do not turn.
You now have another foundation row ready for the next set of scales.
Step 8: Repeat the Pattern
Continue repeating Rows 2–5 until your crochet piece reaches the desired length.
The pattern follows this basic sequence:
- Row 2: Create the first row of scales.
- Row 3: Create the foundation for the next scale row.
- Row 4: Create the next row of scales.
- Row 5: Create the next foundation row.
Keep repeating these four rows. The scales will gradually stack and overlap, creating the distinctive alligator stitch texture.
Tips for Perfect Alligator Crochet Stitches
- Keep your tension consistent so all scales are approximately the same size.
- Make sure you work around the post rather than through the top loops when creating the scales.
- Count your double crochet stitches carefully.
- Avoid pulling the stitches too tightly around the posts.
- Keep the chain spaces consistent throughout the pattern.
- Gently arrange each scale so the stitches spread evenly.
- Use a smooth yarn while learning so you can easily see the stitch posts.
- Practice with a small swatch before starting a large project.
- Use contrasting colors if you want each layer of scales to stand out.
- Check your stitch placement regularly to make sure the scales remain aligned.
Common Mistakes to Avoid
The alligator crochet stitch requires careful stitch placement, so beginners may need some practice before their scales look even.
Here are some common mistakes to watch for:
- Working into the top of a stitch instead of around its post.
- Working the wrong number of double crochet stitches around each post.
- Pulling the stitches too tightly.
- Forgetting the chain spaces between sections.
- Creating scales with different numbers of stitches.
- Losing track of which posts should be used for each scale.
- Placing every scale directly above the previous scale instead of staggering them.
- Skipping a foundation post.
- Making the foundation row too tight.
If your scales look uneven, stop and check the foundation row first. Correctly positioned double crochet posts make it much easier to create neat scales.
Projects You Can Make with the Alligator Stitch
The thick, decorative texture of the alligator crochet stitch makes it suitable for many crochet projects.
Blankets
Use the alligator stitch to create a highly textured blanket or throw. The overlapping scales create a decorative surface that can make a simple blanket look more elaborate.
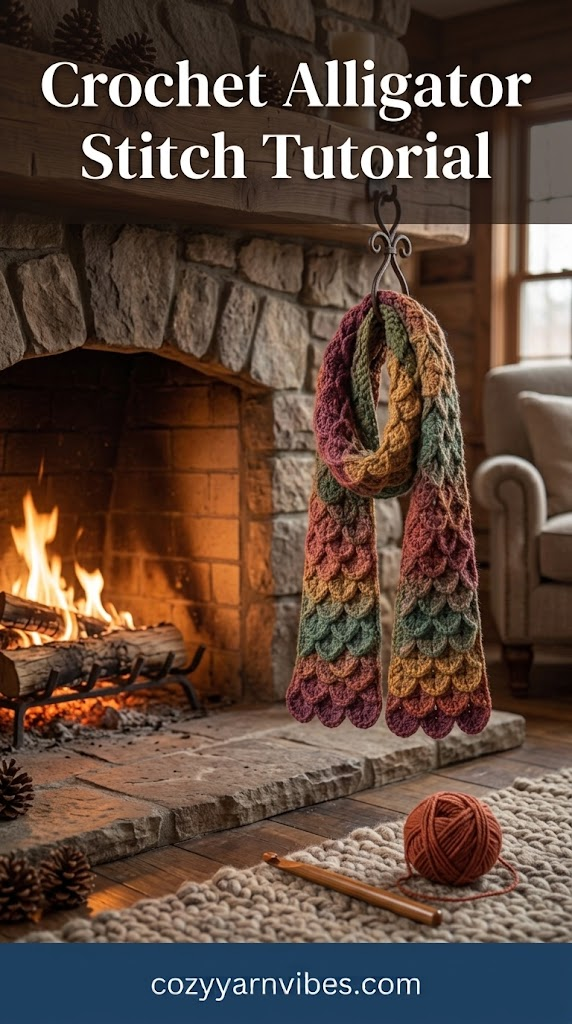
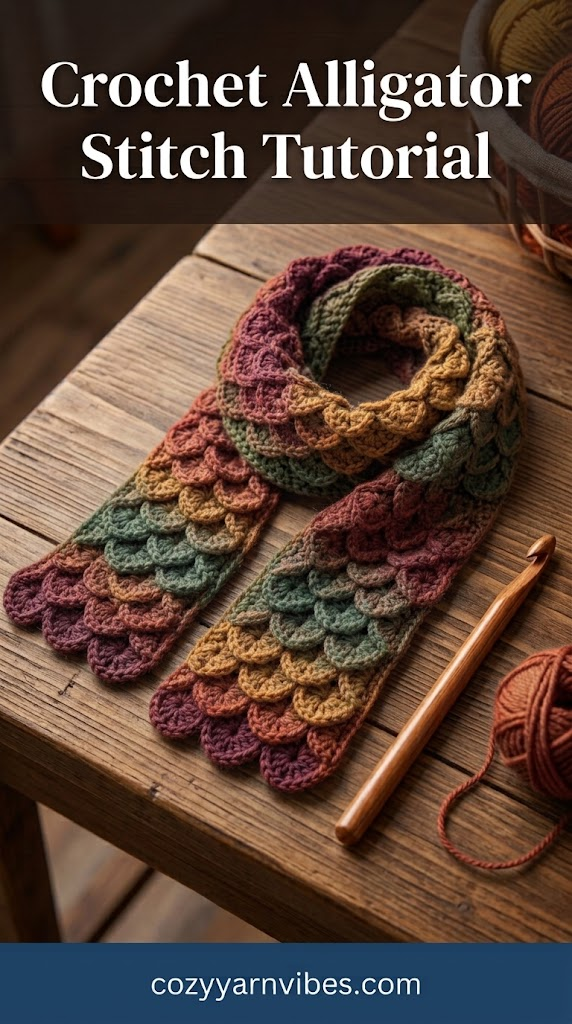
Scarves and Cowls
The scale-like texture works beautifully for scarves, cowls, and wraps. Choose a soft yarn for a comfortable finished accessory.
Bags and Purses
Use the stitch to create textured handbags, purses, clutches, and pouches. The raised scales can give a simple bag a distinctive appearance.
Baby Items
The stitch can be used for baby blankets, booties, hats, and decorative accessories. Soft yarn and gentle colors can create a delicate version of the textured pattern.
Hats and Accessories
Alligator stitch can add an interesting surface to hats, ear warmers, headbands, and other accessories.
Home Décor
Use the stitch for cushion covers, table runners, decorative mats, baskets, and other home décor pieces.
Crochet Flowers and Appliqués
The scale shapes can also be incorporated into decorative crochet motifs, flowers, wings, and other embellishments.
Variations of the Alligator Stitch
Once you are comfortable with the basic alligator crochet stitch, you can experiment with colors, yarn weights, and stitch placement.
- Two-Color Alligator Stitch: Use one color for the foundation rows and another for the scales.
- Multicolor Alligator Stitch: Change colors between rows to create colorful layers.
- Large Scale Stitch: Use thicker yarn or a larger hook to create larger scales.
- Small Scale Stitch: Use thinner yarn and a smaller hook for more delicate scales.
- Alternating Scale Stitch: Offset each row of scales so they create a staggered pattern.
- Textured Alligator Stitch: Experiment with different yarn textures to make the scales more prominent.
Changing the yarn, hook size, and colors can significantly change the final appearance of the stitch.
More Crochet Stitch Tutorials
Continue building your crochet skills with these beginner-friendly stitch guides:
- Single Crochet Stitch (sc)
- Half Double Crochet Stitch (hdc)
- Double Crochet Stitch (dc)
- Treble Crochet Stitch (tr)
Learning basic crochet stitches makes it easier to understand decorative techniques such as the alligator crochet stitch. Once you are comfortable working around stitch posts, you can create many different textured crochet designs.
Conclusion
The alligator crochet stitch is a beautiful textured technique that creates overlapping scales across the surface of your crochet fabric. Although the stitch looks complicated, it is built from familiar techniques such as chain stitches and double crochet.
The key to making neat alligator scales is to work carefully around the stitch posts and keep your tension consistent. Start with a small practice swatch so you can learn how the scales are formed before moving on to a larger project.
Once you understand the basic construction, experiment with different colors, yarn weights, and scale sizes to create blankets, scarves, bags, accessories, and home décor projects with a distinctive textured finish.
Frequently Asked Questions (FAQs)
1. Is the alligator crochet stitch suitable for beginners?
Yes. Beginners who know basic stitches such as chain and double crochet can learn the alligator stitch. The main technique to practice is working double crochet stitches around the posts to form the scales.
2. Why is it called the alligator stitch?
The stitch gets its name from the overlapping scales created across the crochet fabric. The finished texture resembles the skin of an alligator or crocodile.
3. Is the alligator stitch the same as the crocodile stitch?
The names are often used interchangeably for the same scale-like crochet technique. Different patterns may use slightly different stitch counts or construction methods.
4. How many chains do I need for the alligator stitch?
The foundation chain depends on the specific pattern. A common starting point is a multiple of 3 plus 1 extra chain, but the stitch count can vary depending on the design.
5. Why do my alligator scales look uneven?
Uneven tension or inconsistent stitch placement can make the scales different sizes. Make sure you work the same number of double crochet stitches around each post and avoid pulling the stitches too tightly.
6. What yarn is best for the alligator stitch?
A smooth, medium-weight yarn is a good choice when learning because it makes the stitch posts easy to see. Once you are comfortable with the technique, you can experiment with textured, chunky, or specialty yarns.
7. What can I make with the alligator stitch?
You can use the stitch for blankets, scarves, cowls, bags, purses, hats, baby items, cushion covers, table runners, and other decorative crochet projects.
8. Is the alligator stitch difficult to crochet?
The stitch can look complicated because of its three-dimensional scales, but it uses basic crochet techniques. After you learn how to work around the stitch posts, the repeating pattern becomes much easier to follow.