
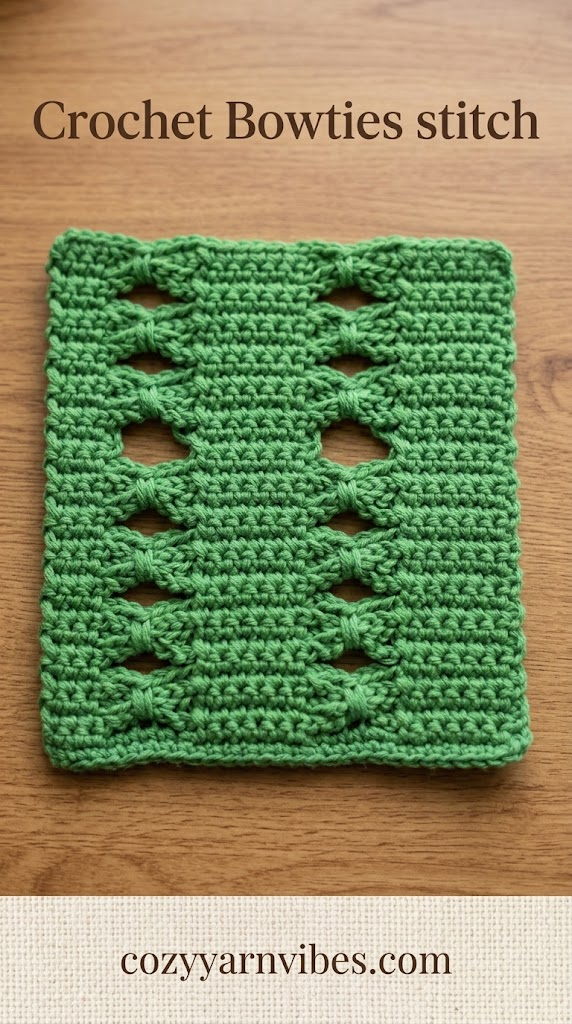
The bowties stitch is a beautiful crochet stitch that creates a repeating pattern of small, bowtie-like motifs across the fabric. The design is formed by creating chain-7 loops over several rows and then gathering those loops together with single crochet stitches. The result is a decorative textured pattern with a distinctive bowtie appearance.
The bowties stitch is worked primarily with single crochet stitches and chain-7 spaces. The chain loops are carried across several rows before being gathered together, creating the characteristic bowtie motifs.
In this guide, you’ll learn what the bowties stitch is, which abbreviations are used, how to crochet the stitch step by step, helpful tips for keeping the motifs even, common mistakes to avoid, and project ideas for using this decorative stitch.
Bowties Stitch Definition
The bowties stitch is a textured crochet stitch that creates repeating bowtie-shaped motifs by combining single crochet stitches with chain-7 spaces. The open chain loops are worked over several rows and then gathered together to form the center of each bowtie.
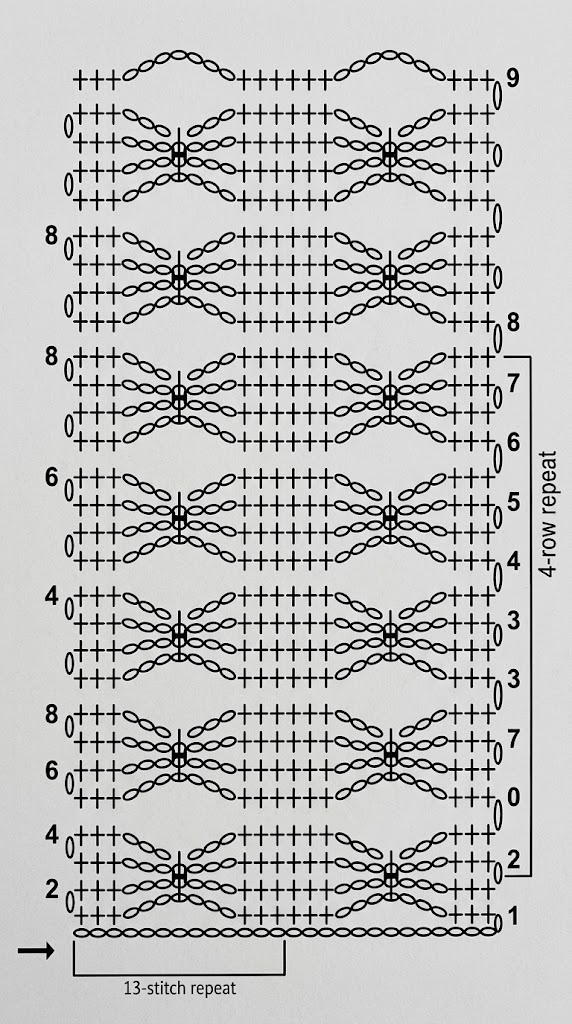
The stitch begins with a foundation chain worked in a multiple of 13, plus 1. After a full single crochet foundation row, the pattern creates chain-7 spaces by skipping seven stitches. These spaces are repeated across several rows before the loops are gathered together.
Rows 3 through 6 form the main repeating sequence. Once the first five rows have established the bowtie structure, repeat Rows 3 through 6 until your project reaches the desired length.
Bowties Stitch Abbreviations
This pattern uses US crochet terms.
Ch chain
Ch-sp chain space
Prev previous
Rep repeat
Sc single crochet
Sk skip
st (s) stitch (stitches)
T-ch turning chain
How to Make the Bowties Stitch
Follow these steps to crochet the bowties stitch pattern. The most important part of this stitch is maintaining the chain-7 loops across the correct rows and gathering all three loops together in Row 5.
Step 1: Make the Foundation Chain
Begin with a foundation chain made using any multiple of 13, plus 1.
For example, you can use 14, 27, 40, 53, or 66 chains. Choose a foundation chain that gives you the width you need for your project.
Try to keep your chain tension even. A foundation chain that is too tight can make the first row difficult to work and may cause the finished fabric to pull inward.
Step 2: Work the First Row
For Row 1, begin by working 1 single crochet (sc) into the second chain from the hook.
Continue across the foundation chain by working 1 single crochet in each chain to the end of the row.
When you reach the end, turn your work.
This creates a solid single crochet foundation that will be used to establish the chain-7 spaces in the following row.
Step 3: Create the First Chain-7 Spaces
Row 2 begins forming the open loops that will eventually become the bowtie motifs.
Chain 1, then work 1 single crochet into the first single crochet. Work 1 single crochet into each of the next 2 single crochets.
Next, chain 7. Skip the next 7 single crochets from Row 1, then work 1 single crochet into each of the next 3 single crochets.
You have now created the first chain-7 space.
Continue across the row by repeating the following sequence: work 1 single crochet in each of the next 3 single crochets, chain 7, skip the next 7 single crochets, then work 1 single crochet in each of the next 3 single crochets.
Repeat this sequence until you reach the end of the row. Turn your work.
Step 4: Build the Bowtie Loops
Row 3 continues building the chain-7 loops without closing or gathering them yet.
Begin with chain 1. Work 1 single crochet into the first single crochet, then work 1 single crochet into each of the next 2 single crochets.
Chain 7, then skip the next chain-7 space from Row 2. Work 1 single crochet into each of the next 3 single crochets.
Continue across the row by repeating this sequence: 1 single crochet in each of the next 3 single crochets, chain 7, skip the next chain-7 space, and 1 single crochet in each of the next 3 single crochets.
The new chain-7 loops are positioned above the previous loops. Do not work stitches into the chain-7 spaces themselves during this row.
Turn your work when you reach the end.
Step 5: Repeat the Loop Row
Row 4 is worked exactly like Row 3. It creates another set of chain-7 loops above the previous row.
Chain 1, then work 1 single crochet into the first single crochet and 1 single crochet into each of the next 2 single crochets.
Chain 7 and skip the next chain-7 space. Work 1 single crochet into each of the next 3 single crochets.
Repeat the sequence across the row: 1 single crochet in each of the next 3 single crochets, chain 7, skip the next chain-7 space, and 1 single crochet in each of the next 3 single crochets.
Continue until you reach the end of the row, then turn your work.
At this point, each bowtie section has three chain-7 loops stacked over one another. These loops will be gathered together in the next row.
Step 6: Gather the Bowtie Loops
Row 5 brings the three chain-7 loops together to create the bowtie shape.
Begin with chain 1. Work 1 single crochet into the first single crochet, followed by 1 single crochet in each of the next 2 single crochets.
Next, chain 3. Locate the three chain-7 loops created over the previous three rows. Work 1 single crochet over all three chain-7 loops together. Insert your hook around the three loops and complete the single crochet through all of them at once.
This gathers the three loops into the center of the motif and creates the bowtie shape.
After securing the loops together, chain 3. Work 1 single crochet into each of the next 3 single crochets.
Continue across the row by repeating the sequence: 1 single crochet in each of the next 3 single crochets, chain 3, 1 single crochet over all three chain-7 loops from the previous three rows, chain 3, and 1 single crochet in each of the next 3 single crochets.
Repeat until you reach the end of the row, then turn your work.
The gathered chain loops should now resemble small bowtie or butterfly-like shapes across the fabric.
Step 7: Continue the Pattern
Row 6 begins the next set of chain-7 loops and prepares the fabric for another group of bowtie motifs.
Chain 1, then work 1 single crochet into the first single crochet and 1 single crochet into each of the next 2 single crochets.
Chain 7, skip the next 7 stitches, then work 1 single crochet into each of the next 3 single crochets.
Continue across the row by repeating the sequence: 1 single crochet in each of the next 3 single crochets, chain 7, skip the next 7 stitches, and 1 single crochet in each of the next 3 single crochets.
Turn your work at the end of the row.
The chain-7 spaces created in Row 6 begin the next set of loops. Continue with Rows 3 through 6 to repeat the bowtie pattern.
Repeat Rows 3–6 until your work reaches the desired length.
As you continue, Row 3 and Row 4 build the chain-7 loops, Row 5 gathers the three previous loops to create the bowtie motif, and Row 6 begins the next set of loops.
Tips for Perfect Bowties Stitch
- Keep your foundation chain and single crochet stitches even throughout the project.
- Count the foundation chain carefully because the stitch requires a multiple of 13, plus 1.
- Make each chain-7 space with exactly 7 chains.
- When instructed to skip a chain-7 space, do not work stitches into that space.
- Keep the three chain-7 loops loose enough to gather comfortably in Row 5.
- When gathering the loops, make sure all three previous loops are included in the single crochet.
- Keep the chain-3 spaces on either side of the gathered bowtie consistent.
- Count your groups of three single crochet stitches to keep the motifs aligned.
- Avoid pulling the chain loops too tightly, as this can make the bowtie motifs difficult to form.
Common Mistakes to Avoid
The bowties stitch depends on carefully maintaining the chain-7 loops over several rows. A small placement error can affect the shape of the finished motifs.
Avoid these common mistakes:
- Using the wrong foundation chain multiple.
- Skipping too few or too many stitches when creating a chain-7 space.
- Working into a chain-7 space when the pattern says to skip it.
- Making the chain-7 loops different sizes.
- Forgetting to repeat Row 4 after Row 3.
- Gathering only one or two of the previous loops in Row 5 instead of all three.
- Working the gathering single crochet through the chains rather than around all three loops.
- Forgetting the chain-3 spaces on either side of the gathered loops.
- Losing track of the groups of three single crochet stitches.
If your bowties look uneven, check that each set contains three chain-7 loops before gathering them. Also make sure the loops are gathered at the same point across each motif.
Projects You Can Make with the Bowties Stitch
The bowties stitch creates an open, decorative texture that works well for projects where you want a repeating motif to stand out.
Blankets
Use the bowties stitch for baby blankets, throws, lightweight blankets, and afghans. The open spaces give the fabric a delicate appearance while the gathered loops add decorative texture.
Scarves and Shawls
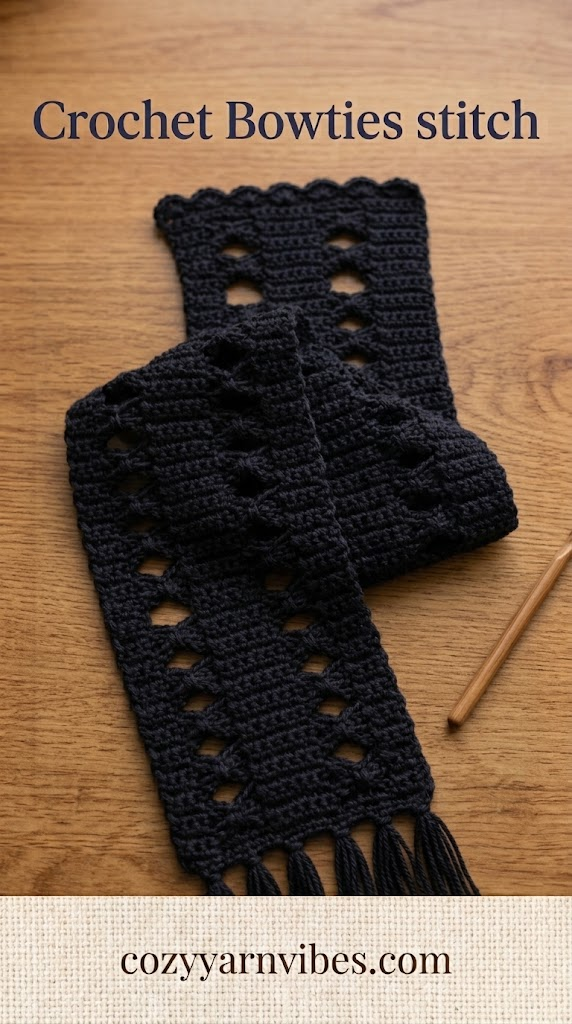
The stitch works beautifully for scarves, wraps, and shawls. Its open structure can create a lightweight fabric with repeating bowtie motifs.
Garments
Incorporate the bowties stitch into sweaters, cardigans, tops, vests, and ponchos. It can be used across an entire garment or as a decorative panel.
Baby Items
The decorative motifs can be used for baby blankets, lightweight wraps, and other handmade baby projects. Choose an appropriate soft yarn for a comfortable finished fabric.
Home Décor
Use the stitch for decorative pillow covers, table runners, curtains, wall hangings, and other home décor pieces. The openwork pattern can add a delicate detail to simple projects.
Accessories
Try the bowties stitch for scarves, shawls, bags, headbands, cowls, and other accessories. The distinctive motifs can give a simple accessory a decorative finish.
Variations of the Bowties Stitch
The basic bowties stitch can be customized with different yarns, colors, and surrounding stitches to create a variety of effects.
- Use contrasting colors between sections to make the bowtie motifs more noticeable.
- Try different yarn weights to change the size and openness of the motifs.
- Combine bowtie stitch rows with solid single crochet rows for contrast.
- Use the stitch as a decorative panel rather than working it throughout an entire project.
- Experiment with yarn fibers to create softer or more structured fabrics.
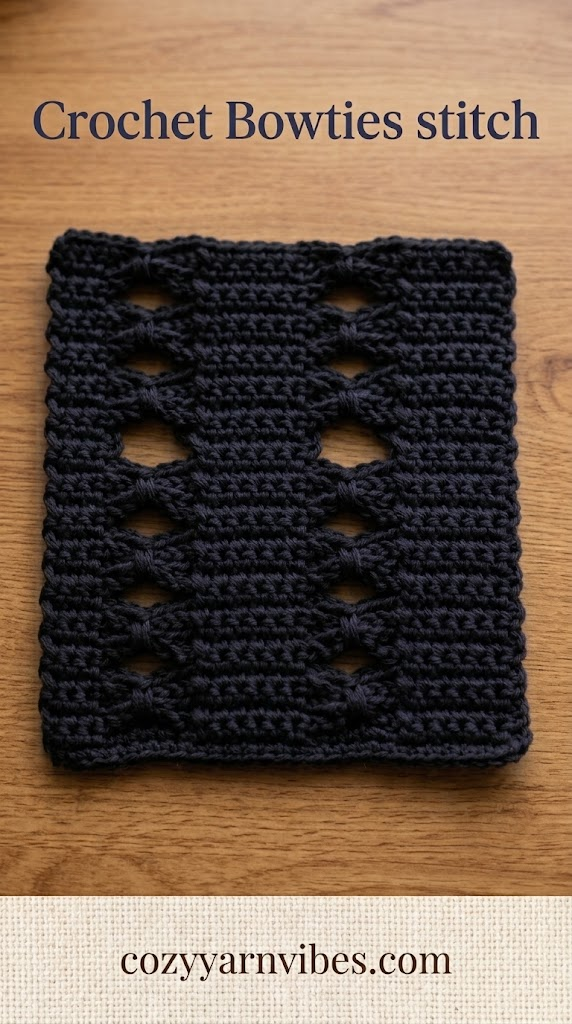
Changing the color and yarn can significantly change the appearance of the bowtie motifs while keeping the same stitch construction.
More Crochet Stitch Tutorials
Continue building your crochet skills with these beginner-friendly stitch guides:
- Single Crochet Stitch (sc)
- Half Double Crochet Stitch (hdc)
- Double Crochet Stitch (dc)
- Treble Crochet Stitch (tr)
Learning different crochet stitches makes it easier to combine textures and openwork patterns in your projects. Once you are comfortable with the bowties stitch, try incorporating it into larger designs or combining it with basic crochet stitches.
Conclusion
The bowties stitch is a decorative crochet pattern that creates repeating bowtie-shaped motifs using simple single crochet stitches and chain-7 loops.
The design is built gradually over several rows. Rows 3 and 4 create the chain-7 loops, while Row 5 gathers the loops from the previous three rows to form each bowtie. Row 6 then begins the next set of loops, allowing the pattern to continue.
With consistent tension and careful stitch placement, the bowties stitch can be used for blankets, scarves, shawls, garments, baby items, accessories, and home décor. Practice the stitch on a small swatch first to become comfortable with maintaining and gathering the chain loops.
Frequently Asked Questions (FAQs)
1. Is the bowties stitch suitable for beginners?
Yes. The bowties stitch can be learned by beginners who are comfortable with basic single crochet and chain stitches. The main technique to practice is carrying the chain-7 loops across several rows and gathering all three loops together.
2. What is the foundation chain multiple for the bowties stitch?
The foundation chain should be made using any multiple of 13, plus 1. This allows the groups of three single crochet stitches and seven skipped stitches to fit correctly across the row.
3. How are the bowtie shapes created?
The bowtie shapes are created by making three chain-7 loops over three consecutive rows and then gathering all three loops together with a single crochet in Row 5. Chain-3 spaces on either side of the gathered loops help define the motif.
4. What does the chain-7 space do?
The chain-7 space creates the long loop that forms part of the bowtie motif. Three of these loops are built over consecutive rows before they are gathered together.
5. How many rows are used to form each bowtie?
Each bowtie is formed from three chain-7 loops created across Rows 2, 3, and 4. These three loops are gathered together in Row 5 to create the finished motif.
6. Why do my bowties look uneven?
Uneven bowties can result from inconsistent chain tension, uneven loop sizes, or accidentally gathering different numbers of loops. Make sure every chain-7 loop contains exactly seven chains and that all three loops are gathered together in Row 5.
7. How do I repeat the bowties stitch?
After completing Rows 1 through 6, repeat Rows 3–6 until your project reaches the desired length. Rows 3 and 4 create the new loops, Row 5 gathers the previous three loops, and Row 6 begins the next set.
8. What can I make with the bowties stitch?
The bowties stitch can be used for blankets, scarves, shawls, garments, baby items, bags, home décor, and other projects where you want an open and decorative crochet texture.