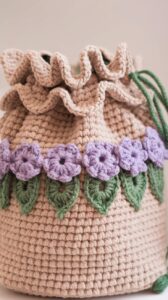
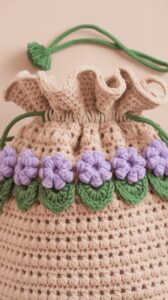
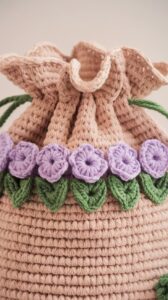
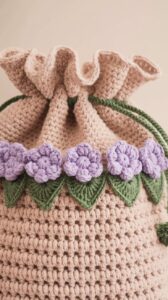
This adorable little pouch is the perfect accessory for carrying small essentials or as a thoughtful handmade gift. A crochet project that combines practicality with charm, featuring single crochet rows and a delicate flower stitch accent.
Here’s how you can make one!


Finished Size
- Approximate Dimensions: 3″ x 3.5″
You can easily adjust the size by adding more stitches or rows.
What You’ll Need
- Yarn: Worsted weight cotton yarn in three colors:
- Base color for the pouch body (neutral).
- Flower color (lavender or your favorite shade).
- Green for the leaves.
- Hook: 4 mm crochet hook.
- Extras: Scissors, yarn needle, and a drawstring cord (or crochet your own).
Stitches You’ll Use
- Ch (Chain): For starting the project and making the drawstring.
- Sc (Single Crochet): Durable and tight for the pouch body.
- Flower Stitch: For the floral row (instructions below).
- Sl st (Slip Stitch): To join rounds or add seamless details.
- Shell Stitch: Adds the scalloped effect at the top edge.
Flower Stitch Quick Guide
- Yarn over, insert the hook into the stitch, and pull up a loop.
- Yarn over, repeat this step 3 more times in the same stitch to create a puff.
- Yarn over and pull through all loops.
- Secure with a chain to form the flower.
Shell Stitch Quick Guide
- In one stitch, work 5 double crochets (dc).
- Skip the next 2 stitches and sl st into the following stitch.
- Repeat to form the scallops.
Pattern for Blooming Buds Pouch
Pouch Base and Body
- Foundation Row: Ch 25 (or desired width). Sc in the second ch from the hook and across. Ch 1, turn.
- Rows 2–15: Sc in each stitch across. Ch 1, turn after each row.
Flower Row
- Switch to green yarn. Sc across the row to create the leaf base.
- Switch to your flower color. Work flower stitches evenly across, skipping 2 stitches between flowers.
Body Continuation
- Switch back to the base color and sc across for 4 more rows.
Shell Edging
- Attach yarn to the top edge and work shell stitches in the round for a scalloped finish.
Finishing the Pouch
- Fold the pouch in half and use sc stitches to join the sides, leaving the top open.
- Weave a cord or crochet a chain through the top row to create the drawstring.
Tips for Success
- Customization: Try different flower colors for a unique look or make it slightly larger for more storage.
- Durability: Use sturdy cotton yarn to keep the pouch strong.
- Blocking: Lightly steam the finished pouch to smooth any uneven stitches.
Why You’ll Love This Project
The Blooming Buds Pouch is not only beginner-friendly but also super versatile. Use it for coins, jewelry, or small trinkets, and it’s a fantastic way to practice combining basic and decorative stitches!