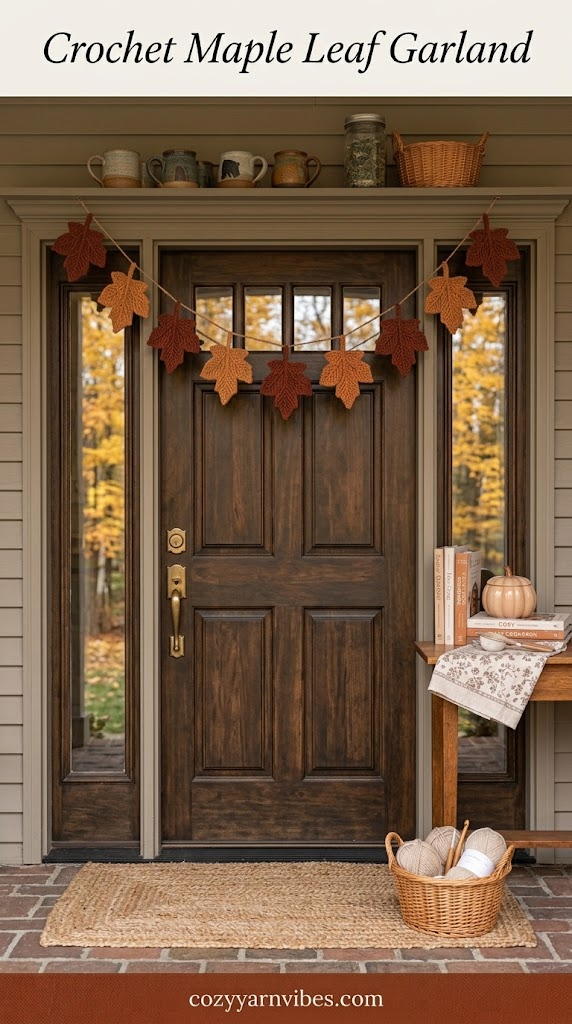
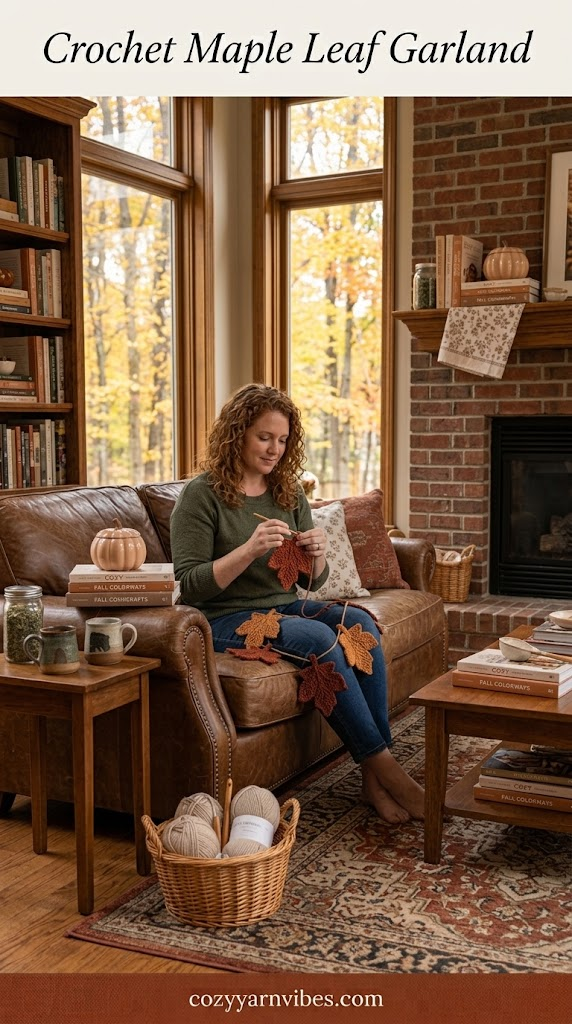
Looking for a simple fall crochet project to decorate your home? This Crochet Maple Leaf Garland is a beautiful way to bring a handmade autumn touch to your space. Made with small crochet maple leaves joined together, this garland is quick to create and can be customized in different fall colors.
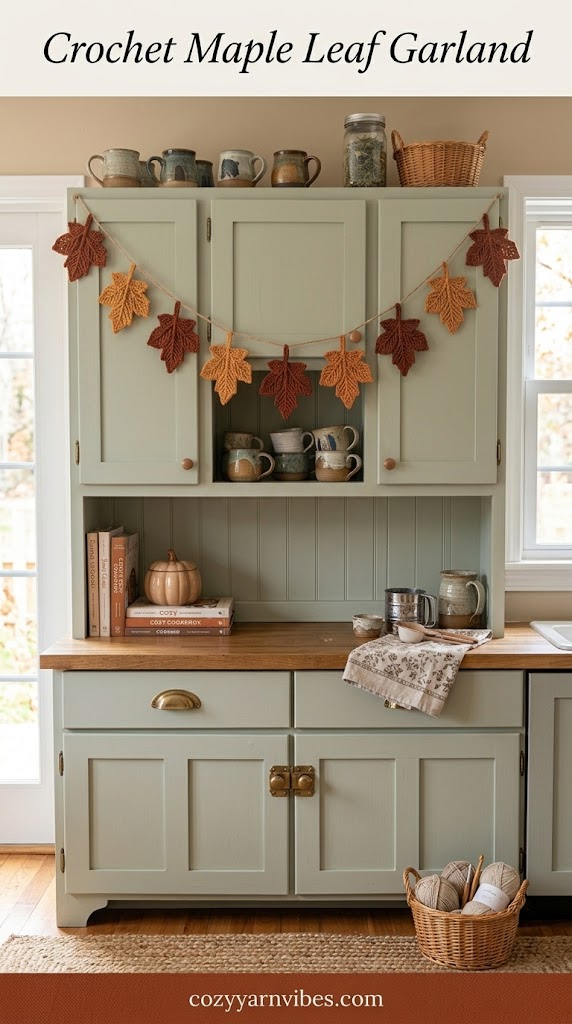
This Crochet Maple Leaf Garland is perfect for decorating mantels, walls, windows, shelves, tables, and seasonal displays. You can make the leaves in classic autumn shades such as red, orange, yellow, and brown, or use green yarn for a more natural look.
Easy Crochet Maple Leaf Garland Tutorial
The Crochet Maple Leaf Garland is made by first crocheting individual maple leaves and then joining them together with a simple chain. You can make as many leaves as you need depending on the length of your garland.
The maple leaves can be made in different sizes and colors to give the finished garland a fuller and more natural appearance. The project uses basic crochet stitches, making it suitable for beginners who are comfortable with chain, single crochet, half double crochet, double crochet, treble crochet, and slip stitch.
Why You’ll Love This Pattern
Easy and beginner-friendly project
Uses only a small amount of yarn
Great for using leftover yarn
Perfect for fall and Thanksgiving décor
Easy to customize with different colors
Makes a beautiful handmade decoration
Can be made in any length
Great for adding a seasonal touch to your home
Skill Level
Beginner to Intermediate
You should be comfortable with basic crochet stitches and working around a foundation chain. The maple leaf requires a little shaping, but the steps are easy to follow.
Finished Size
The finished size of your Crochet Maple Leaf Garland will depend on the number of leaves you make and the length of the chains between them.
For a shorter decoration, make around 5 to 7 leaves. For a longer mantel or wall garland, you can make 10 or more leaves.
Materials Needed
Yarn
Use a small amount of worsted-weight or medium-weight yarn. Cotton or acrylic yarn works well for this project.
Colors
Choose traditional autumn shades such as:
Red
Orange
Yellow
You can use one color for all the leaves or alternate colors throughout the Crochet Maple Leaf Garland.
Additional Supplies
– Crochet hook suitable for your yarn
– Yarn needle
– Scissors
– Measuring tape, if needed
Stitches & Abbreviations (US Terms)
– ch = chain
– sc = single crochet
– hdc = half double crochet
– dc = double crochet
– tr = treble crochet
– sl st = slip stitch
– st = stitch
– sts = stitches
– rep = repeat
How to Make These Stitches
Chain (ch)
Make a slip knot and place it on your hook. Yarn over and pull the yarn through the loop on your hook. Continue until you have the required number of chains.
Single Crochet (sc)
Insert your hook into the stitch, yarn over, and pull up a loop. Yarn over again and pull through both loops on the hook.
Half Double Crochet (hdc)
Yarn over, insert your hook into the stitch, and pull up a loop. You will have three loops on the hook. Yarn over and pull through all three loops.
Double Crochet (dc)
Yarn over and insert your hook into the stitch. Pull up a loop, yarn over and pull through two loops, then yarn over and pull through the remaining two loops.
Treble Crochet (tr)
Yarn over twice and insert your hook into the stitch. Pull up a loop, then work off two loops at a time until one loop remains on the hook.
Slip Stitch (sl st)
Insert your hook into the stitch, yarn over, and pull the yarn through both the stitch and the loop on your hook.
Pattern Notes
Make each maple leaf separately before assembling the garland. Keep your tension relaxed so the leaves can spread out and hold their shape.
You can make all the leaves the same size or combine smaller and larger leaves for a more natural arrangement.
For a fuller Crochet Maple Leaf Garland, alternate the leaf colors instead of using the same color throughout.
How to Make a Crochet Maple Leaf Garland: Step-by-Step
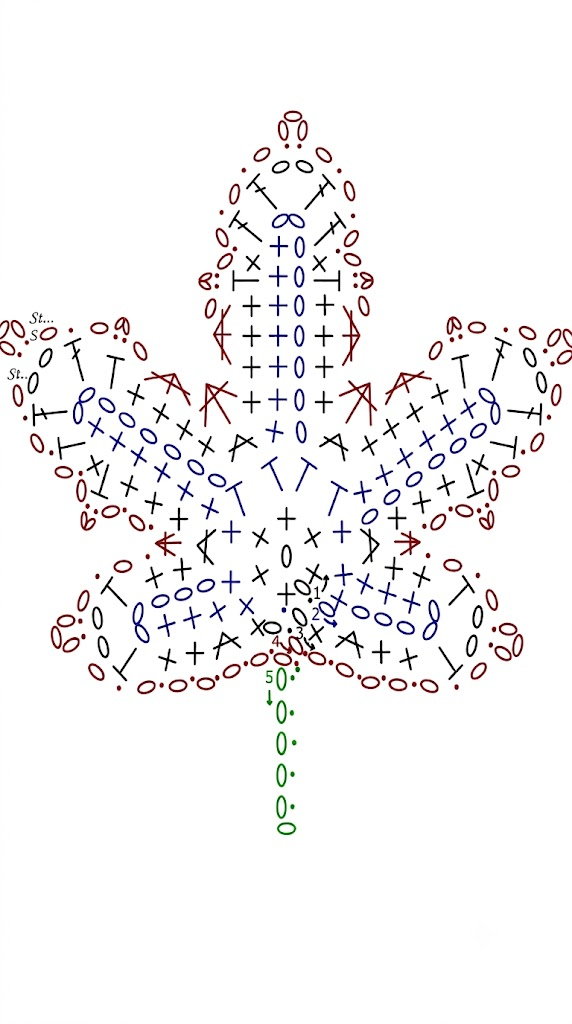
Round 1: Create the Center
Begin by making the small center from which all five maple leaf lobes will be formed.
- Chain 2.
- Work 6 sc into the 2nd chain from the hook.
- Join with a sl st to the first sc.
You now have 6 sc forming the small center ring.
Do not make a large magic ring here. The chart shows a very small central starting point.
Round 2: Create the Five Maple Leaf Lobes
In this round, use the six center stitches to build the five sections of the maple leaf. Each lobe is worked around its designated center stitch, with the middle lobe being the longest.
The first and fifth lobes are the smallest, while the second and fourth are slightly longer.
1st Lobe
- Ch 1.
- Work sc in the 1st sc of Round 1.
- Ch 5.
- Starting in the 3rd ch from the hook, work sc in each chain across.
- Work sc in the same 1st sc of Round 1.
The two chains closest to the hook remain unworked, forming the small chain space at the tip of the lobe.
Important correction: The written stitch count supplied with the pattern says 5 sc, but these instructions actually produce 4 sc in this section. The chart and subsequent shaping support the written stitch placement rather than the incorrect count.
2nd Lobe
- Work sc in the 2nd sc of Round 1.
- Ch 8.
- Starting in the 3rd ch from the hook, work sc in each chain across.
- Work hdc in the same 2nd sc of Round 1.
This forms the longer lobe immediately to the left of the center.
3rd Lobe
- Work hdc in the 3rd sc of Round 1.
- Ch 9.
- Starting in the 3rd ch from the hook, work sc in each chain across.
- Work hdc in the same 3rd sc of Round 1.
This creates the tall central lobe of the maple leaf.
4th Lobe
- Work hdc in the 4th sc of Round 1.
- Ch 8.
- Starting in the 3rd ch from the hook, work sc in each chain across.
- Work sc in the same 4th sc of Round 1.
This creates the lobe that mirrors the second lobe on the opposite side.
5th Lobe
- Work sc in the 5th sc of Round 1.
- Ch 5.
- Starting in the 3rd ch from the hook, work sc in each chain across.
- Work sc in the same 5th sc of Round 1.
This forms the small lobe on the opposite side.
- Finish Round 2 with a sl st in the last sc of Round 1.
At this point, the five points of the maple leaf should be visible. The center lobe is the longest, the two side lobes are slightly shorter, and the two outer lobes are the smallest.
Round 3: Shape and Define the Leaf
Round 3 develops the recognizable maple-leaf silhouette. The stitches become taller toward the points, while decreases between the lobes bring the sections together.
The decreases are important because they create the defined spaces between the five lobes instead of leaving them looking like separate petals.
1st Lobe
- Ch 1.
- Work sc in the first sc.
- Working into the bottom of the foundation chains, work 2 sc in the next ch.
- Work sc in each of the next 2 chs.
- In the ch-2 space at the tip, work (hdc, ch 2, hdc).
- Work sc in each of the next 2 sc.
- Skip the next sc.
This shapes the first small point.
Join the 1st and 2nd Lobes
Work sc2tog using:
- the last sc of the 1st lobe, and
- the first sc of the 2nd lobe.
This creates the first decrease between the lobes.
2nd Lobe
Working into the bottom of the foundation chains:
- Skip the first ch.
- Work sc in each of the next 3 chs.
- Work (hdc, sc) in the next ch.
- Work hdc in the next ch.
- In the ch-2 space at the tip, work (dc, ch 2, dc).
- Work hdc in the next sc.
- Work sc in each of the next 4 sc.
- Skip the next sc.
The taller stitches around the tip give this lobe a wider and more pointed shape.
Join the 2nd and 3rd Lobes
Work sc2tog using:
- the last hdc of the 2nd lobe, and
- the first hdc of the 3rd lobe.
3rd Lobe: Center Point
The third lobe creates the tallest point and becomes the central feature of the maple leaf.
Working into the bottom of the foundation chains:
- Skip the first ch.
- Work sc in each of the next 4 chs.
- Work (hdc, sc) in the next ch.
- Work dc in the next ch.
- In the ch-2 space at the tip, work (dc, ch 2, dc).
- Work dc in the next sc.
- Work (sc, hdc) in the next sc.
- Work sc in each of the next 4 sc.
- Skip the next sc.
The combination of sc, hdc, and dc gradually builds the height toward the central point.
Join the 3rd and 4th Lobes
Work sc2tog using:
- the last hdc of the 3rd lobe, and
- the first hdc of the 4th lobe.
4th Lobe
Work into the bottom of the foundation chains:
- Skip the first ch.
- Work sc in each of the next 4 chs.
- Work hdc in the next ch.
- In the ch-2 space, work (dc, ch 2, dc).
- Work hdc in the next sc.
- Work (sc, hdc) in the next sc.
- Work sc in each of the next 3 sc.
- Skip the next sc.
Join the 4th and 5th Lobes
Work sc2tog using:
- the last sc of the 4th lobe, and
- the first sc of the 5th lobe.
Correction: The supplied instructions accidentally refer to the 3rd lobe at this point. It should be the last sc of the 4th lobe, since this decrease connects the 4th and 5th lobes.
5th Lobe
Work into the bottom of the foundation chains:
- Skip the next ch.
- Work sc in each of the next 2 chs.
- In the ch-2 space, work (hdc, ch 2, hdc).
- Work sc in each of the next 2 sc.
- Work 2 sc in the next sc.
- Work sc in the last sc.
Finish by working:
Ch 1, sl st into the beginning ch-1 of the round.
Round 3 is now complete.
You should now have five clearly defined points, with the central point standing taller than the other four.
Round 4: Decorative Edging
The final round gives the maple leaf a delicate scalloped edge. This round combines slip stitches, chain spaces, and small chain arches around the outside of the leaf.
The sc3tog decreases between the lobes help pull the five sections together and emphasize the characteristic maple-leaf shape.
1st Lobe
Starting at the first lobe:
- Ch 1, sl st in the next st.
- Repeat across the lobe until you reach the ch-2 space.
- In the ch-2 space, work ch 1, (sl st, ch 3, sl st).
- Continue with [ch 1, sl st in next st] twice.
First Inter-Lobe Decrease
Work sc3tog over:
- the last sc of the 1st lobe,
- the decrease between the 1st and 2nd lobes,
- the first sc of the 2nd lobe.
This creates the defined indentation between the first two lobes.
2nd Lobe
- Work [sl st in next st, ch 1] twice.
- In the next hdc, work (sl st, ch 2, sl st).
- Work [ch 1, sl st in next st] across the lobe until reaching the ch-2 space.
- Work ch 1, (sl st, ch 3, sl st) in the ch-2 space.
- Work ch 1, sl st in next dc.
- Work ch 1, (sl st, ch 2, sl st) in the next hdc.
- Work ch 1, sc3tog in the next 3 sts.
Between 2nd and 3rd Lobes
Work another sc3tog over:
- the last sc of the 2nd lobe,
- the decrease between the 2nd and 3rd lobes,
- the first sc of the 3rd lobe.
3rd Lobe: Central Point
The center lobe receives the largest decorative point.
- Work sc3tog in the next 3 sts.
- Ch 1, (sl st, ch 2, sl st) in the next hdc.
- Work [ch 1, sl st in next st] across toward the tip.
- At the ch-2 space, work ch 1, (sl st, ch 3, sl st).
- Work [ch 1, sl st in next st] 3 times.
- Work ch 1, (sl st, ch 2, sl st) in the next hdc.
- Ch 1, sc3tog in the next 3 sts.
Between 3rd and 4th Lobes
Work sc3tog over:
- the last sc of the 3rd lobe,
- the decrease between the 3rd and 4th lobes,
- the first sc of the 4th lobe.
4th Lobe
- Work sc3tog in the next 3 sts.
- Ch 1, (sl st, ch 2, sl st) in the next hdc.
- Ch 1, sl st in the next st.
- Ch 1, (sl st, ch 3, sl st) in the ch-2 space.
- Work [ch 1, sl st in next st] 3 times.
- Ch 1, (sl st, ch 2, sl st) in the next hdc.
- Work [ch 1, sl st in next st] twice.
Between 4th and 5th Lobes
Work sc3tog over:
- the last sc of the 4th lobe,
- the decrease between the 4th and 5th lobes,
- the first sc of the 5th lobe.
5th Lobe
- Work [sl st in next st, ch 1] twice.
- In the next ch-2 space, work (sl st, ch 3, sl st).
- Continue around the remaining stitches with [ch 1, sl st in next st].
- When you reach the beginning of the round, work ch 1.
- Finish with a sl st into the first ch of the round.
Fasten off and weave in the ends.
Finishing the Maple Leaf
Once all four rounds are complete, gently spread the five lobes with your fingers to define the shape. Avoid pulling too firmly, as the small chain arches along the edge can stretch.
The completed leaf should have:
- 1 tall central lobe
- 2 medium side lobes
- 2 smaller outer lobes
- A narrow center
- Small decorative chain arches around the perimeter
- Defined indentations between each lobe
The decreases between the lobes help create the characteristic maple-leaf silhouette.
Important Pattern Notes
There are two apparent errors in the supplied written instructions that are worth noting when publishing the pattern:
- Round 2, 1st and 5th lobes: With ch 5, sc in 3rd ch from hook and each ch across, the chain section produces 3 sc, plus the sc worked into the center stitch. Therefore, the written count of 5 sc does not match the actual instructions. It should not be used as a guide for changing the stitches.
- Round 3, 4th-to-5th lobe decrease: The supplied text says to use the last sc from the 3rd lobe, but this should be the last sc from the 4th lobe. Otherwise, the decrease cannot correctly connect the 4th and 5th lobes.
Step 3: Create the Garland Chain
Make a foundation chain to begin the garland. The length will depend on how long you want your finished decoration to be.
Leave a longer chain at both ends so you can easily hang the garland.
Step 4: Attach the First Leaf
Place the first maple leaf where you want it along the chain. Use a yarn needle and matching yarn to sew the base of the leaf securely to the chain.
Alternatively, you can attach the leaf directly with slip stitches while crocheting the garland chain.
Step 5: Add the Remaining Leaves
Continue adding the maple leaves along the chain, leaving a small and even space between each one.
Try alternating the colors and slightly changing the direction of some leaves. This gives the Crochet Maple Leaf Garland a more natural and decorative appearance.
Step 6: Create the Hanging Loops
Once all the leaves have been attached, make a small chain loop at each end of the garland.
These loops will make it easier to hang your Crochet Maple Leaf Garland from hooks, nails, or other supports.
Step 7: Finish and Shape
Fasten off and weave in any remaining yarn ends. Lay the finished garland flat and gently arrange the leaves.
If any leaves are curling, lightly block them or shape them with your fingers.
How to Customize Your Crochet Maple Leaf Garland
Classic Autumn Garland
Use red, orange, yellow, and brown leaves for a traditional fall look.
Green Maple Leaf Garland
Use different shades of green to create a fresh botanical decoration that can be displayed throughout the year.
Two-Color Garland
Choose two coordinating colors and alternate them along the garland for a simple and organized design.
Mixed-Size Leaves
Make smaller and larger maple leaves and combine them throughout the garland. This creates more visual variety and makes the decoration look fuller.
Where to Use Your Crochet Maple Leaf Garland
There are many places where you can display a Crochet Maple Leaf Garland.
Hang it across a fireplace mantel, along a shelf, around a window, across a wall, or over a doorway. You can also place it across a dining table as part of an autumn centerpiece.
For a seasonal party, use the garland as a backdrop or combine it with crochet pumpkins, flowers, and other handmade decorations.
Care Instructions
The care instructions will depend on the yarn used. For cotton or acrylic yarn, gently hand wash the garland with cool water and mild soap when necessary.
Do not twist or wring the leaves. Press them gently between clean towels to remove excess water and lay the garland flat to dry.
Keep the finished Crochet Maple Leaf Garland away from high heat to help preserve the shape of the leaves.
Frequently Asked Questions
How many leaves do I need for a crochet garland?
The number depends on the length you want. Around 5 to 7 leaves work well for a short decoration, while 10 or more leaves can create a longer garland.
Can I use different colors for the maple leaves?
Yes. Using different autumn colors is one of the easiest ways to make your Crochet Maple Leaf Garland look colorful and seasonal.
Can I make the garland longer?
Yes. Simply crochet a longer connecting chain and add more maple leaves. You can continue adding leaves until the garland reaches your desired length.
Can I make smaller maple leaves?
Yes. Use thinner yarn and a smaller crochet hook to create smaller leaves. You can also adjust the leaf pattern to reduce its overall size.
Can I use leftover yarn?
Absolutely. A Crochet Maple Leaf Garland is an excellent project for using small amounts of leftover yarn in different colors.
Where can I hang a crochet maple leaf garland?
You can hang it on a mantel, shelf, wall, window, doorway, or table. It also works beautifully as seasonal party décor.
Conclusion
This Crochet Maple Leaf Garland is a simple and creative way to decorate your home for fall. By making individual maple leaves and joining them together, you can create a garland in any length and color combination you like.
Use traditional autumn shades for a warm seasonal decoration, or choose your favorite colors to create a garland that can be displayed throughout the year. Once you make your first Crochet Maple Leaf Garland, you can easily create more for different rooms, celebrations, and handmade gifts.
If you want to learn crocheting maple leaf in more detail, read our blog post about How to Crochet a Maple Leaf