
Looking for a simple and pretty fall crochet project? This Crochet Maple Leaf is a fun and easy pattern that you can make with just a small amount of yarn. It has the classic shape of a maple leaf and looks beautiful as a decoration, appliqué, garland, or part of another crochet project.
This pattern is beginner-friendly and uses basic crochet stitches. You can make your leaf in red, orange, yellow, brown, green, or any color you like. It is also a great way to use leftover yarn from other crochet projects.
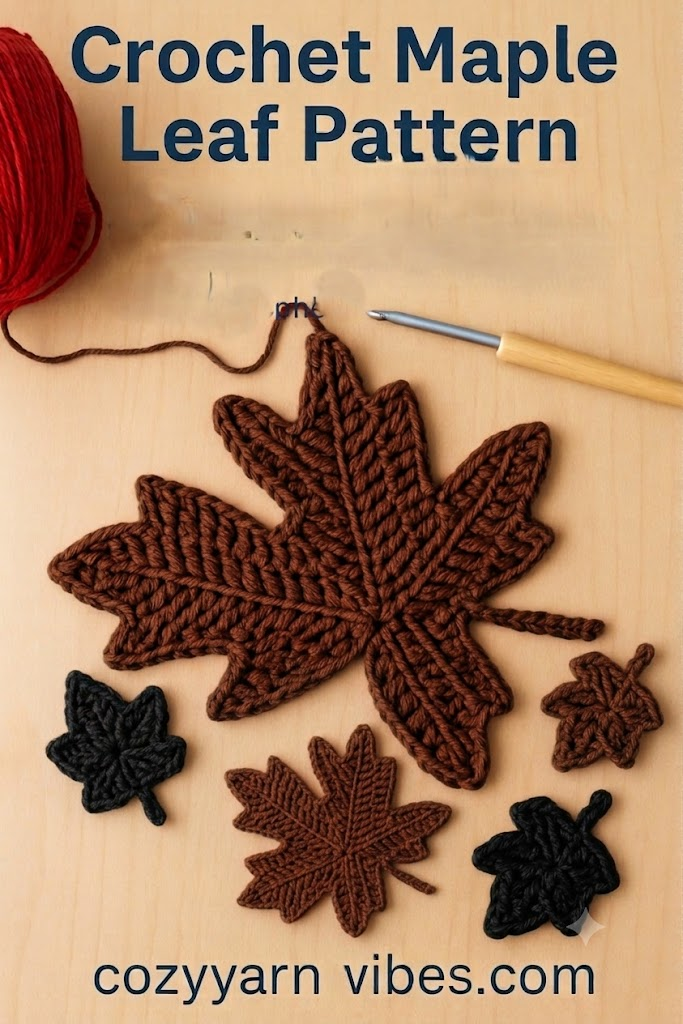
Easy Crochet Maple Leaf Tutorial
This Crochet Maple Leaf is made by building the shape around a small center stem. The leaf has several pointed sections that come together to create the familiar maple leaf shape.
You will begin with a few chain stitches to make the center. Then, you will work stitches around the chains to slowly create the different points of the leaf.
The pattern is small, so it does not take much yarn or time to complete. Once you understand the basic shape, you can easily make several leaves in different colors.
Why You’ll Love This Pattern
Simple and beginner-friendly
Uses only a small amount of yarn
Quick crochet project
Perfect for fall decorations
Easy to make in different colors
Great for using leftover yarn
Can be used for many different crafts
Skill Level
Beginner
If you know how to make chain stitches, single crochet, half double crochet, double crochet, and slip stitches, you can easily make this project.
Finished Size
Approximately:
Width: 4–5 inches
Length: 4–5 inches
The finished size can change depending on your yarn weight, hook size, and crochet tension. You can make a smaller leaf by using thinner yarn and a smaller hook, or a larger leaf by using thicker yarn and a larger hook.
Materials Needed
Yarn
Small amount of worsted-weight yarn (#4)
You only need a small amount of yarn for one leaf, so this is a great project for using leftover yarn.
Color
Red, orange, yellow, brown, or green
You can also use any color that matches your project.
Additional Supplies
4 mm (G) crochet hook
Yarn needle
Scissors
Stitch marker, if needed
Stitches & Abbreviations (US Terms)
ch = chain
sc = single crochet
hdc = half double crochet
dc = double crochet
tr = treble crochet
sl st = slip stitch
st = stitch
sp = space
rep = repeat
How to Make These Stitches
Chain (ch)
Make a slip knot and place it on your hook. Wrap the yarn over the hook and pull it through the loop. Repeat this process until you have the required number of chains.
Single Crochet (sc)
Insert the hook into the stitch. Yarn over and pull up a loop. Yarn over again and pull through both loops on the hook.
Half Double Crochet (hdc)
Yarn over and insert the hook into the stitch. Pull up a loop so that you have three loops on the hook. Yarn over and pull through all three loops.
Double Crochet (dc)
Yarn over and insert the hook into the stitch. Pull up a loop. Yarn over and pull through two loops. Yarn over again and pull through the last two loops.
Treble Crochet (tr)
Yarn over twice and insert the hook into the stitch. Pull up a loop. Yarn over and pull through two loops at a time until only one loop remains on the hook.
Slip Stitch (sl st)
Insert the hook into the stitch, yarn over, and pull the yarn through both the stitch and the loop on the hook. This makes a small and flat stitch.
Pattern Notes
This leaf is worked from the center outward. The center chain forms the main part of the leaf, while different crochet stitches are used to create the pointed sections.
Keep your stitches fairly loose so the leaf can spread out properly. Do not pull the stitches too tightly, as this can make the leaf curl.
You can also block the finished leaf lightly to help it keep its shape.
How to Make a Crochet Maple Leaf: Step-by-Step
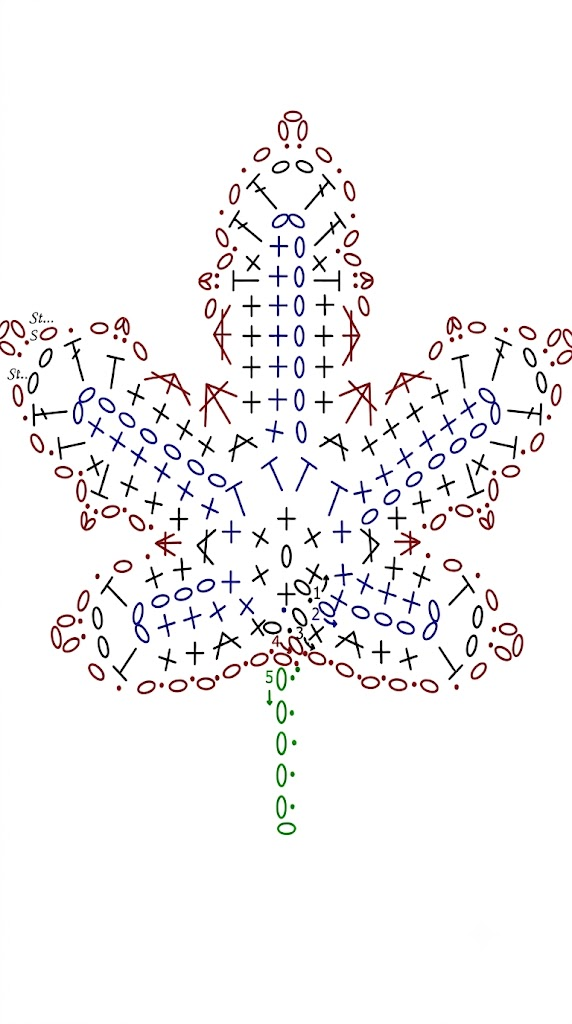
Round 1: Create the Center
- Chain 2.
- Work 6 sc into the 2nd chain from the hook.
- Join with a sl st to the first sc.
You now have 6 sc forming the small center ring.
Do not make a large magic ring here. The chart shows a very small central starting point.
Round 2: Create the Five Maple Leaf Lobes
In this round, each of the 6 center stitches is used to build the leaf structure. The five lobes are formed around the center, with the first and last lobes being the smallest.
Each lobe is worked around its designated center stitch.
1st Lobe
- Ch 1.
- Work sc in the 1st sc of Round 1.
- Ch 5.
- Starting in the 3rd ch from the hook, work sc in each chain across.
- Work sc in the same 1st sc of Round 1.
The two chains closest to the hook remain unworked, forming the small chain space at the tip of the lobe.
Important correction: The written stitch count supplied with the pattern says 5 sc, but these instructions actually produce 4 sc in this section. The chart and subsequent shaping support the written stitch placement rather than the incorrect count.
2nd Lobe
- Work sc in the 2nd sc of Round 1.
- Ch 8.
- Starting in the 3rd ch from the hook, work sc in each chain across.
- Work hdc in the same 2nd sc of Round 1.
This creates the longer lobe immediately to the left of the center.
3rd Lobe
- Work hdc in the 3rd sc of Round 1.
- Ch 9.
- Starting in the 3rd ch from the hook, work sc in each chain across.
- Work hdc in the same 3rd sc of Round 1.
This is the tall central lobe of the maple leaf.
4th Lobe
- Work hdc in the 4th sc of Round 1.
- Ch 8.
- Starting in the 3rd ch from the hook, work sc in each chain across.
- Work sc in the same 4th sc of Round 1.
This mirrors the 2nd lobe on the opposite side.
5th Lobe
- Work sc in the 5th sc of Round 1.
- Ch 5.
- Starting in the 3rd ch from the hook, work sc in each chain across.
- Work sc in the same 5th sc of Round 1.
This creates the small lobe on the opposite side.
- Finish Round 2 with a sl st in the last sc of Round 1.
At this stage, you should be able to clearly see the five points of the maple leaf. The center lobe should be the longest, the two side lobes slightly shorter, and the two outer lobes the smallest.
Round 3: Shape and Define the Leaf
Round 3 is where the leaf begins to take its recognizable maple-leaf shape. Work around each lobe, using taller stitches toward the tips and decreases between the lobes.
The decreases are significant because they pull the five sections together instead of leaving the leaf looking like five separate petals.
1st Lobe
- Ch 1.
- Work sc in the first sc.
- Working into the bottom of the foundation chains, work 2 sc in the next ch.
- Work sc in each of the next 2 chs.
- In the ch-2 space at the tip, work (hdc, ch 2, hdc).
- Work sc in each of the next 2 sc.
- Skip the next sc.
This shapes the first small point.
Join the 1st and 2nd Lobes
Work sc2tog using:
- the last sc of the 1st lobe, and
- the first sc of the 2nd lobe.
This creates the first decrease between the lobes.
2nd Lobe
Working into the bottom of the foundation chains:
- Skip the first ch.
- Work sc in each of the next 3 chs.
- Work (hdc, sc) in the next ch.
- Work hdc in the next ch.
- In the ch-2 space at the tip, work (dc, ch 2, dc).
- Work hdc in the next sc.
- Work sc in each of the next 4 sc.
- Skip the next sc.
The taller stitches around the tip make this lobe wider and more pointed.
Join the 2nd and 3rd Lobes
Work sc2tog using:
- the last hdc of the 2nd lobe, and
- the first hdc of the 3rd lobe.
3rd Lobe: Center Point
The third lobe is the tallest and forms the central point of the maple leaf.
Working into the bottom of the foundation chains:
- Skip the first ch.
- Work sc in each of the next 4 chs.
- Work (hdc, sc) in the next ch.
- Work dc in the next ch.
- In the ch-2 space at the tip, work (dc, ch 2, dc).
- Work dc in the next sc.
- Work (sc, hdc) in the next sc.
- Work sc in each of the next 4 sc.
- Skip the next sc.
The combination of sc, hdc, and dc gradually increases the height toward the central tip.
Join the 3rd and 4th Lobes
Work sc2tog using:
- the last hdc of the 3rd lobe, and
- the first hdc of the 4th lobe.
4th Lobe
Work into the bottom of the foundation chains:
- Skip the first ch.
- Work sc in each of the next 4 chs.
- Work hdc in the next ch.
- In the ch-2 space, work (dc, ch 2, dc).
- Work hdc in the next sc.
- Work (sc, hdc) in the next sc.
- Work sc in each of the next 3 sc.
- Skip the next sc.
Join the 4th and 5th Lobes
Work sc2tog using:
- the last sc of the 4th lobe, and
- the first sc of the 5th lobe.
Correction: The supplied instructions accidentally refer to the 3rd lobe at this point. It should be the last sc of the 4th lobe, since this decrease connects the 4th and 5th lobes.
5th Lobe
Work into the bottom of the foundation chains:
- Skip the next ch.
- Work sc in each of the next 2 chs.
- In the ch-2 space, work (hdc, ch 2, hdc).
- Work sc in each of the next 2 sc.
- Work 2 sc in the next sc.
- Work sc in the last sc.
Finish by working:
Ch 1, sl st into the beginning ch-1 of the round.
Round 3 is now complete.
At this point, the leaf should have five clearly defined points, with the central point being the tallest.
Round 4: Decorative Edging
Round 4 gives the maple leaf its delicate scalloped outline.
Instead of using regular sc around the entire leaf, this round alternates sl sts, chain spaces, and small chain arches. The sc3tog decreases between lobes pull the five points together.
1st Lobe
Starting at the first lobe:
- Ch 1, sl st in the next st.
- Repeat across the lobe until you reach the ch-2 space.
- In the ch-2 space, work ch 1, (sl st, ch 3, sl st).
- Continue with [ch 1, sl st in next st] twice.
First Inter-Lobe Decrease
Work sc3tog over:
- the last sc of the 1st lobe,
- the decrease between the 1st and 2nd lobes,
- the first sc of the 2nd lobe.
This sharply defines the indentation between the two lobes.
2nd Lobe
- Work [sl st in next st, ch 1] twice.
- In the next hdc, work (sl st, ch 2, sl st).
- Work [ch 1, sl st in next st] across the lobe until reaching the ch-2 space.
- Work ch 1, (sl st, ch 3, sl st) in the ch-2 space.
- Work ch 1, sl st in next dc.
- Work ch 1, (sl st, ch 2, sl st) in the next hdc.
- Work ch 1, sc3tog in the next 3 sts.
Between 2nd and 3rd Lobes
Work another sc3tog over:
- the last sc of the 2nd lobe,
- the decrease between the 2nd and 3rd lobes,
- the first sc of the 3rd lobe.
3rd Lobe: Central Point
The center lobe receives the largest decorative point.
- Work sc3tog in the next 3 sts.
- Ch 1, (sl st, ch 2, sl st) in the next hdc.
- Work [ch 1, sl st in next st] across toward the tip.
- At the ch-2 space, work ch 1, (sl st, ch 3, sl st).
- Work [ch 1, sl st in next st] 3 times.
- Work ch 1, (sl st, ch 2, sl st) in the next hdc.
- Ch 1, sc3tog in the next 3 sts.
Between 3rd and 4th Lobes
Work sc3tog over:
- the last sc of the 3rd lobe,
- the decrease between the 3rd and 4th lobes,
- the first sc of the 4th lobe.
4th Lobe
- Work sc3tog in the next 3 sts.
- Ch 1, (sl st, ch 2, sl st) in the next hdc.
- Ch 1, sl st in the next st.
- Ch 1, (sl st, ch 3, sl st) in the ch-2 space.
- Work [ch 1, sl st in next st] 3 times.
- Ch 1, (sl st, ch 2, sl st) in the next hdc.
- Work [ch 1, sl st in next st] twice.
Between 4th and 5th Lobes
Work sc3tog over:
- the last sc of the 4th lobe,
- the decrease between the 4th and 5th lobes,
- the first sc of the 5th lobe.
5th Lobe
- Work [sl st in next st, ch 1] twice.
- In the next ch-2 space, work (sl st, ch 3, sl st).
- Continue around the remaining stitches with [ch 1, sl st in next st].
- When you reach the beginning of the round, work ch 1.
- Finish with a sl st into the first ch of the round.
Fasten off and weave in the ends.
Finishing the Maple Leaf
After completing Round 4, gently spread the five lobes with your fingers. Do not pull aggressively because the small chain arches along the edge can stretch.
The finished shape should have:
- 1 tall central lobe
- 2 medium side lobes
- 2 smaller outer lobes
- A narrow center
- Small decorative chain arches around the perimeter
- Defined indentations between each lobe
The decreases between the lobes are what give the piece its characteristic maple-leaf silhouette.
Important Pattern Notes
There are two apparent errors in the supplied written instructions that are worth correcting when publishing the pattern:
- Round 2, 1st and 5th lobes: With ch 5, sc in 3rd ch from hook and each ch across, the chain section produces 3 sc, plus the sc worked into the center stitch. Therefore, the written count of 5 sc does not match the actual instructions. It should not be used as a guide for changing the stitches.
- Round 3, 4th-to-5th lobe decrease: The supplied text says to use the last sc from the 3rd lobe, but this should be the last sc from the 4th lobe. Otherwise, the decrease cannot correctly connect the 4th and 5th lobes.
Love Crochet Maple Leaves? Shop These Autumn Favorites!
Love the cozy charm of crochet maple leaves but don’t have time to make your own? You can still enjoy beautiful crochet-inspired fall decorations! From charming leaf coasters to thoughtful Thanksgiving gifts and hanging ornaments, these Amazon finds are perfect for adding a handmade touch to your autumn decor.

Handmade Crochet Coasters
Add a cozy handmade touch to your coffee table or autumn gatherings with these decorative crochet coasters. A lovely seasonal accent for your favorite tea or coffee moments.
Shop on Amazon ↗
Crochet Leaf Thanksgiving Gift
A sweet little crochet autumn leaf paired with a thankful message card. Perfect for gifting to friends, coworkers, or loved ones during the Thanksgiving season.
Shop on Amazon ↗
Crochet Thanksgiving Ornaments
Bring extra autumn charm into your home with these crochet hanging decorations. A festive touch for seasonal displays, Thanksgiving decorating, and cozy spaces.
Shop on Amazon ↗♡ Product selection, prices, and availability may change on Amazon.
Other Variations to Try
Make tiny leaves using thin yarn and a small crochet hook.
Use chunky yarn to make large leaves for home decorations.
Make several leaves in different autumn colors.
Add beads to the center for a decorative look.
Join several leaves together to create a fall garland.
Customization Ideas
Solid Color Leaf
Use one color of yarn to create a simple and classic leaf. Red, orange, yellow, and brown are especially beautiful for fall decorations.
Two-Color Leaf
Use one color for the main leaf and another color for the center stem. This creates a simple color contrast.
Multicolor Leaf
Use different colors for different sections of the leaf. This is a fun way to create a bright and colorful design.
Small Crochet Leaves
Use a smaller hook and thinner yarn to make tiny leaves. These are perfect for adding to bags, hats, scarves, cards, and other crochet projects.
Large Crochet Leaves
Use thicker yarn and a larger hook to make a larger leaf. Large leaves can be used as wall decorations, table décor, or part of a fall display.
Where to Use Your Crochet Maple Leaf
There are many ways to use your finished leaf. You can attach it to a crochet bag, sweater, hat, scarf, blanket, or pillow.
You can also make several leaves and join them together to create a fall garland. Place the leaves around your home, on a table, or near a window for a simple seasonal decoration.
Another idea is to use the leaf as a crochet appliqué. Simply sew it onto another crochet or fabric project.
You can even add a small loop to the top and use the leaf as a hanging ornament.
Care Instructions
If you use cotton or acrylic yarn, gently hand wash the finished leaf when needed.
Use mild soap and cool water. Do not twist or stretch the leaf while it is wet.
Press it gently between a clean towel to remove extra water. Lay it flat and allow it to dry completely.
Keep the leaf away from high heat because heat can change the shape of some yarn fibers.
Frequently Asked Questions
Is this pattern suitable for beginners?
Yes. This is a beginner-friendly project. You only need to know a few basic crochet stitches to make the leaf.
How much yarn do I need?
You only need a small amount of yarn for one leaf. It is a great project for using leftover yarn from other crochet projects.
Can I make the leaf smaller?
Yes. Use thinner yarn and a smaller crochet hook to make a smaller leaf. You can also reduce the number of stitches used to make the points.
Can I make a larger leaf?
Yes. Use thicker yarn and a larger crochet hook. You can also add more stitches to make the leaf wider and larger.
Which colors are best for a maple leaf?
Red, orange, yellow, and brown are perfect for an autumn maple leaf. You can also use green for a fresh spring or summer look.
What can I make with crochet leaves?
You can use them for garlands, appliqués, bags, hats, scarves, blankets, pillows, table decorations, ornaments, and many other handmade projects.
Conclusion
This Crochet Maple Leaf is a quick and simple project that is perfect for fall. It uses only a small amount of yarn and can be made in many different colors and sizes.
Whether you are making it as a decoration, adding it to another crochet project, or creating a fall garland, this little leaf is a fun project to try. Once you make one, you can easily make several more and create your own beautiful autumn collection.
Read our blog on Cozy Granny Square Shirt for more inspiring ideas.
I am an experienced crocheter and for the life of me, I cannot understand these instructions for the maple leaf pattern. Do you have a video you could share? I just need something to get me started. Thank you.
I made the leaf by the instructions first and they were confusing. Then I redid the leaf by following the written directions and the chart at the same time. That really helped and the leaf turned ok.
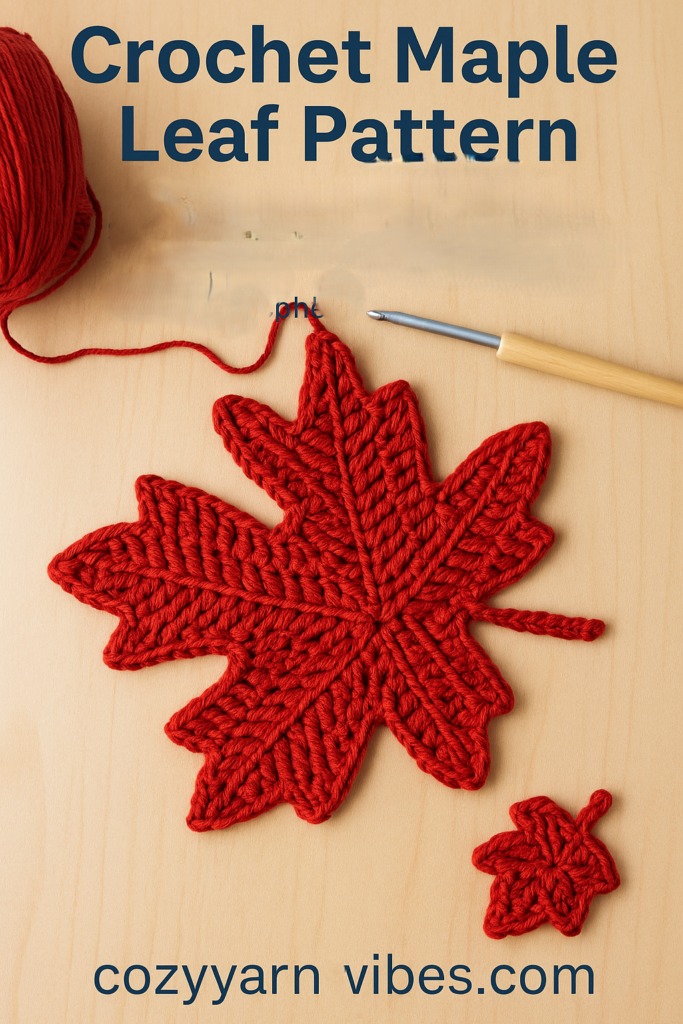
Very special note: This written pattern and chart is not for the finished works pictured shown on this site. These directions on this page are for a similar leaf. If you notice that the finished works are practically made up of double crochets.
I agŕee with Cathie. I have tried and tried. Does not come out at all.
Same here! It is somehow very
confusing. A Video or more detailed
instructions would be helpful.
It is a beautiful Maple leaf
This pattern makes something similar to the tiny leaf in the cover photo. I was able to produce a decent maple leaf. I’m afraid the large leaf may be AI generated. I’m about to give up on finding an actual pattern for that one. I substituted ch 4 for the ch 6 on the edges of the side lobes to make thema little tighter. Hope this helps someone!
The last round of this didnt really make any sense. Im pretty sure this pattern is AI with the kind of weirdness I spotted and the way its written. I made it my own thing. For those who want it, its below in my comment. (Im writing this from looking at my finished product, so there may be some tiny mistakes in terms if missing chains or slipstiches. Use your own creativity!)
Everything within [] is worked in the same stitch
Round 1 to 3 I followed the pattern (except for starting with a magic circle anyway 😂). Some of it didn’t make much sense (like doing hdc, sc, hdc in some places), but I stuck with it, because I didn’t want to frog. Those mistakes don’t matter too much for the final leaf.
The last round, Round 4 is very different:
Lobe 1: sc, dc, [dc, ch2, slst], sl, sc, hdc, [2dc, ch2, slst].
In ch2 space of lobe 1: slst, ch3, tr, ch3, slst in top of treble, tr, ch2, slst.
Top of lobe 1: Sc, sc2tog last stitch of lobe 1 and first stitch of lobe 2 (so skip the sc2tog from previous round).
Lobe 2: sc, hdc, [2dc, ch2, slst], sl, sc, [hdc, dc, ch2, slst in top of dc, ch, slst].
In ch2 space of lobe 2: slst, ch3, tr, ch3, slst in top of treble, tr, dc, ch2, slst.
Top of lobe 2: [slst, ch2, dc, ch2, slst in top of dc, dc, hdc], hdc, sc, slst, sc2tog last stitch of lobe 2 and first stitch of lobe 3 (so skip the sc2tog from previous round).
Lobe 3: slst, sc, hdc, [2dc, ch2, slst in top of dc], ch, slst, sc, [hdc, dc, ch2, slst in top of dc], ch1
In ch2 space of lobe 3: slst, ch3, tr, ch3, slst in top of treble, tr, ch3, slst
Other side of lobe 3: [ch2, dc, ch2, slst in top of dc, hdc], sc, slst, [ch2, dc, ch2, slst in top of dc, dc], hdc, sc, slst, sc2tog last stitch of lobe 3 and first stitch of lobe 4 (so skip the sc2tog from previous round).
Other side is mirrored.
Lobe 4: slst, sc, hdc, [hdc, 2dc, ch2, slst in top of dc, slst]
In ch2 space of lobe 4: slst, ch2, dc, tr, ch3, slst in top of treble, tr, ch3, slst.
Bottom of lobe 4: [slst, ch2, 2dc], hdc, sc, slst, ch2, dc, dc, sc.
Stem of leaf: slst to bottom of leaf, ch9 (or longer or shorting depending how long you want the stem to be). Hdc in 2nd chain from the hook, slst in each chain. Slst in bottom of the leaf.
Enjoy your hopefully better maple leaf! It won’t be that big, but mine turned out really pretty.