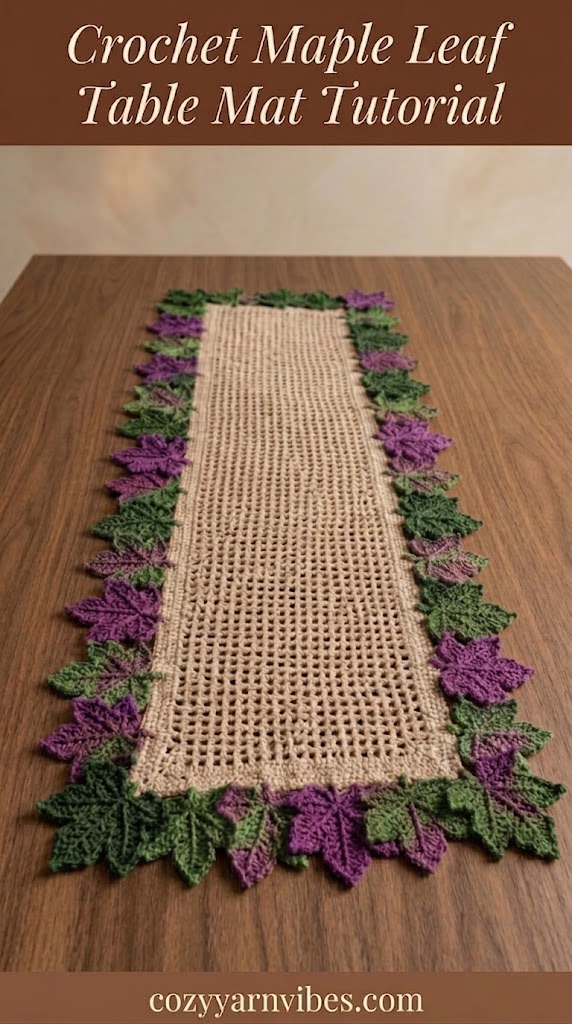
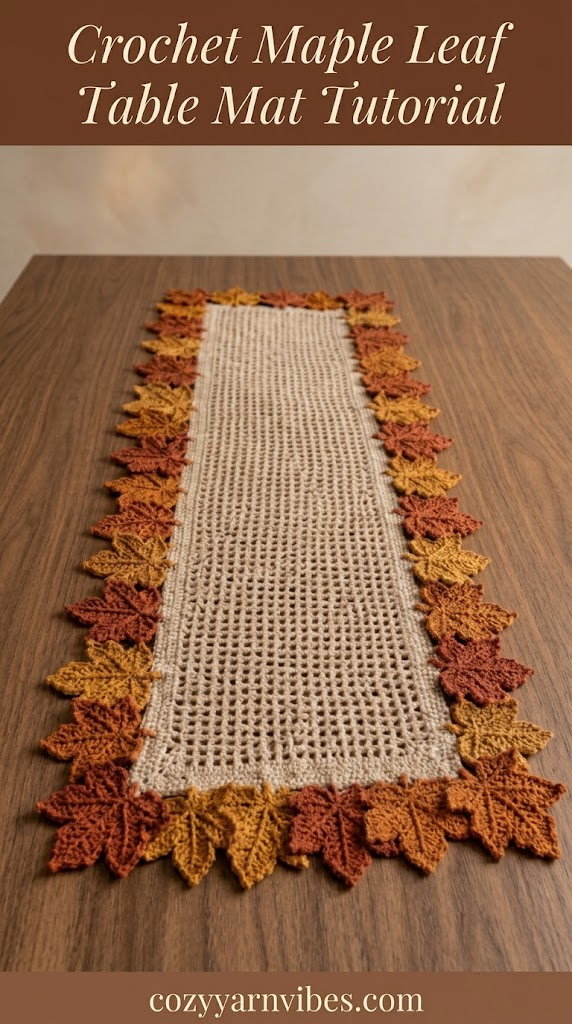
Bring the beauty of autumn to your dining table with this beautiful Maple Leaf Table Mat. This crochet project combines the warm colors and natural shapes of fall to create a lovely handmade decoration for your home.
The Maple Leaf Table Mat is a great project for crocheters who want to make something seasonal and practical. You can place it under a vase, candle, centerpiece, serving dish, or other fall decorations.
This pattern uses basic crochet stitches and is worked in rows, making it an enjoyable project for beginners who are comfortable with chain, single crochet, half double crochet, and double crochet stitches.
Easy Maple Leaf Table Mat
This Maple Leaf Table Mat is designed to give your fall table a warm handmade look. The mat can be crocheted in traditional autumn shades such as rust, orange, mustard, brown, or deep red.
The project starts from the center and gradually grows outward. As you work the rows, the mat develops its leaf-inspired shape and decorative edges.
You can make one mat for a small centerpiece or crochet several matching mats to decorate your dining table. Using different fall colors for each one can also create a beautiful seasonal arrangement.
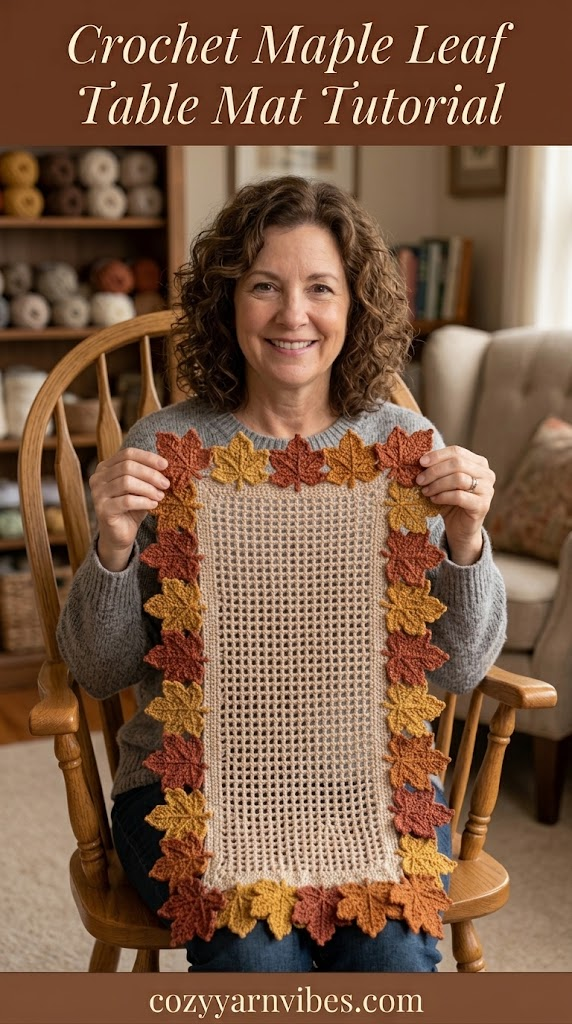
Why You’ll Love This Pattern
Beautiful maple leaf-inspired design
Perfect for fall and Thanksgiving decorations
Beginner-friendly crochet construction
Uses basic crochet stitches
Easy to customize with different colors
Great for dining tables and coffee tables
Can be used as a decorative centerpiece
Makes a thoughtful handmade fall gift
Skill Level
Beginner to Easy Intermediate
If you are comfortable making chain, single crochet, half double crochet, double crochet, and slip stitches, you should be able to follow this Maple Leaf Table Mat pattern.
Finished Size
Approximately:
Length: 36 inches
Width: 14 inches
The finished size may vary depending on your yarn, crochet hook, and tension.
You can make the Maple Leaf Table Mat smaller or larger by adding or removing rows before beginning the decorative leaf sections.
Materials Needed
Yarn
• Medium weight cotton yarn (#4)
• Approximately 200–300 yards
Cotton yarn is a good choice for a table mat because it is durable, washable, and holds its shape well. You can also use another yarn suitable for home décor projects.
Color
• Rust, orange, mustard, golden yellow, brown, or deep red
For a traditional fall look, choose a warm maple leaf color. You can also use green yarn for the leaves or combine several autumn shades.
Additional Supplies
6 mm crochet hook
Yarn needle
Scissors
Measuring tape
Stitches & Abbreviations (US Terms)
ch = chain
sc = single crochet
hdc = half double crochet
dc = double crochet
sl st = slip stitch
st = stitch
sp = space
rep = repeat
BLO = back loop only
How to Make These Stitches
Chain (ch)
Make a slip knot on your hook. Yarn over and pull the yarn through the loop on your hook. Continue making chains until you have the required number.
Single Crochet (sc)
Insert your hook into the indicated stitch and pull up a loop. You will now have two loops on the hook. Yarn over and pull through both loops to complete the single crochet.
Half Double Crochet (hdc)
Yarn over and insert your hook into the stitch. Pull up a loop so you have three loops on the hook. Yarn over once more and pull through all three loops.
Double Crochet (dc)
Yarn over and insert your hook into the stitch. Pull up a loop. Yarn over and pull through two loops, then yarn over again and pull through the remaining two loops.
Slip Stitch (sl st)
Insert your hook into the indicated stitch, yarn over, and pull the yarn through both the stitch and the loop already on your hook.
Pattern Notes for Maple Leaf Table Mat
Keep your stitches even as you work around the mat. If the edges begin to curl, check your stitch count and make sure you are working the increases correctly.
The maple leaf details are created around the outer section of the mat. These decorative sections give the finished piece its characteristic fall leaf appearance.
You can adjust the final size by changing the number of rows or by using a different yarn and hook size.
Maple Leaf Table Mat: Step-by-Step
Step 1: Make the Foundation Chain
Using your main color yarn and a G-6 crochet hook, make 128 chains.
This foundation chain will determine the length of your center panel. Keep your chain stitches even and avoid making them too tight.
Step 2: Work Row 1
For the first row, make 1 double crochet (dc) into the 4th chain from the hook.
The first 3 chains count as your first double crochet.
Next, chain 1, skip the next chain, and make 1 double crochet into the following chain.
Continue repeating this pattern across the entire foundation chain:
Ch 1, skip 1 chain, dc in the next chain.
Keep repeating until you reach the end of the row.
You should have 64 double crochet posts with 63 chain-1 spaces between them.
Turn your work to begin Row 2.
Step 3: Work Row 2
For Row 2, begin with ch 4. This counts as 1 double crochet and 1 chain.
Turn your work.
Skip the first chain-1 space. Then make 1 dc into the next double crochet.
Next, ch 1, skip the next chain-1 space, and make 1 dc into the following double crochet.
Continue repeating this pattern across the row:
Ch 1, skip 1 ch-space, dc in the next dc.
At the end of the row, make the final double crochet into the top of the turning chain from the previous row.
Turn your work.
Step 4: Repeat the Mesh Rows
For Rows 3 through 55, simply repeat Row 2.
Start each row with ch 4, which counts as a double crochet and chain 1. Continue working the same mesh pattern across the row.
Remember to:
- Skip each chain-1 space.
- Work 1 dc into each double crochet from the previous row.
- Use ch 1 between the double crochet stitches.
- Work the final dc into the top of the turning chain.
- Turn your work at the end of every row.
Continue until you have completed 55 rows.
Size Check
After completing Row 55, your center mesh panel should measure approximately 8 inches wide and 28 inches long after blocking.
Before blocking, the panel should be around 7.5 to 8.5 inches wide. If it is noticeably narrower or wider, check your crochet tension and gauge before continuing.
Step 5: Add the Border
Do not fasten off your main color yarn after completing Row 55.
Now you will add a single crochet border around all four sides of the mesh panel. This creates a neat edge and gives you a sturdy base for attaching the maple leaves.
Begin with ch 1. Do not turn your work.
Along the Top Edge
Work 1 sc into each double crochet post and 1 sc into each chain-1 space across the top edge.
You should have 127 sc along this side.
First Corner
At the corner, work 3 sc into the corner stitch.
The middle stitch of these 3 sc will mark the center of the corner.
Along the Right Side
Now work down the long side of the panel.
Work 2 sc into the side of each completed row. Since the panel has 55 rows, you will work 110 sc along this side.
Second Corner
At the next corner, work 3 sc into the corner stitch.
Along the Bottom Edge
Continue across the bottom edge, working 1 sc into each foundation chain.
You should have 127 sc along this side.
Third Corner
Work 3 sc into the next corner stitch.
Along the Left Side
Work 2 sc along the side of each row, giving you another 110 sc along this long edge.
Final Corner
At the last corner, work 3 sc into the corner stitch.
Finally, slip stitch to the first single crochet to join the border.
Fasten off the main color yarn and weave in the loose end with a yarn needle.
Step 6: Mark the Corners
Before adding the maple leaves, place a stitch marker in the middle stitch of each 3-sc corner group.
You should have four marked corner stitches, one at each corner of the center panel.
These markers make it easier to identify the corners when you begin attaching the maple leaves.
Your main center panel for the Maple Leaf Table Mat is now complete. The finished mesh creates the rectangular center shown in the design, while the maple leaf pieces can be added around the outer edges using the separate leaf pattern.
Crochet Maple Leaf Pattern
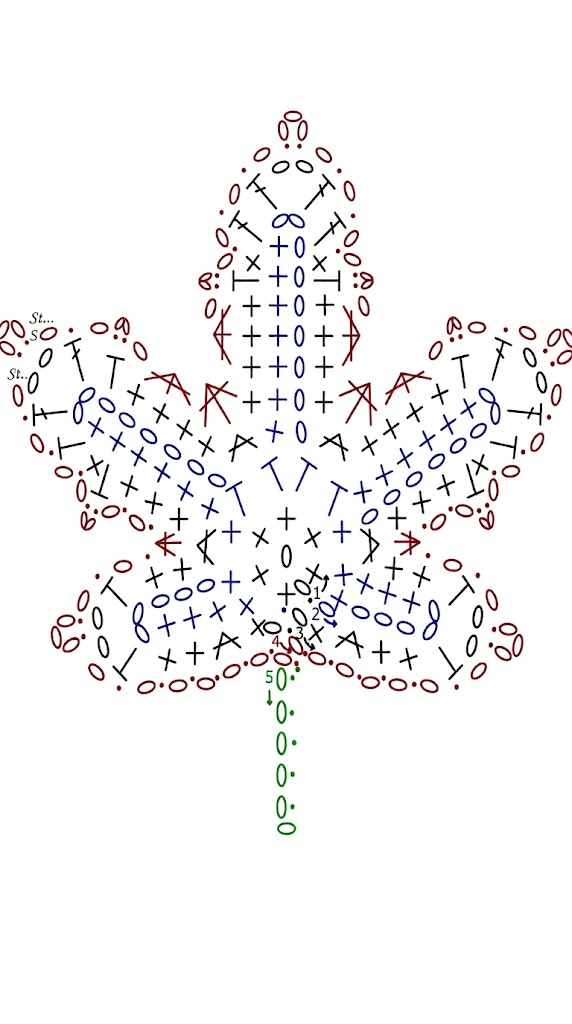
This crochet maple leaf is made in four rounds. The center starts with a small ring, followed by five leaf lobes. Round 3 shapes the lobes into a recognizable maple leaf, while Round 4 adds the decorative scalloped edging.
Round 1: Create the Center
- Chain 2.
- Work 6 sc into the 2nd chain from the hook.
- Join with a sl st to the first sc.
You now have 6 sc forming the small center ring. Do not make a large magic ring.
Round 2: Create the Five Maple Leaf Lobes
Each of the 6 center stitches is used to build the five lobes. The center lobe is the tallest, the two side lobes are slightly shorter, and the two outer lobes are the smallest.
1st Lobe
- Ch 1.
- Work sc in the 1st sc of Round 1.
- Ch 5.
- Starting in the 3rd ch from the hook, work sc in each chain across.
- Work sc in the same 1st sc of Round 1.
The two chains closest to the hook remain unworked, forming the small chain space at the tip.
Important correction: The supplied written count says 5 sc, but these instructions actually produce 4 sc in this section. The chart and following shaping support the written stitch placement rather than the incorrect count.
2nd Lobe
- Work sc in the 2nd sc of Round 1.
- Ch 8.
- Starting in the 3rd ch from the hook, work sc in each chain across.
- Work hdc in the same 2nd sc of Round 1.
3rd Lobe
- Work hdc in the 3rd sc of Round 1.
- Ch 9.
- Starting in the 3rd ch from the hook, work sc in each chain across.
- Work hdc in the same 3rd sc of Round 1.
This creates the tall central lobe.
4th Lobe
- Work hdc in the 4th sc of Round 1.
- Ch 8.
- Starting in the 3rd ch from the hook, work sc in each chain across.
- Work sc in the same 4th sc of Round 1.
This mirrors the 2nd lobe.
5th Lobe
- Work sc in the 5th sc of Round 1.
- Ch 5.
- Starting in the 3rd ch from the hook, work sc in each chain across.
- Work sc in the same 5th sc of Round 1.
- Finish Round 2 with a sl st in the last sc of Round 1.
You should now see five maple leaf points, with the center lobe being the tallest.
Round 3: Shape the Maple Leaf
Round 3 gives the leaf its recognizable shape. Work around each lobe using sc, hdc, and dc, with taller stitches toward the points. The sc2tog decreases between the lobes pull the sections together and create the leaf’s indentations.
1st Lobe
- Ch 1.
- Work sc in the first sc.
- Working into the bottom of the foundation chains, work 2 sc in the next ch.
- Work sc in each of the next 2 chs.
- In the ch-2 space at the tip, work (hdc, ch 2, hdc).
- Work sc in each of the next 2 sc.
- Skip the next sc.
Join the 1st and 2nd lobes with sc2tog, using the last sc of the 1st lobe and the first sc of the 2nd lobe.
2nd Lobe
Working into the bottom of the foundation chains:
- Skip the first ch.
- Work sc in each of the next 3 chs.
- Work (hdc, sc) in the next ch.
- Work hdc in the next ch.
- In the ch-2 space at the tip, work (dc, ch 2, dc).
- Work hdc in the next sc.
- Work sc in each of the next 4 sc.
- Skip the next sc.
Join the 2nd and 3rd lobes with sc2tog, using the last hdc of the 2nd lobe and the first hdc of the 3rd lobe.
3rd Lobe: Center Point
The third lobe forms the tallest center point.
- Skip the first ch.
- Work sc in each of the next 4 chs.
- Work (hdc, sc) in the next ch.
- Work dc in the next ch.
- In the ch-2 space at the tip, work (dc, ch 2, dc).
- Work dc in the next sc.
- Work (sc, hdc) in the next sc.
- Work sc in each of the next 4 sc.
- Skip the next sc.
Join the 3rd and 4th lobes with sc2tog, using the last hdc of the 3rd lobe and the first hdc of the 4th lobe.
4th Lobe
- Skip the first ch.
- Work sc in each of the next 4 chs.
- Work hdc in the next ch.
- In the ch-2 space, work (dc, ch 2, dc).
- Work hdc in the next sc.
- Work (sc, hdc) in the next sc.
- Work sc in each of the next 3 sc.
- Skip the next sc.
Join the 4th and 5th lobes with sc2tog, using the last sc of the 4th lobe and the first sc of the 5th lobe.
Correction: The supplied instructions accidentally refer to the 3rd lobe here. It should be the last sc of the 4th lobe.
5th Lobe
- Skip the next ch.
- Work sc in each of the next 2 chs.
- In the ch-2 space, work (hdc, ch 2, hdc).
- Work sc in each of the next 2 sc.
- Work 2 sc in the next sc.
- Work sc in the last sc.
- Finish with Ch 1, sl st into the beginning ch-1 of the round.
Round 3 is complete. The leaf should now have five defined points, with the center point being the tallest.
Round 4: Decorative Edging
Round 4 adds the delicate scalloped edge. It uses slip stitches, chain spaces, small chain arches, and sc3tog decreases between the lobes.
1st Lobe
- Ch 1, sl st in the next st.
- Repeat across the lobe until you reach the ch-2 space.
- In the ch-2 space, work ch 1, (sl st, ch 3, sl st).
- Continue with [ch 1, sl st in next st] twice.
Work sc3tog over the last sc of the 1st lobe, the decrease between the 1st and 2nd lobes, and the first sc of the 2nd lobe.
2nd Lobe
- Work [sl st in next st, ch 1] twice.
- In the next hdc, work (sl st, ch 2, sl st).
- Work [ch 1, sl st in next st] across the lobe to the ch-2 space.
- In the ch-2 space, work ch 1, (sl st, ch 3, sl st).
- Work ch 1, sl st in next dc.
- Work ch 1, (sl st, ch 2, sl st) in the next hdc.
- Work ch 1, sc3tog in the next 3 sts.
Between the 2nd and 3rd lobes, work sc3tog over the last sc of the 2nd lobe, the decrease between the 2nd and 3rd lobes, and the first sc of the 3rd lobe.
3rd Lobe: Central Point
- Work sc3tog in the next 3 sts.
- Ch 1, (sl st, ch 2, sl st) in the next hdc.
- Work [ch 1, sl st in next st] toward the tip.
- In the ch-2 space, work ch 1, (sl st, ch 3, sl st).
- Work [ch 1, sl st in next st] 3 times.
- Work ch 1, (sl st, ch 2, sl st) in the next hdc.
- Ch 1, sc3tog in the next 3 sts.
Between the 3rd and 4th lobes, work sc3tog over the last sc of the 3rd lobe, the decrease between the 3rd and 4th lobes, and the first sc of the 4th lobe.
4th Lobe
- Work sc3tog in the next 3 sts.
- Ch 1, (sl st, ch 2, sl st) in the next hdc.
- Ch 1, sl st in the next st.
- Ch 1, (sl st, ch 3, sl st) in the ch-2 space.
- Work [ch 1, sl st in next st] 3 times.
- Ch 1, (sl st, ch 2, sl st) in the next hdc.
- Work [ch 1, sl st in next st] twice.
Between the 4th and 5th lobes, work sc3tog over the last sc of the 4th lobe, the decrease between the 4th and 5th lobes, and the first sc of the 5th lobe.
5th Lobe
- Work [sl st in next st, ch 1] twice.
- In the next ch-2 space, work (sl st, ch 3, sl st).
- Continue around the remaining stitches with [ch 1, sl st in next st].
- When you reach the beginning of the round, work ch 1.
- Finish with a sl st into the first ch of the round.
Fasten off and weave in the ends.
Finishing the Maple Leaf
Gently spread the five lobes with your fingers to define the shape. The finished leaf should have:
- 1 tall central lobe
- 2 medium side lobes
- 2 smaller outer lobes
- A narrow center
- Small decorative chain arches around the edge
- Defined indentations between the lobes
The decreases between the lobes help create the characteristic maple leaf shape.
Total Maple Leaves For The Mat
Repeat the same pattern for making all the maple leaves. the total number of maple leaves depends on the size of your table mat, however, if you are making a mat exactly similar to the images, you need to make 40-50 maple leaves.
Joining The Maple Leaves
Arrange the finished maple leaves around the outer edge of the table mat, alternating colors and allowing them to slightly overlap. Position each leaf with its base just underneath the mat’s edge, then use a yarn needle and matching yarn to sew through the leaf’s base and the nearest stitches of the mat. Make small, neat stitches to keep the leaf securely attached without sewing through the entire leaf.
Continue attaching the remaining leaves evenly around the mat, keeping their pointed ends facing outward. Once all the leaves are attached, knot the yarn on the back and weave in the ends. Gently adjust the leaves so they sit neatly and create a full, layered autumn border.
Important Pattern Notes
There are two corrections in the supplied instructions:
- For the 1st and 5th lobes of Round 2, the written count of 5 sc does not match the actual stitch placement. The instructions produce 4 sc in this section.
- For the 4th-to-5th lobe decrease in Round 3, use the last sc of the 4th lobe, not the 3rd lobe, to correctly connect the two lobes.
Customization Ideas
Traditional Autumn Colors
Use rust, orange, mustard, brown, and deep red to create a traditional fall color palette. You can use one color for the entire mat or change colors between the center and leaf border.
Multicolor Maple Leaves
Crochet each leaf section in a different fall shade. This gives the mat a colorful appearance that resembles fallen autumn leaves.
Solid Color Mat
For a simpler and more modern look, crochet the entire Maple Leaf Table Mat in one color. Cream, beige, burnt orange, or dark brown can create an elegant seasonal decoration.
Larger Table Mat
Continue adding rows to the center before making the leaf border if you want a larger mat. Remember to keep the increases evenly spaced so the mat remains flat.
Smaller Decorative Mat
For a smaller version, stop adding center rows earlier and begin the leaf border sooner. A small version works beautifully underneath candles, small vases, or decorative bowls.
Styling Ideas
Place the Maple Leaf Table Mat underneath a fall centerpiece to create a cozy seasonal display. A vase filled with dried flowers, small pumpkins, candles, or pinecones can look beautiful in the center.
You can also use several mats across a dining table. Place one underneath each centerpiece or serving dish to create a coordinated autumn arrangement.
For a Thanksgiving table, combine the mat with warm-colored napkins, wooden decorations, pumpkins, and other natural fall elements.
The Maple Leaf Table Mat can also be used on a coffee table, side table, entryway table, or kitchen counter.
Care Instructions
Wash your crochet table mat according to the instructions recommended for your yarn.
If you are using cotton yarn, gently hand wash the mat in cool or lukewarm water with a mild detergent.
Do not twist or wring the mat because this can stretch the stitches and change its shape.
After washing, gently squeeze out excess water and lay the mat flat on a clean towel. Carefully reshape the maple leaf points while the mat is still damp and allow it to dry completely.
Frequently Asked Questions
Is this Maple Leaf Table Mat suitable for beginners?
Yes. The project uses basic crochet stitches and simple increases. Beginners who are comfortable with sc, hdc, dc, and slip stitches can practice these stitches while making a seasonal home decoration.
What yarn works best for a Maple Leaf Table Mat?
Medium-weight cotton yarn is a good choice because it is durable, washable, and holds its shape well. You can also choose another sturdy yarn suitable for home décor.
Can I make the table mat larger?
Yes. Add more rows to the center before starting the maple leaf border. Make sure your increases remain evenly spaced so the mat stays flat.
Can I use multiple colors?
Of course. Fall colors such as orange, rust, mustard, brown, burgundy, and golden yellow work beautifully for this project. You can also use a different color for each maple leaf section.
Can I make this mat smaller?
Yes. Simply work fewer rows in the center before adding the decorative border. This will create a smaller version suitable for smaller tables or decorative displays.
Can I use the Maple Leaf Table Mat for Thanksgiving?
Yes. The maple leaf design and warm autumn colors make it a lovely decoration for a Thanksgiving table. Place it underneath a centerpiece, candle arrangement, vase, or serving dish.
Conclusion
The Maple Leaf Table Mat is a beautiful crochet project for bringing the colors and feeling of fall into your home. Its leaf-inspired details and warm seasonal colors make it a lovely addition to your dining table or other living spaces.
Whether you make one Maple Leaf Table Mat for a small centerpiece or several for a complete table arrangement, you can easily customize the size, colors, and border to match your fall décor.
Choose your favorite autumn yarn colors, pick up your crochet hook, and start creating this beautiful Maple Leaf Table Mat for the fall season.
For more interesting maple leaf designs, read our blog post on Maple Leaf Garland.