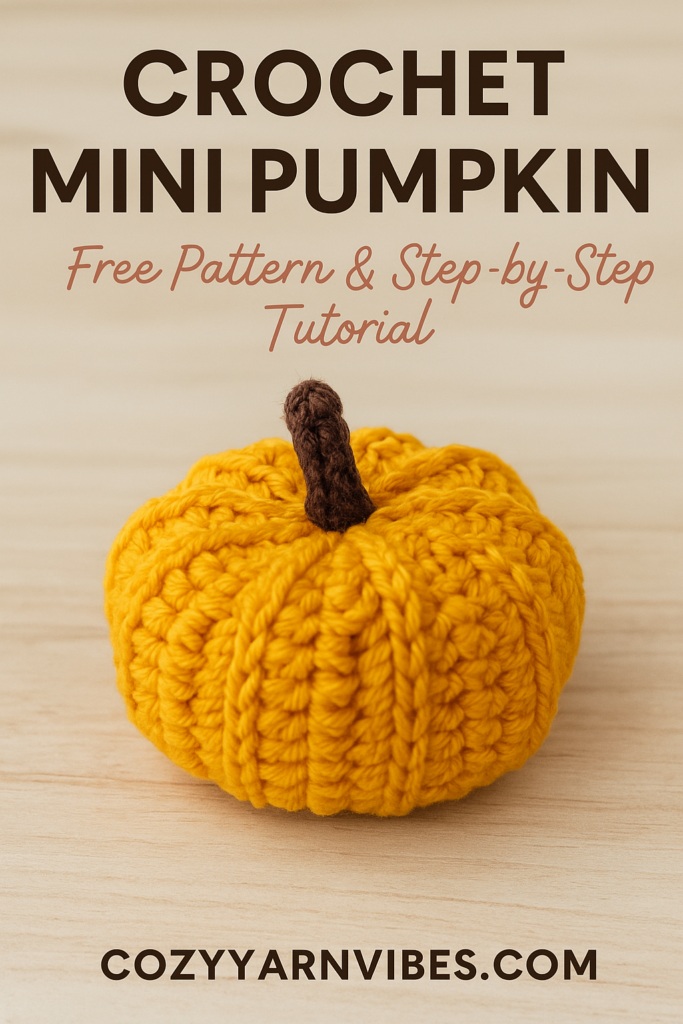
Crochet Mini Pumpkin Pattern (Step-by-Step)
These cute mini crochet pumpkins are the perfect seasonal decoration for fall, Thanksgiving, or Halloween. They’re beginner-friendly and quick to make, ideal for coasters, table décor, or even garlands. Let’s dive into the detailed pattern!
🧶 Materials Needed
- Orange yarn (for the pumpkin body)
- Brown yarn (for the stalk)
- 3.5–4 mm crochet hook
- Yarn needle
- Fiberfill stuffing
Crochetta Crochet Kit for Beginners, Crochet Kit Step-by-Step Video Tutorials, Crochet Starter Kit Learn to Crochet Kits for Adults Beginners, Jumbo 3 Colorful Octopus (40%+ Yarn Content)
$26.99 (as of March 3, 2026 10:19 GMT +00:00 – More infoProduct prices and availability are accurate as of the date/time indicated and are subject to change. Any price and availability information displayed on [relevant Amazon Site(s), as applicable] at the time of purchase will apply to the purchase of this product.)
The Woobles Beginners Crochet Kit with Easy Peasy Yarn as seen on Shark Tank – with Step-by-Step Video Tutorials – Snoopy
$39.96 (as of March 3, 2026 10:19 GMT +00:00 – More infoProduct prices and availability are accurate as of the date/time indicated and are subject to change. Any price and availability information displayed on [relevant Amazon Site(s), as applicable] at the time of purchase will apply to the purchase of this product.)
The Woobles Crochet Kit for Beginners – Easy Arts and Crafts Knitting & Crochet Animals Kit As Seen On Shark Tank – Pierre The Penguin
$29.96 (as of March 3, 2026 10:19 GMT +00:00 – More infoProduct prices and availability are accurate as of the date/time indicated and are subject to change. Any price and availability information displayed on [relevant Amazon Site(s), as applicable] at the time of purchase will apply to the purchase of this product.)
Gipony Crochet Kit for Beginners, Crochet Animal Kits,Crocheting Kit for Starters with Step-by-Step Video Tutorials, Beginner Crochet Kit for Adults (Axolotl 1Pack)
(as of March 3, 2026 10:19 GMT +00:00 – More infoProduct prices and availability are accurate as of the date/time indicated and are subject to change. Any price and availability information displayed on [relevant Amazon Site(s), as applicable] at the time of purchase will apply to the purchase of this product.)✨ Pumpkin Body Pattern
- Foundation:
Ch 13 (or adjust length depending on the size of pumpkin you want). - Row 1:
Work 1 sc in the 2nd ch from hook. Continue working sc across. Ch 1, turn. - Row 2 onward:
Work sc in back loops only (BLO) across the row. This creates ribbing.
Repeat until you have a rectangle long enough to wrap around and form a tube (about 20–22 rows for small pumpkins). - Form the Pumpkin Shape:
- Fold the rectangle in half lengthwise.
- Use the yarn needle to sew the two short sides together to create a tube.
- With yarn still attached, weave in and out along the bottom edge of the tube. Pull tightly to close.
- Stuff & Shape:
- Turn inside out so seam is hidden.
- Stuff firmly with fiberfill.
- Weave the yarn along the top edge and pull tight to close. Secure with stitches.
🍂 Adding the Stalk
- With brown yarn, ch 6.
- Hdc in 2nd ch from hook and across. (5 hdc total).
- Fasten off, leaving a tail.
- Sew the stalk securely on top of the pumpkin.

🎃 Extra Tip for Realistic Look
- After finishing, take a long piece of orange yarn.
- Insert through the center top, push through bottom, and pull tightly.
- Wrap yarn around the pumpkin a few times (like making “segments”) to give it a realistic pumpkin shape.
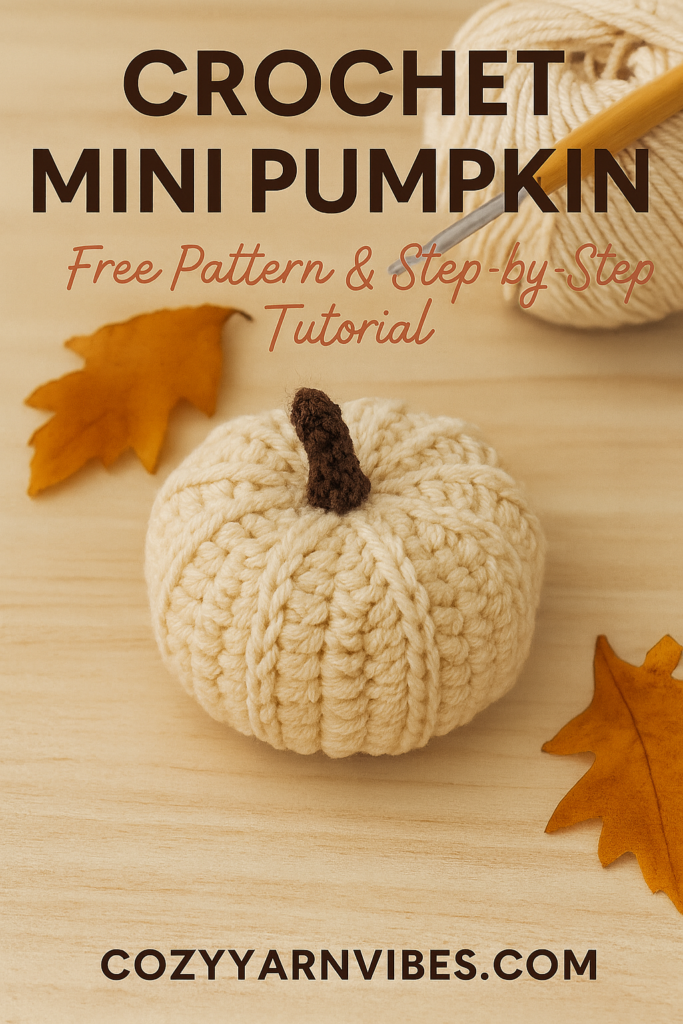
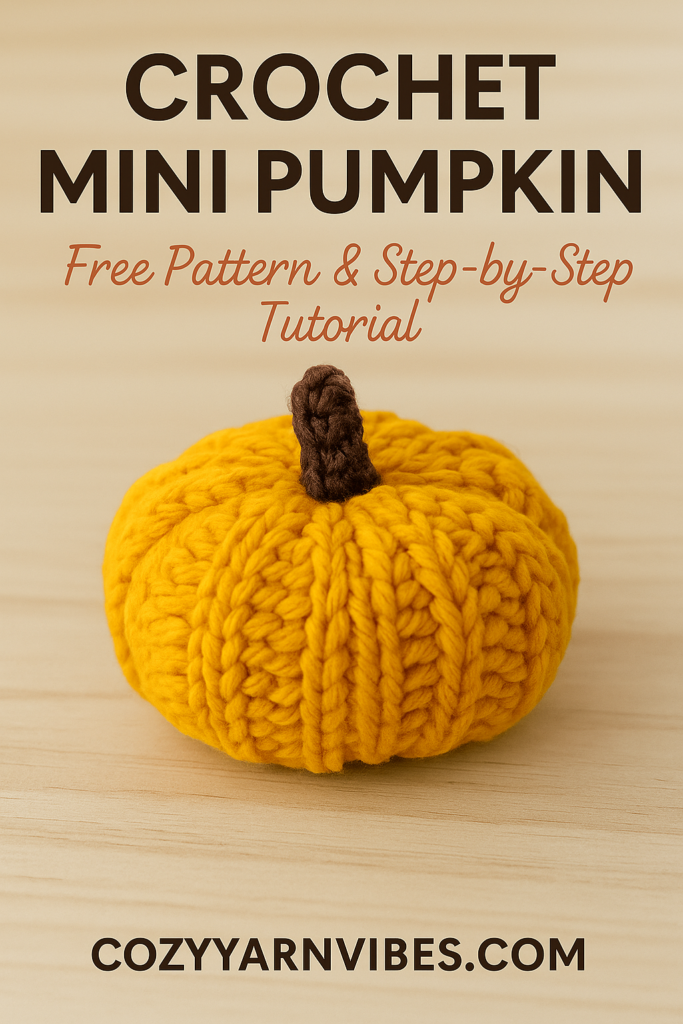
✅ Finished Size
- About 3–4 inches across (depending on yarn and hook size).
Waking Up Again: A Journey of Grief & Gratitude
$9.99 (as of March 3, 2026 10:17 GMT +00:00 – More infoProduct prices and availability are accurate as of the date/time indicated and are subject to change. Any price and availability information displayed on [relevant Amazon Site(s), as applicable] at the time of purchase will apply to the purchase of this product.)