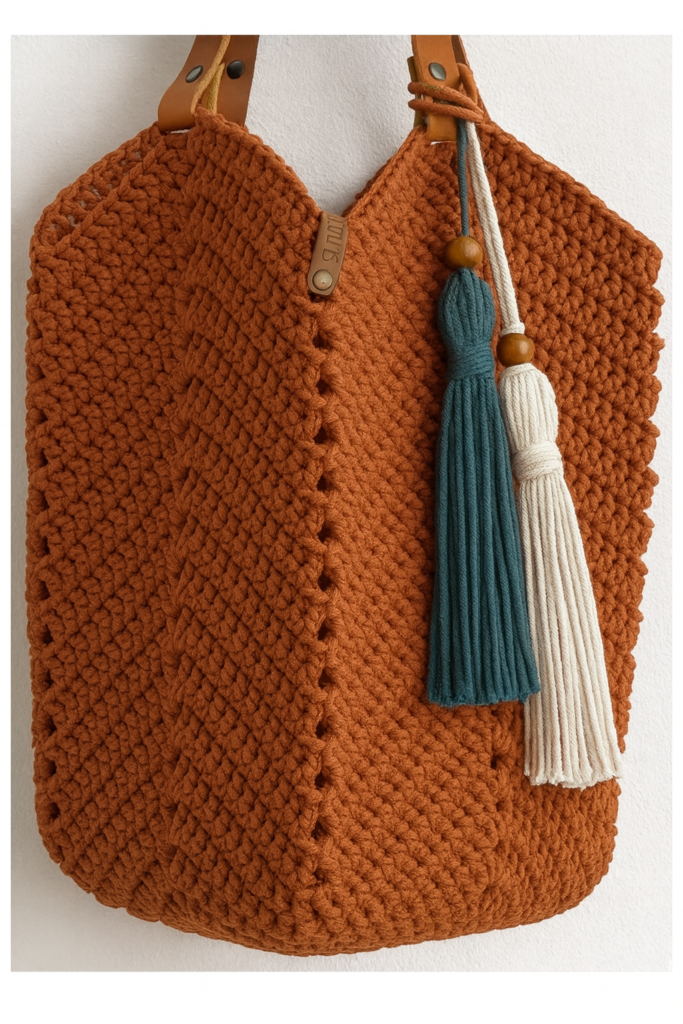
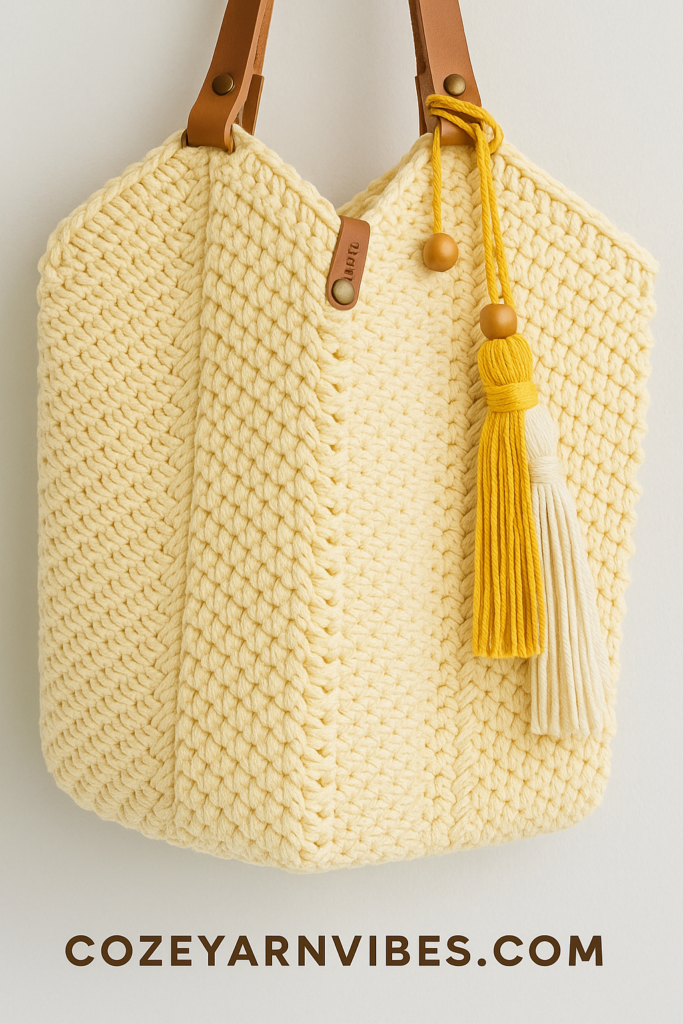
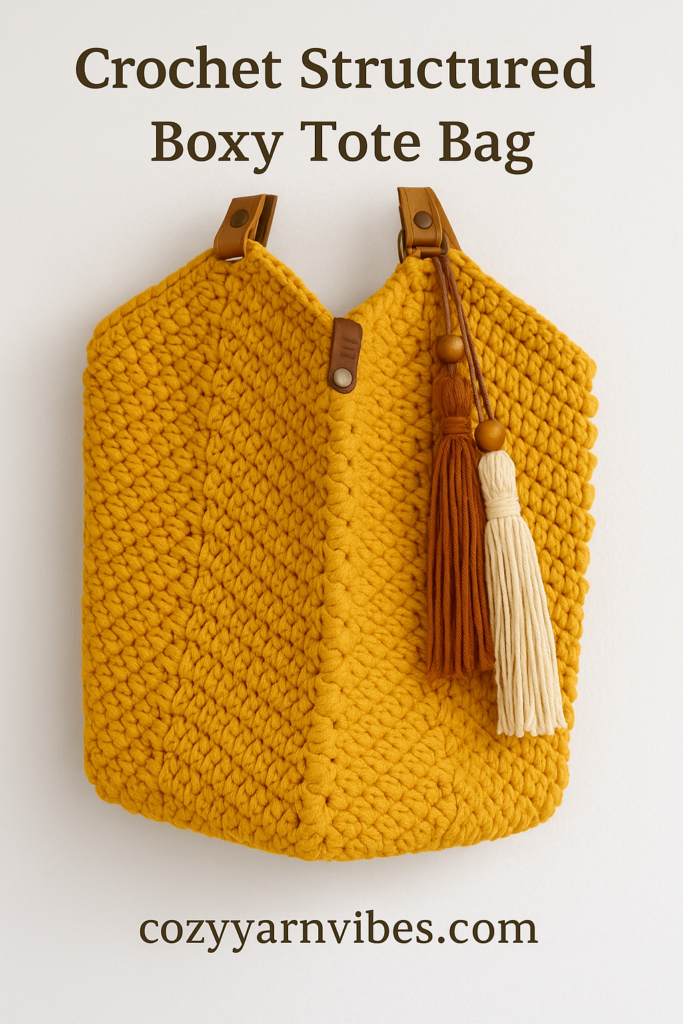
Crochet Structured Boxy Tote Bag – Free Pattern & Step-by-Step Guide
Looking for a sturdy, stylish, and practical bag that can carry your essentials in style? This Crochet Structured Boxy Tote Bag is the perfect project! With its square base, strong vertical walls, and chic tassel detail, this bag is both fashionable and functional.
The best part? It’s made using one continuous panel from a chart pattern, so you’ll have minimal seams and maximum durability.
🧵 Materials
- Yarn: T-shirt yarn, cord yarn, or macramé cord (~500–600g depending on size)
- Hook: 6.0 mm – 8.0 mm crochet hook (adjust for tension)
- Handles: Leather or crocheted handles (two, approx. 40–50 cm)
- Scissors & Yarn needle
- Optional: Bag lining fabric & magnetic snap closure
- Accessories: Large tassel for decoration
Mnuizu Crochet Kit for Beginners, Animal Crochet kit for Starters with Instructional and Step-by-Step Video Tutorials, Complete Crochet Accessories, Crochet Kit for Adults,Easy Starter Present(Fox)
$6.99 (as of July 18, 2026 18:04 GMT +00:00 – More infoProduct prices and availability are accurate as of the date/time indicated and are subject to change. Any price and availability information displayed on [relevant Amazon Site(s), as applicable] at the time of purchase will apply to the purchase of this product.)
Aeelike Crochet Kit for Beginners Young and Old, First Crochet Kit for Adults Include 23pcs Crochet Hooks, 655 Yards Yarn Set for Crocheting, Instruction, Bag, Crochet Accessories and Supplies, Navy
$19.99 (as of July 18, 2026 18:04 GMT +00:00 – More infoProduct prices and availability are accurate as of the date/time indicated and are subject to change. Any price and availability information displayed on [relevant Amazon Site(s), as applicable] at the time of purchase will apply to the purchase of this product.)
Gipony Crochet Kit for Beginners, Crochet Animal Kits, Crocheting Kit for Starters, Learn to Crochet with Step-by-Step Video Tutorials, Beginner Crochet Kit for Adults(Panda)
(as of July 18, 2026 18:04 GMT +00:00 – More infoProduct prices and availability are accurate as of the date/time indicated and are subject to change. Any price and availability information displayed on [relevant Amazon Site(s), as applicable] at the time of purchase will apply to the purchase of this product.)
Crochet Kit for Beginners: Make 3 Cute Amigurumi Animals with Easy-to-Follow Video Tutorial, Complete Beginner Crochet Kits for Kids Adults, Creative Christmas Birthday Gift Idea for Women & Girls
$9.99 (as of July 18, 2026 18:04 GMT +00:00 – More infoProduct prices and availability are accurate as of the date/time indicated and are subject to change. Any price and availability information displayed on [relevant Amazon Site(s), as applicable] at the time of purchase will apply to the purchase of this product.)📐 Finished Size (Adjustable)
- Height: ~30 cm (12 in)
- Width: ~28 cm (11 in)
- Depth: ~12 cm (4.5 in)
- Base: Work granny square until it matches the size you want (7 rounds in example)
- Height: Add as many zig-zag wall rows as you prefer
🔑 Stitches & Abbreviations
- ch – chain
- dc – double crochet
- dc2tog – double crochet 2 together
- sl st – slip stitch
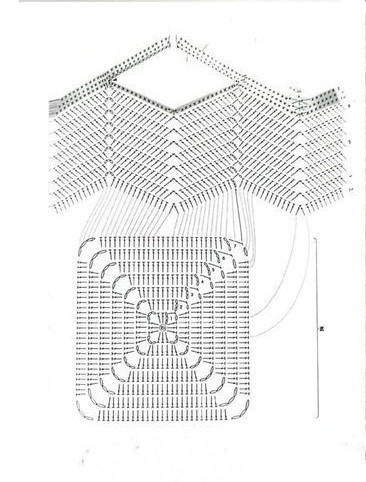
🪡 Pattern Instructions
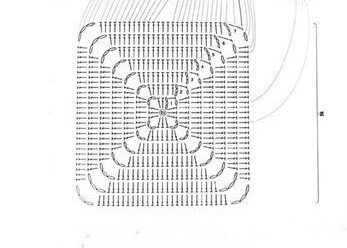
Granny Square Base
- Magic Ring: Ch 3 (counts as dc), 2 dc into ring, ch 3, 3 dc into ring × 3. Ch 3, sl st to join. (You now have 4 corners of 3 dc each separated by 3 ch.)
- R(2): Ch 3, make 6 dc across the side stitches. At the corner space: 3 dc, ch 3, 3 dc. Continue around with 7 dc per side, ch 3 at corners. Join.
- Row 3: Ch 3, work 10 dc along each side, with 3 dc, ch 3, 3 dc at corners. Join.
- R( 4):Ch 3, work 15 dc per side, corners as above.
- Continue Increasing: Each row adds ~5 more dc per side. Repeat until you have 7 rows (or as many as needed) for the base size you want.
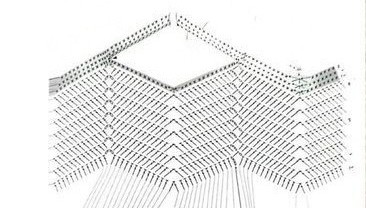
Zig-Zag Walls
- Foundation for Walls: Count the total stitches around the last granny row. Chain that same number to start walls.
- R 1 (Zig-Zag):
- Dc in next 9 chains.
- Dc2tog over next 2 chains (to create the dip).
- Double crochet in next 10 chains.
- Ch 4, dc in same stitch (creates the peak).
- Dc in next 9 chains.
- Repeat the zig-zag sequence all around.
- 2 and Onward:
- Repeat the zig-zag pattern, stacking dc stitches on top of dc stitches, dips over dips, and peaks over peaks.
- This builds the textured chevron-style wall pattern.
Assembly
- Work zig-zag rows until bag reaches desired height.
- Join sides neatly (sl st or whip stitch).
- Add leather or crochet handles securely.
- Optional: Attach a tassel for decoration.
✨ Customization
- Make a color-block version by changing yarn color between the base and the walls.
- Use a contrasting corner stitch color in the granny square for a patterned look.
- Add lining to make the bag stronger and long-lasting.
🧺 Care Instructions
- Hand wash gently with cold water.
- Reshape and lay flat to dry.
- Avoid hanging heavy items to prevent stretching.
- For raffia/t-shirt yarn bags, spot clean with a damp cloth.
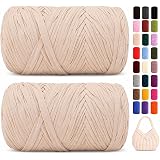
560g/240yds T Shirt Yarn for Crocheting, Soft Elastic Fabic Tshirt Yarn for Crochet, 2 Pack Polyester Yarn for Bags/Baskets/Coaster/Rugs/DIY Crafts for Knitting
$14.99 (as of July 19, 2026 18:17 GMT +00:00 – More infoProduct prices and availability are accurate as of the date/time indicated and are subject to change. Any price and availability information displayed on [relevant Amazon Site(s), as applicable] at the time of purchase will apply to the purchase of this product.)