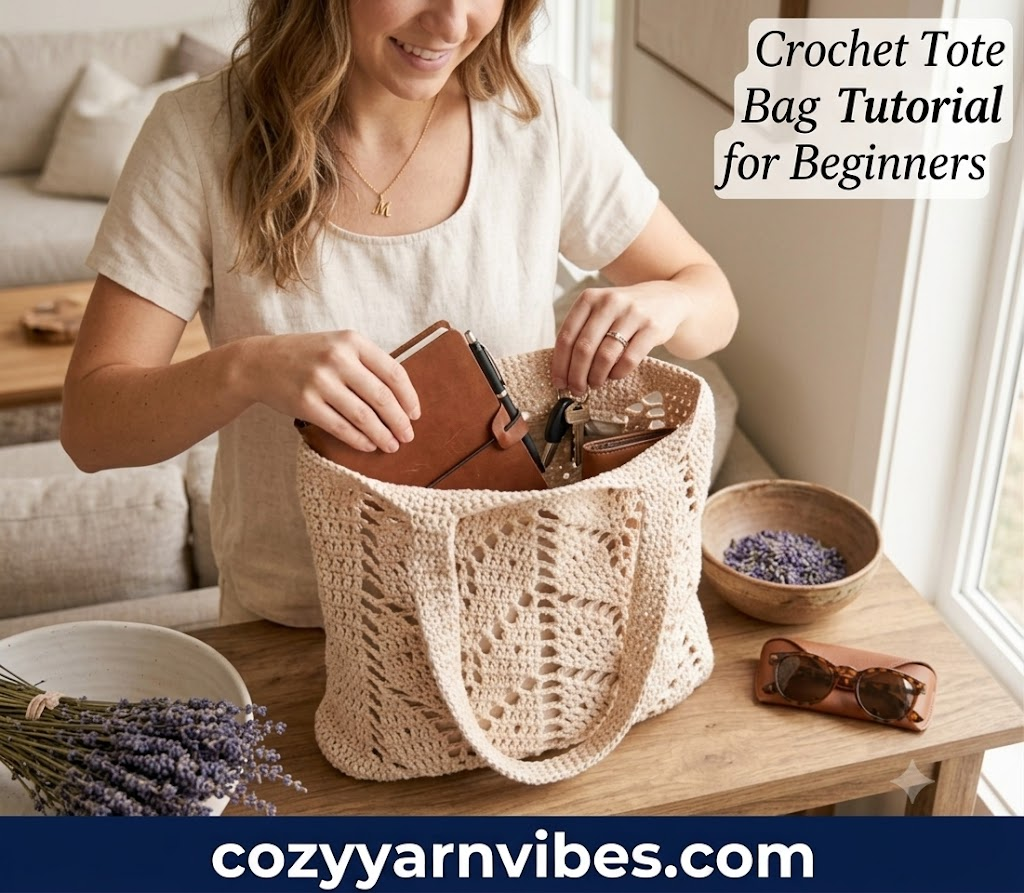
Ever seen a beautiful and elegant crochet tote bag on the internet and wondered if it’s even possible for you to make it? Well, we’ve all been through this phase where we assume that every graceful and delicate crochet design can be made only by experts. Today, I am here to bust this myth for you.
In this blog post, we will discover a detailed, step-by-step process for how to crochet a tote bag for beginners. After reading this blog post, you will certainly pick up your yarn and hook and start crafting this elegant tote bag for your daily use.
If you are a beginner who has never crocheted before, this crochet tote bag tutorial for beginners might be the one for you. We will also discover some unique styling ideas and designs that will make your bag more attractive and functional. So, let’s get started.
Wave/Chevron Lace Crochet Tote Bag Tutorial For Beginners
Today we are making an absolutely elegant tote bag: Wave/Chevron Tote Bag. This bag is perfect for everyday use and gives your every outfit a major uplift. Here’s why you will love this tote bag:
- Grocery Shopping: Carry fruits, vegetables, bread, and other everyday groceries in an eco-friendly reusable bag.
- Beach Tote: Pack beach essentials like a towel, sunscreen, sunglasses, and a water bottle.
- Everyday Handbag: Use it to carry your wallet, phone, keys, makeup, and other daily essentials.
- Farmers’ Market Bag: Perfect for carrying fresh produce, flowers, and handmade goods from local markets.
- Project Bag: Store your crochet supplies, knitting projects, yarn, hooks, and accessories in one place.
- Travel Tote: Carry snacks, a book, a water bottle, and other travel essentials during day trips or vacations.
- Gift Bag: Use it as a reusable and attractive gift bag for birthdays, holidays, or special occasions.
Skill Level Needed
Skill Level: Easy to Intermediate
This bag is perfect for people who want to start their first crochet project. If you are someone who has done some small crochet projects before and want to upscale things, this bag can be a great option. Even if you don’t have much experience in crocheting, this crochet tote bag tutorial for beginners will help you.
Finished Size
The finished tote bag measures approximately:
Height: 15 inches (38 cm) tall
Width: 14 inches (35.5 cm) wide
Depth: 3 to 4 inches (7.5 to 10 cm).
Handle Drop: 22 to 24 inches (56 to 61 cm) long
The shoulder handles are long, making them comfortable to carry over the shoulder. The finished size may vary slightly depending on the yarn weight, hook size, and individual crochet tension.
Materials Needed for this Crochet Tote Bag
Here are the materials you need to make this bag, so make sure to gather all these before you start your process:
- Yarn: Cotton is the best choice for bags; it holds its shape and doesn’t stretch out like acrylic. If you want that classic look in the photo, you will want a cream/off white 100% cotton yarn. Something like Sugar ‘n Cream, Bernat Handicrafter Cotton, or any DK/worsted weight cotton. You need about 300-400 grams, depending on the size of bag you want.
- Crochet hook: 3.5 mm- 4 mm (check your yarn label for the recommended hook size and always go with what feels comfortable for your tension)
- Scissors for cutting
- Yarn or tapestry needle (for joining pieces and weaving in ends)
- 1 wooden button (for closure)
- Stitch markers (not required, but a real lifesaver for beginners to know where each row starts and ends)
Gipony Crochet Kit for Beginners Animal,Crochet Animal Kits,Crochet Pet Toys Kits,Learn to Crochet with Step-by-Step Video Tutorials,Beginners Crochet Kits for Adults(2 Pack French Bulldog)
$16.99 (as of July 27, 2026 16:43 GMT +00:00 – More infoProduct prices and availability are accurate as of the date/time indicated and are subject to change. Any price and availability information displayed on [relevant Amazon Site(s), as applicable] at the time of purchase will apply to the purchase of this product.)
Crochet Kit for Beginners: Make 3 Cute Amigurumi Animals with Easy-to-Follow Video Tutorial, Complete Beginner Crochet Kits for Kids Adults, Creative Christmas Birthday Gift Idea for Women & Girls
$9.99 (as of July 27, 2026 16:43 GMT +00:00 – More infoProduct prices and availability are accurate as of the date/time indicated and are subject to change. Any price and availability information displayed on [relevant Amazon Site(s), as applicable] at the time of purchase will apply to the purchase of this product.)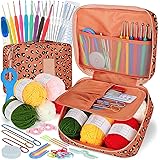
Coopay Crochet Kit for Beginners Adults Kids w/Step-by-Step Instructions | Complete Beginner Crochet Kit with Ergonomic Crochet Hooks Set,Upgrade Yarn and Portable Storage Case-2026 Ideal Gift
$15.32 (as of July 27, 2026 16:43 GMT +00:00 – More infoProduct prices and availability are accurate as of the date/time indicated and are subject to change. Any price and availability information displayed on [relevant Amazon Site(s), as applicable] at the time of purchase will apply to the purchase of this product.)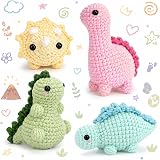
Crochetta Crochet Kit for Beginners, Crochet Starter Kits for Adults, Amigurumi Craft Knitting Crocheting Kits with Step-by-Step Video Tutorials, 6 Pc Hanging Potted Plants Family(40%+ Yarn
$13.99 (as of July 27, 2026 16:43 GMT +00:00 – More infoProduct prices and availability are accurate as of the date/time indicated and are subject to change. Any price and availability information displayed on [relevant Amazon Site(s), as applicable] at the time of purchase will apply to the purchase of this product.)Suggested Color Alternatives:
If you don’t want to go with this cream/beige colored yarn, you can go for these color combinations instead:
- Summer Vibes: If you are planning on making a crochet tote bag for the summer season, you can use colors like light pink, light blue, or bright yellow. These colors will look best in the summer season.
- Halloween Spook: Halloween season brings spooky and scary vibes, so make sure to prepare a tote bag with black and orange yarn. This will give you a perfect Halloween-inspired tote bag.
- Christmas Festival: With the Christmas season arriving, a tote bag can be a fun way to express your celebration spirit. You can use blue, red, and green yarn to make a festive-style tote bag.
Crochet Patterns Abbreviations For Beginners
Before starting the pattern, make sure you have learned the basic stitches perfectly. This will save you a lot of time, effort, and frustration. Every crochet tote bag tutorial for beginners on YouTube includes basic stitches. You can watch a video or two. However, here are the basic stitch abbreviations that will help you along the way:
| Abbreviation | Stitch Name |
| ch | chain |
| sl st | slip stitch |
| sc | single crochet |
| dc | double crochet |
How to Do These Stitches?
These are ways of doing these stitches
- Chain Stitch (ch)
You will begin by creating a slip knot on the hook. Yarn over and draw the yarn through the loop on your hook. Continue doing this until you get the number of chain stitches required.
2. Slip Stitch (sl st)
Here, insert your hook into the next stitch. Yarn over and draw the yarn through both the stitch and the loop on your hook at once. The slip stitch can be used mostly to join pieces together, closing ends and moving from one stitch to another without any height gain.
3. Single Crochet (sc)
Here, you will insert your hook into the stitch and yarn over. Pull up a loop such that you end up with two loops on your hook. Yarn over and draw the yarn through both the loops on your hook. This stitch produces a tight fabric that is ideal for use on the bottom and borders of a tote bag.
4. Double Crochet (dc)
You will yarn over and insert your hook into the next stitch. Yarn over and pull up a loop, resulting in three loops on your hook. Yarn over and draw the yarn through the first
Understanding the Wave/Chevron Lace Pattern (The Secret Behind the Look)
Here’s the part that makes this bag look so impressive, but is actually simple once you get it: the lacy, diamond-like texture comes from increasing (crowding extra stitches into one spot) at certain points and decreasing (skipping or joining stitches together) at other points, over and over, in a steady rhythm.
Here’s an analogy: think of your stitch line as a wave. At the top of each “peak” you crochet a bunch of extra stitches fanning out from one point. Then, as you move down into the “valley”, you skip a few stitches to bring the row back down. That peak-and-valley rhythm is what creates the pretty scalloped diamond lace effect, and once you’ve made it through one full repeat, your hands will start memorizing the pattern, and you continue the process effortlessly.
If you don’t understand it now, don’t worry; below in this crochet tote bag tutorial for beginners, we will discuss everything in detail.
Tote Bag Instructions: Understanding the Crochet Chart
The colorful diagram will look confusing at first, but once you completely understand all the symbols, it will be a very easy process. Look in the crochet chart below and identify the patterns. Here’s what each individual pattern stands for:
1. Oval Symbol
The small oval shape represents a chain stitch.
Chains are used for:
- Starting the project
- Creating spaces
- Turning at the end of rows
2. T Shape
The long symbol with one small line across it represents a double crochet.
These stitches create the solid parts of the fabric.
3. V Shape
When two double crochets meet at the bottom to form a V, it means:
Work 2 double crochets into the same stitch or chain space.
This creates the beginning of each shell.
4. Fan or Shell Shape
Several double crochets worked into one space create the beautiful shell design.
These shells form the peaks seen across the bag.
5. Chain Spaces
Whenever you see several oval symbols grouped together, they represent chain spaces.
Instead of crocheting into stitches, the next row is often worked into these spaces.
Step-by-Step Free Crochet Tote Bag Tutorial
Here’s a step-by-step crochet tote bag tutorial for beginners. Let’s start together!
Step 1: Making The Foundation Chain and Base
In the first step, we will make a foundation chain row that will decide the width of our bag. Now, the width of the bag shown in the picture is almost 14-16 inches. If you are also making a 14- 16-inch-wide bag, you need to make almost 55-65 chains in the foundation.
The number of chains also depends on the type of hook and yarn you are using. If you are using DK or light worsted cotton with a 4 mm hook, a 14-inch-wide bag would likely start with about 55-65 chains.
You can adjust the number of chains in the foundation to make sure your bag is the perfect size for you. You can make any size bag by altering this foundation chain number.
Beginner Tip: Don’t start your chains too tight. Keep them flexible enough for further binding.
In the next step, we will make 6 to 7 rows of single crochet depending on how much base width of the bag you need. These continuous 6 to 7 rows of single crochet will help shape the bag and give it a sturdy look. Single crochet works best for making the base because it has no spaces and thus, it will also help carry your items in the bag.
Step 2: Starting The First Row (Blue Color)
Next, we will start making the first row. From the left side of the sc, start by making a chain 3. Then you need to skip 1 stitch and make 4 double crochet (dc) in the next 4 stitches. Now make a chain 2, skip 2 stitches, and make 6 dc in the next 6 stitches. Now, after the 6 dc, you need to make a 2dc decrease in the next 2 stitches.
Now make a chain 2, skip 1 stitch, and make a V stitch. A V stitch is made by combining dc, 1 ch, and another dc in the same stitch. Then start making ch 2, skip a stitch, and make a 2 dc decrease. Then make 5 dc in the next 5 stitches.
Make a 2 dc decrease in the next 2 stitches, make ch 2, skip a stitch, and then again make a 2 dc decrease. Then make 5 dc in the next 5 stitches, another 2 dc decrease, ch 2, skip 1 stitch, and make a
V stitch ( dc, ch 1, another dc) in the same stitch.
Now make ch 2, skip a stitch, make a 2 dc decrease in the next 2 stitches, and then 6 dc in the next 6 stitches. Now make ch 2, skip a stitch, and make 4 dc in the next 4 stitches. Now make ch 3.
Here, your first row has ended. The ch 3 at the end will become the start of the next row.
Step 3: Making The Second Row (Brown Color)
The second row will start from the last ch 3 you made. Then you need to skip a stitch and make 4 dc in the next 4 stitches. Now make a chain 2, skip 2 stitches, and make a 2 dc decrease in the next 2 stitches. Then make 3 dc in the next 3 stitches. Then make a 2 dc decrease in the next stitches, ch 2, skip 2 stitches.
Then you need to make 3 dc and work it in the 1st dc of the previous row that makes the V stitch. Then make ch 2, skip a stitch, and then again make 3 dc stitched in the 2nd dc of the V stitch in the last row. This is a complex step, but this step is the reason why you will get a diamond/shell shape in your bag pattern.
Now make ch 2, skip 2 stitches, make a 2 dc decrease, 3 dc in the next 3 stitches, and another 2 dc decrease in the next 2 stitches. Then build a ch 2, skip 2 stitches, and again make a 2 dc decrease in the next 2 stitches, 3 dc in the next 3 stitches, and again a 2 dc decrease in the next 2 stitches.
Now make a ch 2, skip 2 stitches. Then you need to make 3 dc and work it in the 1st dc of the previous row that makes the V stitch. Then make ch 2, skip a stitch, and then again make 3 dc, stitched in the 2nd dc of the V stitch in the last row.
Now make ch 2, skip 2 stitches, make a 2 dc decrease, 3 dc in the next 3 stitches, and another 2 dc decrease in the next 2 stitches. Now you need to make a ch 3 at the end and 4 dc in the next 4 stitches. Then, at the end, make ch 3.
Step 4: Making the Third Row (Purple Color)
Now we will continue the 3rd row from the ch 3 we made last time. Make ch 2, skip 2 stitches, make a 2 dc decrease in the next 2 stitches, 1 dc in the next stitch, and another 2 dc decrease in the next 2 stitches.
Now make ch 2, skip 2, make 2 dc in the same stitch, 1 dc in the next stitch, and another pair of 2 dc in the next same stitch. In this way, a total of 5 dc are stitched in 3 different stitches (2 pairs). Now make ch 2, skip 2, and then again make 2 dc in the same stitch, 1 dc in the next stitch, and another pair of 2 dc in the same stitch.
Then make ch 2, skip 2, make 2 dc decrease in the next 2 stitches, 1 dc in the next stitch, and another 2 dc decreases in the next 2 stitches. Now make ch 2, skip 2, make 2 dc decrease in the next 2 stitches, 1 dc in the next stitch, and another 2 dc decreases in the next 2 stitches. Now make ch 2, skip 2, make 2 dc in the same stitch, 1 dc in the next stitch, and another pair of 2 dc in the same stitch.
Now make ch 2, skip 2, make 2 dc in the same stitch, 1 dc in the next stitch, and another pair of 2 dc in the same stitch. Then make ch 2, skip 2, make 2 dc decrease in the next 2 stitches, 1 dc in the next stitch, and another 2 dc decreases in the next 2 stitches.
Now make ch 2, skip 2, and then make 4 dc in the next 4 stitches. End with a ch 3 again.
Step 5: Making the Fourth Row (Blue Color)
After making the ch 3, skip 2 stitches and make a 3 dc decrease in the next 3 stitches. A 3 dc decrease is made when 3 dc are joined at the head, but they are worked in 3 different stitches. Now make a ch 2, skip 2, make a 2 dc in the next stitch, 3 dc in the next 3 stitches, and again a 2 dc in the next stitch.
Now make a ch 2, skip 2, make a 2 dc in the next stitch, 3 dc in the next 3 stitches, and again a 2 dc in the next stitch.
Then make ch 2, skip 2 stitches, and 3 dc decrease in the next 3 stitches. Again, make ch 2, skip 2 stitches, and 3 dc decrease in the next 3 stitches. Now make a ch 2, skip 2, make 2 dc in the next stitch, 3 dc in the next 3 stitches, and again a 2 dc in the next stitch.
Make ch 2, skip 2 stitches, and again 2 dc in the next stitch, 3 dc in the next 3 stitches, and again 2 dc in the next stitch. Now make ch 2, skip 2, and make a 3 dc decrease in the next 3 stitches. Now make ch 2, skip 2, and then make 4 dc in the next 4 stitches. End with a ch 3 again.
Step 6: Making the Fifth Row (Orange Row)
We will start again from the ch 3. Now make a 2 dc decrease in the next 2 stitches, 6 dc in the next 6 stitches, and 2 dc in the next same stitch.
Make ch 2, skip 2, make 2 dc in the same stitch, 6 dc in the next 6 stitches, and 2 dc in the next same stitch.
Now make 2 ch, skip 2 stitches, and make 2 dc in the same stitch, 6 dc in the next 6 stitches, and 2 dc in the next same stitch.
Again, make 2 ch, skip 2 stitches, and make 2 dc in the same stitch, 6 dc in the next 6 stitches, and 2 dc in the next same stitch. Make ch 2, 4 dc in the next 4 stitches, and ch 3.
Step 7: Making the Length of the Bag
Repeat rows 1-5 until you reach the determined length of the bag. Make the same stitches in the same sequence because these crochet stitches will help you make a diamond shape or peak/valley shape again and again.
At the end of the last row, make sure to make 2-3 (or more depending on the size and design of the bag) single crochet rows. These single crochet rows will help strengthen the bag. At this point, the crocheting of your front panel is done, but you need to add lining, so don’t forget that part.
Beginner Tip: Every couple of rows, turn your work over and count your stitches across. If your piece is staying the same width all the way through, you’re doing it right–the increases and decreases should be even.
Step 8: Making the Second Panel
Use the same steps above from Steps 1- 7 to make the second panel. This will be the back of your crochet tote bag.
Step 9: Making the Inner Lining
Before joining the panels, attach a fabric lining to the wrong side of each crochet panel. Cut the lining to match the size of the panel, fold the edges inward by about ½ inch (1.3 cm), and hand sew it neatly around the edges using small, hidden stitches. Once both panels are lined, place them with the lining facing inward and join the edges using a slip stitch to complete the tote bag.
Step 10: Make the Handles
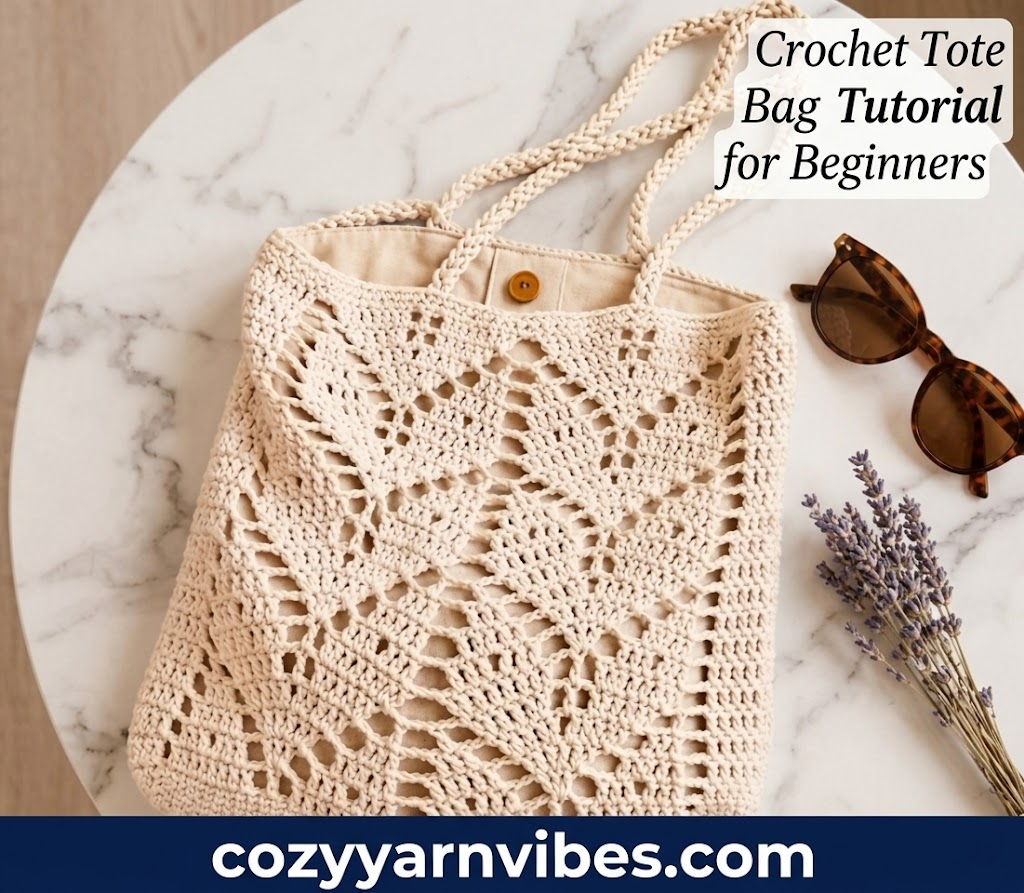
Next, you need to make the rope-style handles as shown in the image. To make rope-style handles, you need to:
- Make three long chains (each about 60–70 cm/24–28 inches, depending on how long you want your handles to hang)
- Braid the three chains together like you would braid hair
- Knot off both ends securely
Make two of these braided handles.
Step 11: Attach the Handles
Place handles 6–8 cm (2.5–3 inches) in from the side seams on the inside top edge of the bag. Using your yarn needle, whip stitch back and forth several times through both the end of the handle and the round of the bag’s border, firmly. Do this on all four ends. Don’t rush this part; a handle that’s about to fall off is every crocheter’s worst nightmare. So double and triple stitch it.
Step 12: Attach the Button Closure
Sew your wooden button onto the center front of the top border, a couple of centimeters below the edge. On the back panel, crochet a small chain loop by chaining about 8 to 10 stitches and joining them into a loop. Sew this loop onto the inside back edge so it can stretch over the button and close the bag.
Step 13: Weave In Ends and Block Your Bag
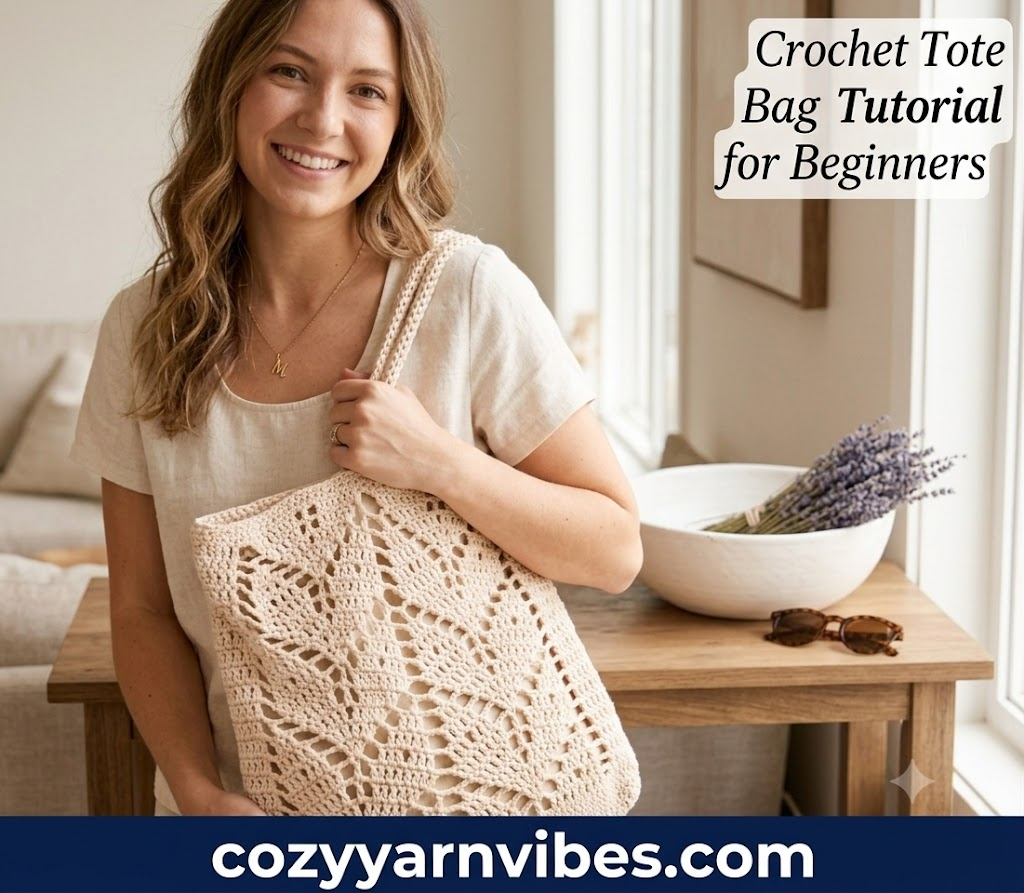
Thread any loose yarn tails onto your yarn needle and weave them invisibly into nearby stitches, then trim them. Finally, block your bag. Lightly dampen it with water or steam it with an iron held a few inches away; never touch the iron directly to the yarn. Lay it flat and shape it gently into a neat rectangle while it dries. This step changes a slightly curly, uneven piece of lace into one that lies flat, as seen in the photo.
Other Variations To Try
- Alter the Size of the Bag
This bag is easy to increase or reduce its size. If you need to increase the size of the tote, start with making more foundation chains and adding more rows to your crochet work. To decrease the size of the tote, make less chains and less rows.
- Use Varied Color Patterns
Use any colors of yarn you like to make the tote bag unique and unusual. One-colored tote bag looks elegant and beautiful; however, using more than one color will result in a bright and catchy product. You can also use striped or gradient yarn.
- Make Different Handles
To change the length of your tote bag, you may elongate the crochet handles and make it a shoulder bag or shorten them and make it a handbag. Also, you may decide not to use the crochet handles and sew other handles on it – leather, bamboo, or wood.
- Sew Fabric Lining into the Tote Bag
This will help you to reinforce your tote and prevent your things falling out of it through the lace holes. You may also sew a small inside pocket for your phone, keys, and other small
Customization Tips
- Change the yarn color to match your style.
- Make the bag bigger or smaller by adjusting the starting chain.
- Use longer, shorter, or leather handles for a different look.
- Add a fabric lining for extra strength and durability.
- Decorate with a button, tassel, flower, or handmade label.
Care Instructions For Your Tote Bag
Now that you have made a precious crochet tote bag using this crochet tote bag tutorial for beginners, you need to take proper care of it too. Here are some easy and simple care steps for crochet tote bags that will make your bag more durable:
- Washing: Always wash your bag by hand. Don’t wash it in a washing machine. Gently hand wash the bag with lightweight detergent. You can also add softener to keep the bag soft.
- Drying: Don’t dry your crochet bag in intense heat. Let it naturally dry in the air. Don’t use spinners or wringers to dry it. This will damage the knots permanently.
- Storing: Don’t hang your bag with handles for a long time. If you are not using it, then it is better to fold it lightly and place it in a drawer.
Final Thoughts
After reading this crochet tote bag tutorial for beginners, I hope you have gained a lot of ideas about how to make a crochet tote bag from start. Crocheting is not a complex task; it just needs your passion and attention.
Read our articles and blog posts about the latest tutorials and guides for more interesting and innovative ideas and guides for crochet products.
FAQS
What’s the difference between crochet and knitting?
In crocheting, you work with a single hook and a single stitch at one time. While in knitting, you use two hooks and multiple stitches at one time. Crocheting is simpler than knitting.
What size hook should a beginner start with?
Beginners should use a 4-5 mm (G/6 to G/8) hook paired with a worsted yarn. This combination is very easy for beginners.
What yarn is best for beginners?
A smooth, light-colored, thick acrylic yarn is best for beginners.
How do I read a crochet pattern?
Patterns use standardized abbreviations (ch = chain, sc = single crochet, dc = double crochet, etc.), usually listed at the top of the pattern. You can also use a crochet tote bag tutorial for beginners.