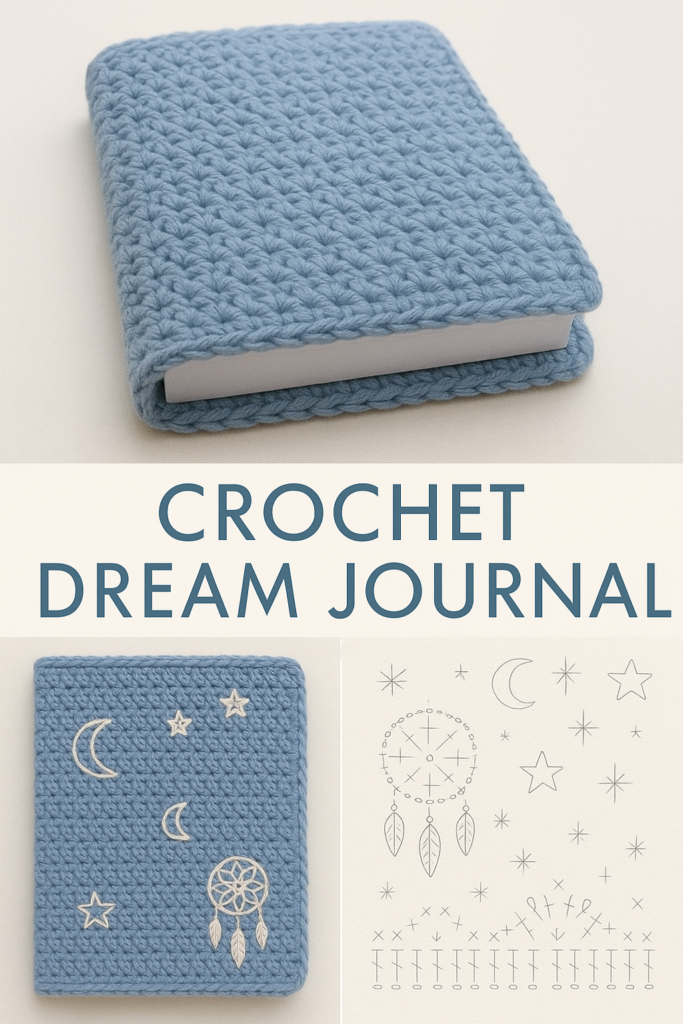
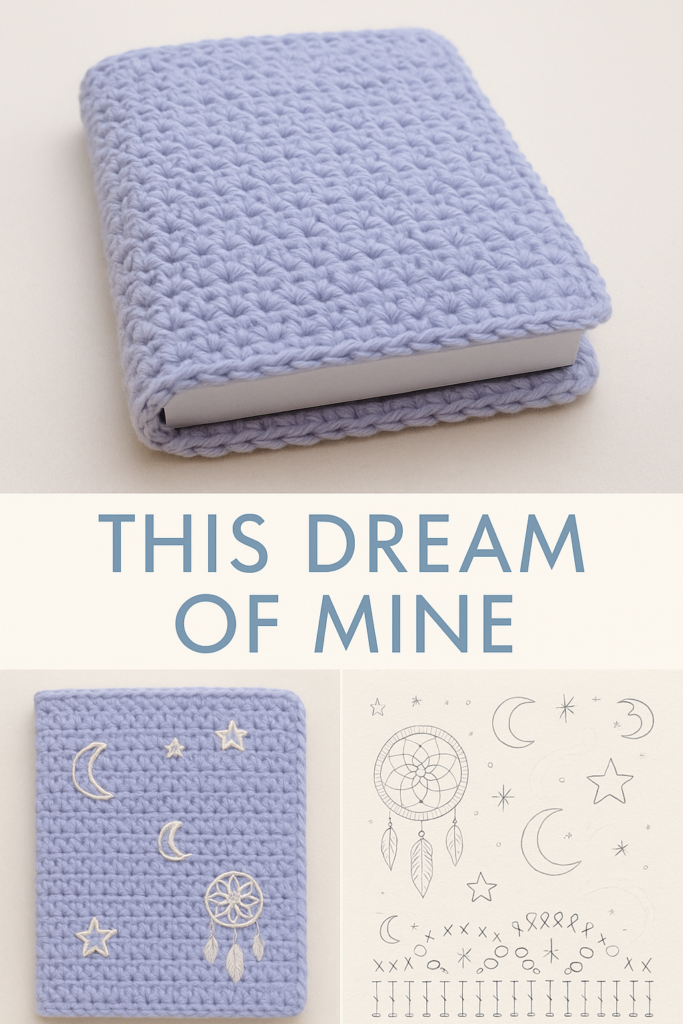
📔 DIY Crochet Notebook Cover – Shell Stitch Pattern
by CozyYarnVibes
Give your notebooks a handcrafted charm with this textured crochet cover featuring a shell stitch design. It’s stylish, functional, and customizable for any size or purpose.
✨ Materials Needed:
- Cotton or linen-blend yarn (shown in natural tan)
- Crochet hook Cotton or linen-blend yarn (natural or eco yarn recommended)
- 3.5 mm crochet hook (or appropriate size for your yarn)
- Tapestry needle
- Notebook or journal
- Scissors
- Optional: Button, lining fabric, or elastic band(around 3.5 mm or suitable for your yarn)
- Notebook or journal to cover
- Scissors & tapestry needle
The Woobles Beginners Crochet Kit with Easy Peasy Yarn as seen on Shark Tank – with Step-by-Step Video Tutorials – PAC-MAN Crochet
$39.99 (as of July 18, 2026 18:04 GMT +00:00 – More infoProduct prices and availability are accurate as of the date/time indicated and are subject to change. Any price and availability information displayed on [relevant Amazon Site(s), as applicable] at the time of purchase will apply to the purchase of this product.)
UzecPk Crochet Kit for Beginners, Crochet Kit, 4 Pcs Crochet Coasters Kits with Crochet Yarn, Crochet Hook, Step-by-Step Instructions Video, Crochet Supplies Set Craft Kits for Adults
$8.98 (as of July 18, 2026 18:04 GMT +00:00 – More infoProduct prices and availability are accurate as of the date/time indicated and are subject to change. Any price and availability information displayed on [relevant Amazon Site(s), as applicable] at the time of purchase will apply to the purchase of this product.)
INSCRAFT 62 Acrylic Yarn Skeins, 2170 Yards Yarn for Knitting and Crochet, Includes 2 Crochet Hooks,2 Weaving Needles,10 Stitch Markers, Perfect Beginner Kit for for Adults Kids
$31.49 (as of July 18, 2026 18:04 GMT +00:00 – More infoProduct prices and availability are accurate as of the date/time indicated and are subject to change. Any price and availability information displayed on [relevant Amazon Site(s), as applicable] at the time of purchase will apply to the purchase of this product.)
The Woobles Minecraft Crochet Kit – Beginner Crochet Kit for Adults, Easy Knitting Kit with Woobles Yarn, DIY Crafts, Crochet Animals, Minecrafts, Gift for Gamers & Crafters (Creeper)
$44.99 (as of July 18, 2026 18:04 GMT +00:00 – More infoProduct prices and availability are accurate as of the date/time indicated and are subject to change. Any price and availability information displayed on [relevant Amazon Site(s), as applicable] at the time of purchase will apply to the purchase of this product.)🧵 Stitch Key:
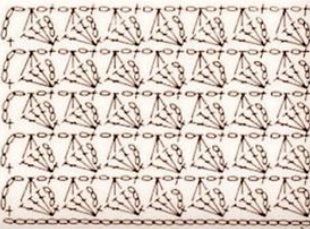
As seen in the chart (bottom right corner), here’s a guide to the symbols:
ch= Chaindc= Double Crochetshell= 3 dc in the same stitch
🧶 Step-by-Step Instructions
✅ 1. Measure & Chain Foundation
- Measure the width + thickness of your notebook, then chain enough stitches to wrap around the front, spine, and back of the book, leaving a little stretch (or use the book’s height for vertical rows).
- Make sure the starting chain is a multiple of 4 + 2 (for turning).
✅ 2. Row 1 – Base Row (Foundation Row)
- Ch (multiple of 4 + 2).
- Starting in 3rd ch from the hook:
- 1 dc in next ch, skip 1 ch, 3 dc in next ch, skip 1 ch, repeat across.
- End with 1 dc in second-to-last stitch and 1 dc in the last stitch.
✅ 3. Row 2 – Pattern Begins
- Ch 2 (counts as first dc), turn.
- Skip 1 dc, work 3 dc in center of 3-dc cluster from previous row, skip 1 dc, 1 dc in next dc.
- Repeat across.
- Each shell (3 dc cluster) will sit on top of the previous shell’s center dc.
✅ 4. Repeat Pattern
- Repeat Row 2 for as many rows as needed to cover the entire notebook height.
- Make sure to end on a completed shell row for a clean edge.
✅ 5. Make 2 Panels
- One for the front and one for the back cover.
- You can also make a single long panel to wrap around completely with flaps, as shown.
✅ 6. Slip Stitch or Sew Together
- Place your notebook inside to measure.
- Seam sides using slip stitch or single crochet.
- You can leave flaps open or crochet edges to hold the notebook snugly.
🧵 Pattern Chart Legend (repeated):
Start: Chain multiple of 4 + 2
Row 1: dc, *skip 1 ch, 3 dc in next, skip 1 ch, 1 dc*, repeat
Row 2+: ch 2, dc, *skip 1, 3 dc in middle of previous cluster, skip 1, 1 dc*, repeat
🧠 Tips & Variations:
- Use variegated yarn for a striped or gradient effect.
- Add edging in a contrast color with single crochet or crab stitch.
- Sew in a lining using fabric to protect pages and increase durability.
- Use chunky yarn and larger hooks for a cozier aesthetic.
🔧 Assembly:
- Place the notebook inside the finished panels.
- Seam up the edges leaving side flaps open for removable covers.
- Optionally, add a button loop closure or an elastic band to keep the notebook shut.
- For hardcover books, block the crochet piece to fit snugly.
🎨 Customization Tips:
- Add a pocket for pens or sticky notes by sewing an extra patch on the front.
- Embroider initials or symbols for personalization.
- Create covers for multiple sizes – planners, journals, sketchbooks.
💡 Optional Enhancements:
- Add a button flap or elastic band.
- Line with fabric for extra sturdiness.
- Use a contrast yarn for edging.
🧼 Care Instructions:
- Hand wash gently in cold water with mild soap.
- Lay flat to dry to maintain shape.
- Avoid machine washing if using delicate or natural yarns.
🎁 Perfect For:
- Handmade gifts for writers, artists, or students.
- Personalized school or office supplies.
- Eco-friendly packaging for photo albums or memory books.
- Unique product for craft fairs or Etsy shops.