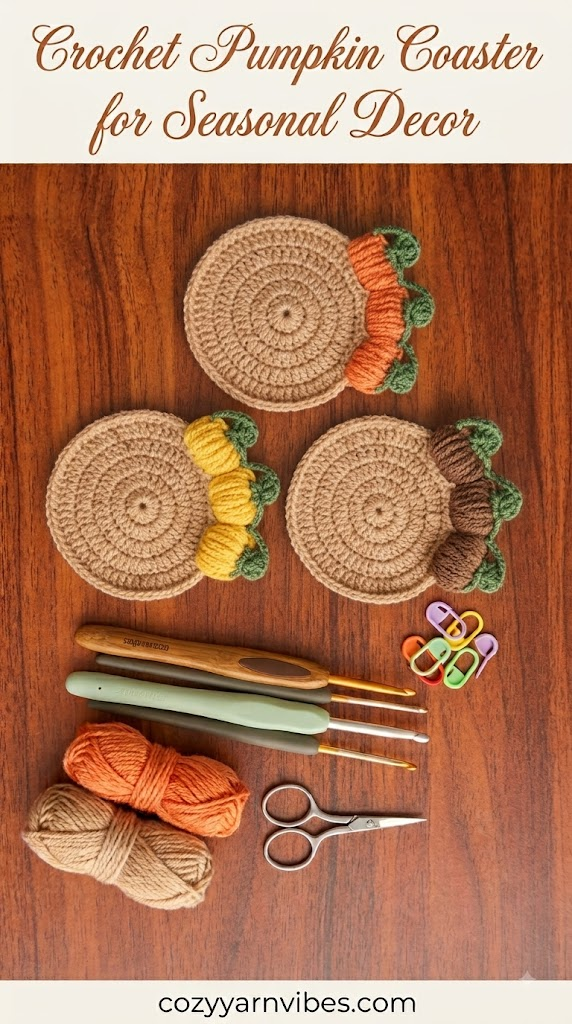
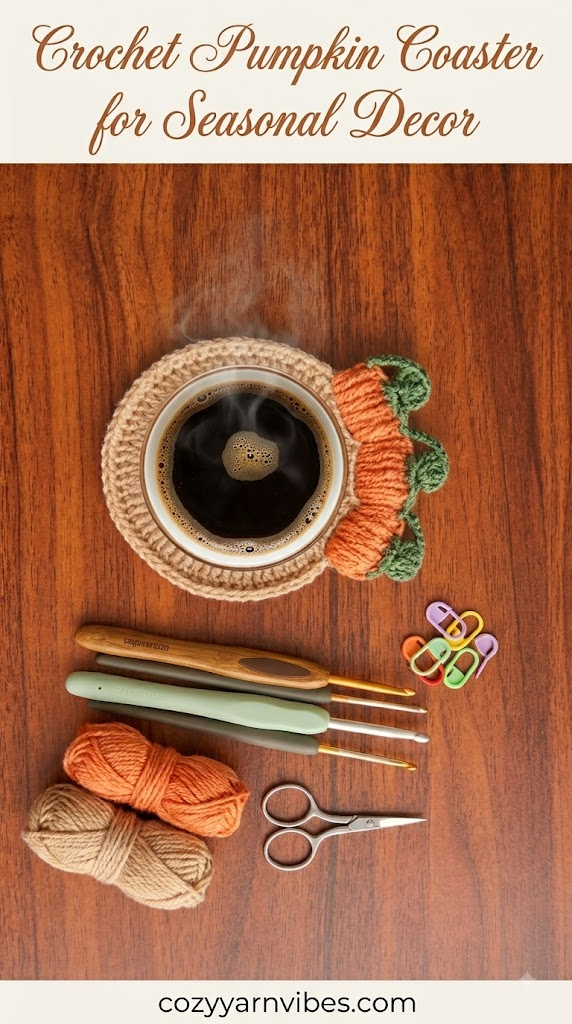
Looking for a cute and easy crochet project for fall? This crochet pumpkin coaster is a simple way to bring warm seasonal colors and handmade charm to your home. The pumpkin shape makes it perfect for fall tables, Thanksgiving gatherings, coffee stations, and cozy autumn decorating. With basic crochet stitches and a small amount of yarn, you can make several coasters in different colors for yourself or as handmade gifts.
Easy Crochet Pumpkin Coaster Tutorial
This crochet pumpkin coaster is worked in rounds to create a simple pumpkin shape with a slightly raised texture. The pumpkin body is made first using orange yarn, followed by a small brown or green stem. The finished coaster is flat enough to hold mugs, cups, and glasses while adding a lovely seasonal touch to your table.
The pattern uses basic stitches, making it a quick project that you can complete in a short amount of time. You can make a matching set of four, six, or even eight coasters for your fall table.
Why You’ll Love This Pattern
- Beginner-friendly pattern
- Quick and easy to make
- Uses only a small amount of yarn
- Perfect for fall and Thanksgiving decor
- Great for coffee tables and dining tables
- Easy to customize with different colors
- Makes a lovely handmade gift
- Perfect for using leftover yarn
Skill Level
Beginner to Easy Intermediate
If you already know how to make chains, single crochet, half double crochet, and slip stitches, you can easily make this crochet pumpkin coaster.
Finished Size
Approximately:
- Width: 4.5–5 inches
- Height: 4–4.5 inches
- Stem: approximately 1 inch
You can easily make the coaster smaller or larger by changing your hook size, yarn weight, or number of rounds.
Materials Needed
Yarn
- Worsted Weight Cotton Yarn (#4)
- Approximately 20–25 yards of orange yarn for each coaster
- A small amount of brown or green yarn for the stem
Cotton yarn is recommended because it is durable, easy to wash, and helps the coaster stay flat when placed underneath a mug or glass.
Color
- Pumpkin Orange
- Brown or Dark Green for the Stem
- Optional Cream, Beige, Mustard, Rust, or Olive Green for variations
Additional Supplies
- 4 mm (G) Crochet Hook
- Yarn Needle
- Scissors
- Stitch Marker
- Measuring Tape
Stitches & Abbreviations (US Terms)
- ch = chain
- sc = single crochet
- hdc = half double crochet
- sl st = slip stitch
- st = stitch
- sts = stitches
- rep = repeat
- rnd = round
- FO = fasten off
How to Make These Stitches
Chain (ch)
Yarn over and pull through the loop on your hook to make a chain.
Single Crochet (sc)
Insert the hook into the stitch.
Yarn over and pull up a loop.
Yarn over again and pull through both loops on the hook.
Half Double Crochet (hdc)
Yarn over and insert the hook into the stitch.
YO and pull up a loop.
YO again and pull through all three loops on the hook.
Slip Stitch (sl st)
Insert the hook into the stitch, yarn over, and pull the yarn through both the stitch and the loop on your hook.
Pattern Notes
- The coaster is worked from the center outward.
- Use US crochet terminology throughout the pattern.
- Keep your tension even so the coaster stays flat.
- Do not pull your stitches too tightly.
- The pumpkin shape is created by working increases around the center.
- The stem is made separately and attached after the pumpkin body is finished.
- Blocking the finished coaster can help improve its shape.
- Make sure the coaster lies flat before using it.
Crochet Pumpkin Coaster Step-By-Step Process
Round 1: Create the Center
Begin with a magic ring using white yarn.
Chain 3. This chain counts as the first double crochet of the round.
Work 11 double crochet stitches into the center of the magic ring.
You will have 12 double crochet stitches in total because the starting chain-3 is counted as one double crochet.
Round 1: Magic ring, ch 3, 11 dc in the ring. (12 dc)
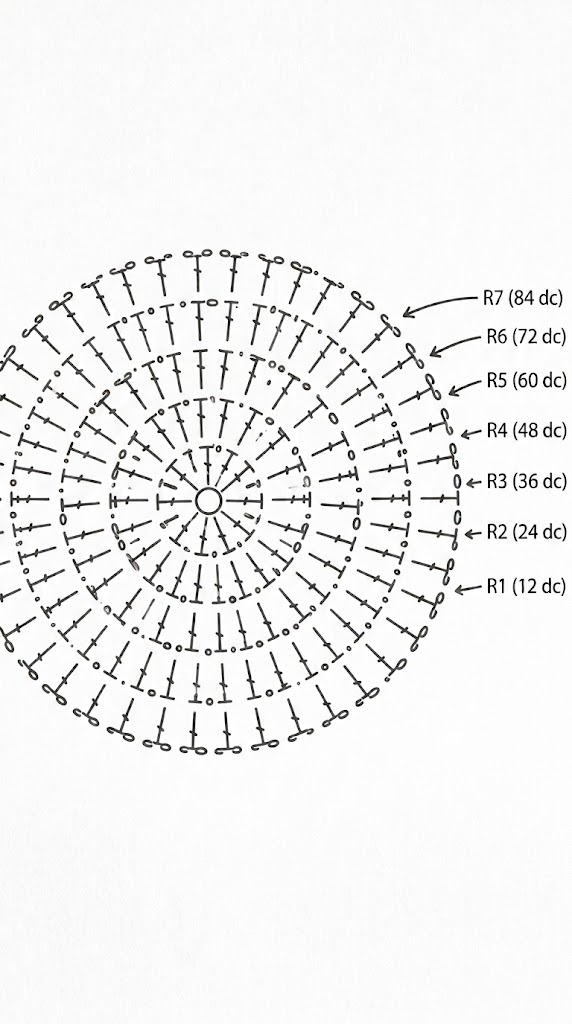
The center of the chart shows the magic ring, with the chain-3 and 11 additional double crochets radiating evenly around the center.
Pull the magic ring closed so there is no large opening in the center.
Round 2: Increase in Every Stitch
For Round 2, increase in every stitch around the circle.
Work 2 double crochet stitches into each stitch from Round 1.
Since Round 1 has 12 stitches, working 2 double crochets into each stitch will double the stitch count from 12 to 24.
Round 2: 2 dc in each st around. (24 dc)
As you work this round, make sure both double crochets are worked into the same stitch. The chart shows two double crochet symbols extending from each stitch of the previous round.
At the end of the round, you should have 24 double crochet stitches.
Round 3: One Double Crochet, Then an Increase
Round 3 begins the next stage of evenly spaced increases.
Work 1 double crochet in the first stitch. Then work 2 double crochet stitches into the next stitch.
Continue repeating this sequence around the entire round: 1 dc in the next stitch, 2 dc in the following stitch.
Round 3: (1 dc, 2 dc in next st) repeat around. (36 dc)
The increase is placed every second stitch. This adds 12 stitches to the previous round, increasing the stitch count from 24 to 36.
The chart shows the increase points spreading evenly around the circle, which keeps the base flat and round.
Round 4: Two Double Crochets, Then an Increase
For Round 4, the spacing between increases becomes slightly wider.
Work 1 double crochet in each of the next 2 stitches. Then work 2 double crochet stitches into the following stitch.
Repeat this sequence around the entire round.
Round 4: (2 dc, 2 dc in next st) repeat around. (48 dc)
Each repeat contains three worked stitches but produces four double crochet stitches because the increase creates an additional stitch.
Continue this sequence consistently around the circle until you reach the beginning of the round.
You should have 48 double crochet stitches at the end of Round 4.
Round 5: Three Double Crochets, Then an Increase
Round 5 continues the same increase method.
Work 1 double crochet in each of the next 3 stitches. Then work 2 double crochet stitches into the following stitch.
Repeat this sequence around the entire round.
Round 5: (3 dc, 2 dc in next st) repeat around. (60 dc)
The increase is now placed after every three regular double crochets. This adds another 12 stitches to the previous round, bringing the total to 60 double crochet stitches.
Keep your tension even throughout this round. Consistent tension will help prevent the circular base from becoming wavy or curling.
Round 6: Four Double Crochets, Then an Increase
For Round 6, work 1 double crochet in each of the next 4 stitches. Then work 2 double crochet stitches into the next stitch.
Repeat this sequence evenly around the entire circle.
Round 6: (4 dc, 2 dc in next st) repeat around. (72 dc)
The increase is now spaced after every four regular double crochets.
When the round is complete, you should have 72 double crochet stitches.
At this stage, the base should be noticeably larger while still maintaining its circular shape.
Round 7: Five Double Crochets, Then an Increase
Round 7 is the final increase round shown in the provided chart.
Work 1 double crochet in each of the next 5 stitches. Then work 2 double crochet stitches into the following stitch.
Repeat this sequence all the way around the circle.
Round 7: (5 dc, 2 dc in next st) repeat around. (84 dc)
The increases are now spaced after every five regular double crochets. This final increase round brings the total stitch count from 72 to 84 double crochet stitches.
The round chart confirms that Round 7 finishes with 84 double crochet stitches.
At the end of this round, your white circular base should be wide, flat, and evenly shaped. This is the main foundation on which the pumpkin design will be created later.
Round 8: Single Crochet Border
Round 8 is worked entirely in single crochet. There are no increases in this round.
Work 1 single crochet in every stitch around the circle.
Round 8: sc in each st around. Change to GREEN yarn. (84 sc)
Because you are working one single crochet into each of the 84 stitches from Round 7, the stitch count remains exactly the same at 84 stitches.
Work carefully around the entire circle, making sure that you do not accidentally add or skip stitches.
The purpose of this round is to create a firm single crochet edge around the white circular base. Once the round is complete, change to green yarn as instructed in the pattern.
Final Base Stitch Count
After completing all 8 rounds, your crochet pumpkin coaster base should have the following stitch counts:
- Round 1: 12 dc
- Round 2: 24 dc
- Round 3: 36 dc
- Round 4: 48 dc
- Round 5: 60 dc
- Round 6: 72 dc
- Round 7: 84 dc
- Round 8: 84 sc
The stitch count increases by 12 stitches in every increase round from Round 1 through Round 7. Round 8 does not increase because you work one single crochet into each existing stitch.
Step 2: Shape the Pumpkins
You will make 3 pumpkins across the top of the coaster.
- With the yarn attached, work SC in BLO across the pumpkin section. This creates the raised lines on the pumpkin.
- Shape the stitches into a small, rounded pumpkin.
- Repeat the same steps to make 3 pumpkins side by side.
- For extra texture, you can add a few bobble stitches or use yarn to highlight the pumpkin grooves.
Step 3: Create the Stems
You will need 3 green stems, one for each pumpkin.
- Attach green yarn with a SL ST at the top of the pumpkin.
- Work 5–6 SC across the top.
- CH 4, then work SC back along the chain to make the stem.
- Repeat for all 3 pumpkins.
Step 4: Add Final Details
- Use brown yarn to add small details or pumpkin lines if desired.
- Use a tapestry needle to weave in all loose ends.
- Shape the pumpkins gently with your fingers to give them a neat, rounded look.
Customization Ideas
Classic Pumpkin
Use traditional orange yarn with a brown stem for a warm and recognizable autumn pumpkin.
Rustic Fall Pumpkin
Try rust, burnt orange, mustard, cream, and brown yarn to create a farmhouse-inspired fall color palette.
Mini Pumpkin
Use a smaller hook and lighter yarn to make miniature pumpkins that can be used as decorative accents or small coasters.
Colorful Pumpkins
Experiment with sage green, cream, dusty pink, mustard, burgundy, and deep brown for a modern fall display.
Halloween Pumpkin
Use bright orange yarn with a black stem or add a small embroidered jack-o’-lantern face to turn the coaster into Halloween decor.
Styling Ideas
This crochet pumpkin coaster looks beautiful with:
- Fall mugs
- Pumpkin spice drinks
- Thanksgiving table settings
- Wooden serving trays
- Autumn centerpieces
- Candles
- Mini pumpkins
- Fall floral arrangements
- Coffee station decor
- Rustic farmhouse decorations
Place several coasters around your dining table or coffee table to create a coordinated seasonal display.
You can also pair orange coasters with cream or brown table runners for a warm and cozy autumn look.
Other Variations to Try
- Use different shades of orange to create a colorful pumpkin coaster set.
- Add a small crocheted leaf beside the stem for extra detail.
- Embroider a jack-o’-lantern face for Halloween.
- Make the pumpkin slightly larger and use it as a small trivet.
- Create matching pumpkin coasters in several fall colors.
- Add a contrasting border around the outside edge.
- Use cotton yarn scraps to create a multicolored pumpkin collection.
- Make several coasters and package them together as a handmade fall gift set.
Care Instructions
Hand wash your crochet pumpkin coaster in cool or lukewarm water using a mild detergent.
Do not use bleach or harsh cleaning products because they may damage or fade the yarn.
Gently squeeze out excess water without twisting the coaster.
Lay it flat on a clean towel and allow it to air dry completely.
Avoid placing the coaster in direct heat or using high heat in a dryer.
Store your coasters flat in a dry place when they are not being used.
Conclusion
This crochet pumpkin coaster is a quick and enjoyable project for anyone who loves handmade seasonal decor. Its simple pumpkin shape, warm colors, and easy construction make it a lovely addition to fall tables, coffee stations, and Thanksgiving gatherings.
Whether you make a single coaster for yourself or create a complete matching set, this project is easy to customize with different colors, sizes, and decorative details. It is also a great way to use leftover cotton yarn and create something useful for your home.
If you enjoy making seasonal crochet projects, add this crochet pumpkin coaster to your fall crochet list and experiment with different pumpkin colors and embellishments.
For more interesting crochet ideas read our post about maple leaf crochet project; a step-by-step guide.
Frequently Asked Questions
Is this crochet pumpkin coaster beginner-friendly?
Yes. This crochet pumpkin coaster uses basic stitches such as chain, single crochet, half double crochet, and slip stitch. Beginners who are comfortable with these stitches should be able to follow the pattern.
What yarn is best for crochet pumpkin coasters?
Cotton yarn is the best choice because it is durable, washable, and less likely to stretch. Worsted weight cotton yarn is especially suitable for making sturdy coasters.
Can I make the coaster bigger?
Yes. You can make a larger version by continuing the increase rounds until the coaster reaches your preferred size. A larger version can also work as a small trivet.
Can I use acrylic yarn instead of cotton?
Yes, acrylic yarn can be used, but cotton is generally a better choice for coasters because it handles heat and moisture better and tends to hold its shape well.
Can I make this crochet pumpkin coaster in different colors?
Absolutely. You can use traditional orange, neutral fall colors, muted autumn shades, or even Halloween-inspired colors. Making each coaster in a different color is a simple way to create a unique seasonal set.