Lacy Diamond Bloom Table Runner – Full Detailed Pattern & Chart Guide
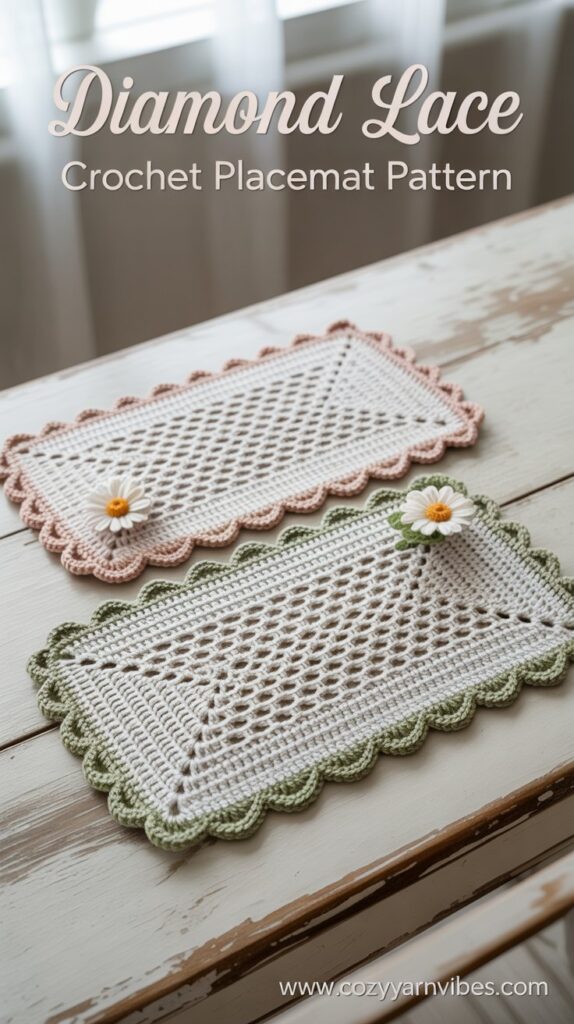
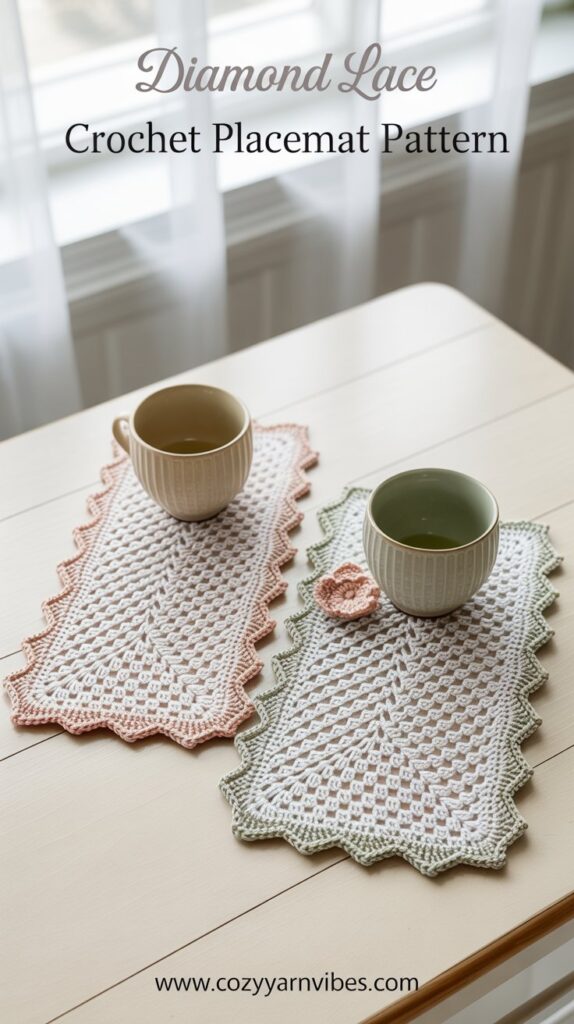
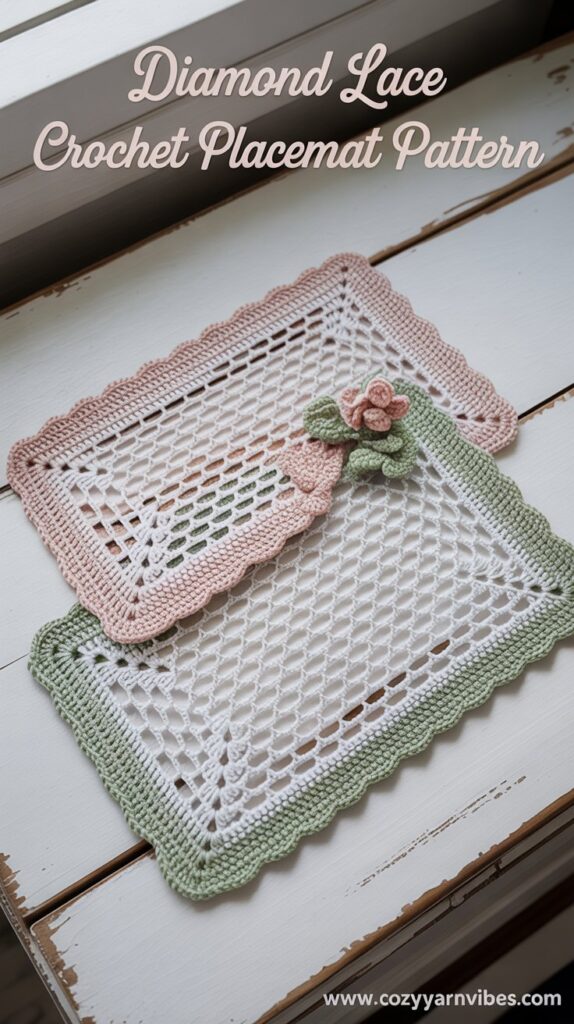
Welcome to Cozy Yarn Vibes! In today’s tutorial, we’ll walk you through how to crochet this gorgeous rectangular lace table runner or placemat using the chart provided. This dainty design features a diamond filet crochet pattern finished with a lovely scalloped picot border.
🧵 Materials
| Item | Description |
|---|---|
| Yarn | 100% cotton, sport or DK weight |
| Hook | 2.5 mm to 3.5 mm (depending on tension) |
| Tapestry Needle | For weaving in ends |
| Scissors | Small and sharp |
| Stitch Markers | Optional but helpful for beginners |
| Blocking tools | Pins, board, and spray bottle/steam iron |
🪡 Stitches & Abbreviations
| Symbol | Stitch | Abbreviation |
|---|---|---|
| ○ | Chain | ch |
| Double Crochet | ||
| ▭ | Open Mesh Block | ch 1, skip 1, dc in next |
| ■ | Filled Mesh Block | 3 dc across consecutive stitches |
| X | Single Crochet | sc |
| ⨁ | Picot (ch 3, sl st in first ch) | picot |
📏 Final Size (approx.)
- Single Placemat: ~23 x 28 cm (9″ x 11″)
- To make a table runner, simply repeat the pattern and join multiple pieces or extend the rows before finishing the border.
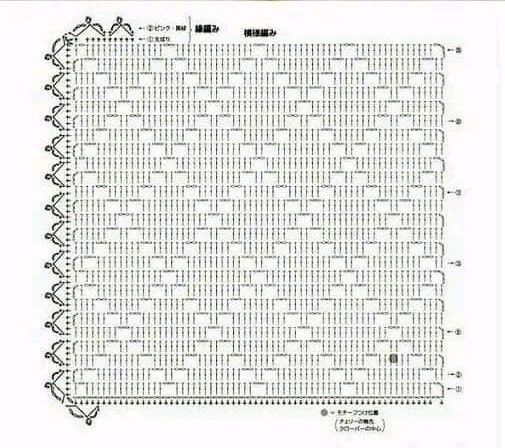
🔸 Understanding the Chart Layout
- The chart represents the piece row by row starting from the bottom up.
- Each square corresponds to a “block” — either open or filled:
- Open Block (mesh) = dc, ch 1, skip 1, dc
- Filled Block = dc in 3 consecutive stitches
- Rows alternate direction: Right to left, then left to right.
- Corner motifs on the chart represent picot and loop border instructions.

🧶 MAIN BODY – Step-by-Step Instructions
🔹 Step 1: Foundation Chain
- Chain 71.
- 14 mesh blocks across (14 × 5 = 70 stitches)
- Plus 1 turning chain = 71
You can make your placemat longer or shorter by increasing/decreasing in multiples of 5.
🔹 Step 2: Row 1 – Base Mesh Setup
- Skip 5 chains, dc in 6th chain from hook.
- (ch 1, skip 1, dc in next) repeat until end of row.
- You should finish with a dc in the last stitch.
This creates a full row of open mesh.
🔹 Step 3: Row 2 and Onwards – Diamond Pattern Begins
Now follow the charted filet pattern:
Each row builds on the previous one, gradually shaping diamonds using open and filled blocks.
🧷 How to Read Chart Rows:
- Each square = 1 block
- Filled Block = dc in each of 3 stitches (you’re working over ch-1 spaces + dc from the row below)
- Open Mesh = dc, ch 1, skip 1, dc
- Turn at the end of each row, ch 3 (counts as 1 dc), and continue
🔁 Repeat Rows
Continue building up the chart row by row.
| Row | Pattern Logic |
|---|---|
| 1 | All open mesh |
| 2 | Start 1 filled block at 3rd position |
| 3 | Expand filled blocks outward (increase by 1 block left/right) |
| 4-7 | Reach widest part of diamond |
| 8-12 | Reverse and shrink the filled section |
| 13+ | Repeat same diamond sequence |
Tip: Use stitch markers to mark where diamonds begin or end — especially helpful for longer pieces.
🧵 Final Row of Main Body:
Once you reach the last row of diamonds, finish with one full row of double crochets (or open mesh again, for consistency). This creates a strong base for your border.
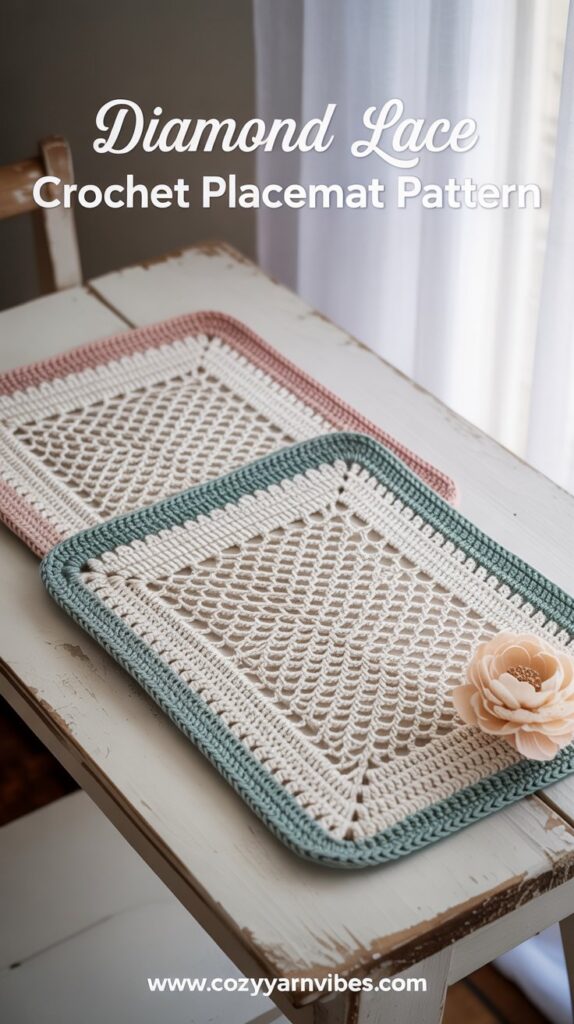
💠 BORDER – Step-by-Step Instructions
The border features loops and picots, adding a delicate frame around your project.
🔹 Step 1: Single Crochet Edge
- Work 1 round of single crochet evenly around all four sides.
- Place:
- 1 sc per dc or 1 sc per ch-space
- 2 or 3 sc in each corner to avoid curling
🔹 Step 2: Picot Loop Border
Now begin the border from the corner and repeat this pattern:
*sc in next st, ch 5, sl st into 1st ch (loop);
sc in next st, ch 3, sl st into 1st ch (picot);*
🔁 Repeat this loop–picot combo evenly around the edge.
🟨 Corner Variation:
- In corners, use:
- ch 7 loops instead of ch 5 for a wider turn
- Or work (sc, ch 3, sl st, sc, ch 5, sl st) all in the same stitch
🌸 Optional Embellishments
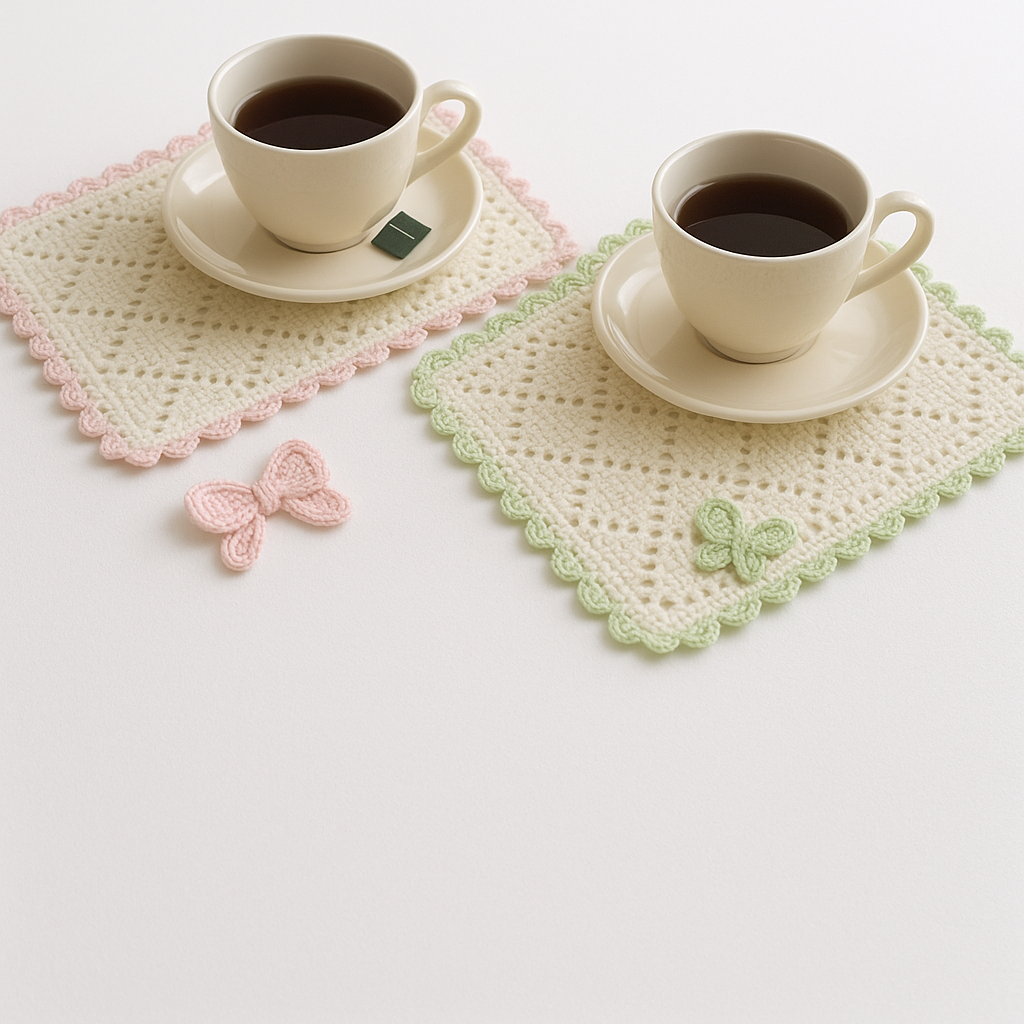
- Add a crocheted flower or bow in one corner as shown in the image. Use soft pastel tones like blush pink or lemon yellow.
- You can also crochet a mini butterfly or heart motif to add to the corner as a personalized touch.
📌 Blocking Instructions (Essential)
To make the pattern pop and flatten the edges:
- Gently wet block the finished piece or use a steam iron through a cloth.
- Pin all corners and border points to a blocking mat.
- Let it dry completely before unpinning.
🧺 Care Instructions
- Hand wash only, in cool or lukewarm water
- Use mild detergent
- Lay flat to dry
- Iron on low with a cloth barrier if needed
Thank you, I’ve just been searching for info about this topic for a while and yours is the greatest I have found out till now. But, what about the conclusion? Are you certain concerning the source?